
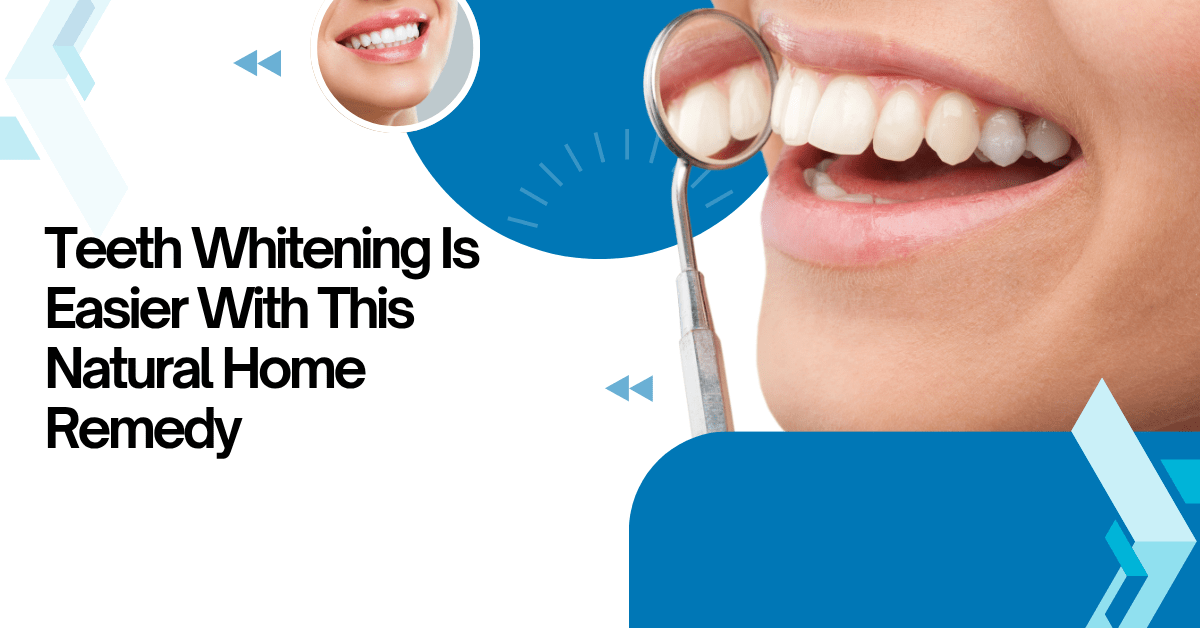
Teeth Whitening – Let me start with something most dental articles won’t say out loud: having perfectly white teeth isn’t the natural state of a human mouth. It never was.
Natural, healthy teeth sit somewhere between ivory and light yellow. Enamel — the outer layer of your tooth — is actually slightly translucent, which means the yellowish dentin underneath it shows through to some degree in everyone. So if you’ve been staring at your reflection convinced something is wrong with you, breathe. You’re probably just a normal person with normal teeth.
That said, there’s a very real difference between natural tooth color and staining caused by years of coffee, tea, wine, and the general chaos of adult life. And there’s nothing wrong with wanting to address that. Whitening your teeth isn’t vanity — it’s personal grooming, the same as getting a haircut or caring about your skin. If it makes you feel more confident, it’s worth understanding properly.
The problem is that the teeth whitening world is an absolute mess of conflicting advice, overpriced treatments, viral home remedies with zero scientific backing, and products that range from genuinely useful to quietly damaging your enamel. This article is my honest attempt to sort through all of it — not to sell you anything, just to give you the kind of information a knowledgeable friend would share over coffee.
We’ll cover how whitening actually works, the truth about home remedies, what to realistically expect from strips and trays, and answers to every practical question people ask but rarely get a straight answer on.
Why Your Teeth Got Stained in the First Place
Before jumping into solutions, it helps to understand what you’re actually dealing with — because not all discoloration is the same, and that matters a lot when it comes to choosing what to do about it.
The Surface-Level Stuff (Extrinsic Staining)
This is the most common kind. Extrinsic staining happens on the outer surface of your enamel and it’s caused almost entirely by what you eat, drink, and put in your mouth on a regular basis.
Coffee is the single biggest culprit for most people. The tannins in coffee and tea cling to the micro-ridges on your enamel and gradually build up a yellowish-brown layer over months and years. Red wine does the same thing. Dark berries, soy sauce, tomato-based sauces — anything with deep, rich pigmentation has the potential to contribute.
Smoking is in its own category. Nicotine and tar don’t just sit on the surface — they penetrate into enamel over time, creating stains that are significantly harder to lift than food or drink staining.
The good news: extrinsic staining is generally the most responsive to whitening treatments. If your yellowing comes mostly from lifestyle habits, you have real options.
The Deeper Problem (Intrinsic Staining)
Intrinsic staining is more complicated. It happens within the inner structure of the tooth — in the dentin — and it’s caused by things that were often beyond your control:
Aging is a huge one. As you get older, enamel naturally wears down and thins out. As it does, more of the yellowish dentin shows through. This isn’t anyone’s fault — it’s just biology.
Certain medications can cause significant internal discoloration. Tetracycline antibiotics taken during childhood are infamous for this. Some antihistamines, blood pressure medications, and antipsychotics can also affect tooth color from the inside out. Fluoride overexposure during tooth development can cause white spots or brownish patches called fluorosis.
Trauma to a tooth — an old injury, even one from years ago — can disrupt normal enamel formation or cause internal bleeding that permanently darkens a tooth.
Why does this distinction matter? Because most over-the-counter whitening products and home remedies are primarily effective against extrinsic staining. Intrinsic discoloration often requires either prescription-strength professional treatment or, in more severe cases, alternatives like veneers. Knowing which you’re dealing with helps set realistic expectations from the start.
How Whitening Actually Works
Most effective whitening treatments — from dentist-applied gels to drugstore strips — rely on the same core chemistry: peroxide.
Hydrogen peroxide and carbamide peroxide (which breaks down into hydrogen peroxide once applied) penetrate through the enamel into the dentin, where they trigger an oxidation reaction. That reaction breaks apart the complex molecules responsible for discoloration into smaller, lighter compounds. The result is a tooth that reflects more light and appears whiter.
The concentration of peroxide varies widely. In-office professional treatments often use 25–40% hydrogen peroxide, applied under carefully controlled conditions with gum barriers to protect soft tissue. At-home trays from a dentist typically use 10–22% carbamide peroxide. OTC strips sit at a much more modest 5–10% hydrogen peroxide. Home remedy versions (like rinsing with drugstore hydrogen peroxide) are usually 1–3%.
Higher concentration doesn’t automatically mean better results — it mostly means faster results with higher sensitivity risk. What matters more than concentration alone is contact time, the consistency of application, and the specific type of staining you’re trying to treat.
The Real Talk on Home Remedies for Teeth Whitening
Social media has turned teeth whitening into a DIY trend, and honestly, not all of it is terrible — but a lot of it is. Here’s the honest breakdown of the popular ones.
Baking Soda
Baking soda is probably the most legitimate of the home remedy options, which is why it appears in so many commercial toothpastes. It’s a mild abrasive, meaning it physically scrubs away surface deposits on your enamel. It works — but only on extrinsic staining, and only at the surface level.
The catch is that it’s doing its job through gentle scratching. Used once or twice a week with light pressure, that’s fine. Used daily or scrubbed in aggressively, you start removing enamel rather than stains — and since enamel doesn’t grow back, the long-term consequence can actually be more yellowing as the dentin beneath becomes more visible.
Think of it like sanding a table. A little sanding cleans it up. Too much sanding and you’ve gone through the finish.
Oil Pulling
Oil pulling — swishing coconut or sesame oil around your mouth for 15–20 minutes — is a practice that goes back thousands of years in Ayurvedic medicine. It does have genuine oral health benefits: it reduces certain harmful bacteria, can help with gum health, and leaves your mouth feeling remarkably clean.
As a whitening treatment though? The evidence isn’t there. It doesn’t penetrate enamel, it doesn’t break down chromophores, and no rigorous clinical study has demonstrated meaningful whitening from oil pulling alone. It’s a good habit for oral hygiene broadly. It’s not a whitening treatment.
Activated Charcoal
This one has had an enormous moment on social media, and it’s probably the most important one to be honest about: activated charcoal is not recommended by most dentists, and the science doesn’t back it up for whitening purposes.
The problem is twofold. First, charcoal is significantly more abrasive than regular toothpaste — more abrasive than baking soda, more abrasive than your enamel can comfortably handle with repeated use. Second, most charcoal-based dental products don’t contain fluoride, which means regular use can increase your cavity risk while simultaneously wearing down enamel. The British Dental Journal published research raising these same concerns, noting that charcoal pastes could actually increase staining risk over time rather than reduce it.
It might feel like it’s doing something because charcoal is dramatic-looking and gives a temporary surface clean. But “feels like it’s working” and “is actually working safely” are two very different things.
Strawberries and Lemon
The idea here is that the natural acids in these fruits dissolve stains. There’s a kernel of truth: malic acid in strawberries and citric acid in lemons can lift very light surface deposits. But the mechanism is the same thing that makes acidic foods bad for your enamel in general. You’re essentially applying a mild acid to your teeth and hoping it removes stains faster than it erodes enamel — and that’s not a great trade.
If you enjoy a strawberry-baking soda paste as an occasional thing, once a week with proper rinsing afterward, it’s not going to cause disaster. But as a routine whitening strategy it’s more risk than reward.
Hydrogen Peroxide Rinse
Diluted hydrogen peroxide (mixing drugstore 3% hydrogen peroxide with equal parts water) is probably the most scientifically grounded home remedy for whitening. It’s literally the same active ingredient as professional treatments, just at a much lower concentration.
Used as a rinse a couple of times a week — swish for 60 seconds, spit thoroughly, don’t swallow — it can help maintain whiteness and lift very light surface staining. The key is “diluted” and “occasional.” Undiluted peroxide or frequent use can irritate gum tissue and potentially damage enamel with prolonged exposure.
Pros & Cons of Teeth Whitening
| ✅ Pros | ❌ Cons |
| Boosts confidence and self-esteem noticeably | Temporary tooth sensitivity is very common |
| Non-invasive with no surgery or recovery time | Doesn’t work on crowns, veneers, or fillings |
| Results visible within days of starting | Professional treatments can be expensive |
| Safe long-term track record when used correctly | Results gradually fade without maintenance |
| Options available for nearly every budget | Overuse can weaken and erode enamel over time |
| Motivates better daily oral hygiene habits | Not suitable for pregnant women or under-16s |
| Reversible — no permanent change to tooth structure | Deep intrinsic staining often responds poorly |
Professional Whitening: What You’re Actually Paying For
In-Office Treatments
In-office whitening is the fastest option available. A dentist or hygienist applies a high-concentration peroxide gel to your teeth, often with a rubber dam or gel barrier protecting your gums, and in some cases activates it with a light or laser. The whole process typically takes 60–90 minutes and the results are immediate.
This is genuinely effective. Clinical measurements show significant color change after a single session. If you have an event coming up and you want visible results fast, this is the route that delivers.
The main downsides are cost (more on that shortly) and sensitivity. Because the peroxide concentration is high, temporary tooth sensitivity in the hours or days following treatment is common. It fades — but for people who already have sensitive teeth, it can be uncomfortable.
Dentist-Supervised At-Home Trays
This is often the approach dentists actually recommend for most patients, and it tends to get overlooked because it sounds less glamorous than laser whitening. Your dentist takes impressions of your teeth, makes custom-fitted trays, and sends you home with a carbamide peroxide gel. You wear the trays for a few hours each day or overnight for two to four weeks.
The results are slower, but research consistently shows that at-home tray treatment has lower relapse rates — meaning the results last longer — compared to single in-office sessions. The custom fit means the gel sits evenly against every surface of every tooth, without pooling or missing spots. The lower peroxide concentration means less sensitivity. For most people’s situations, this method represents the best balance of effectiveness, safety, and value.
The 10 Questions People Actually Google About Teeth Whitening
These are the real questions people type into search bars at midnight while squinting at their reflection. Here are honest, complete answers.
How Much Does Teeth Whitening Cost?
The cost varies dramatically depending on the method you choose, and it helps to understand what you’re comparing.
Professional in-office bleaching at a dental practice typically runs somewhere between $300 and $1,000 or more per session. High-end cosmetic dental practices in major cities sit at the top of that range. General dentistry practices in smaller towns are usually more affordable. Laser-enhanced systems (like Zoom!) tend to cost more than standard in-office gel treatments.
Dentist-supervised at-home tray kits usually fall in the $200–$500 range, which includes the impression, custom tray fabrication, and the initial supply of whitening gel. Refill gel is generally inexpensive.
Over-the-counter whitening strips from reputable brands run $30–$70 for a full kit. Whitening toothpastes are $5–$20. LED whitening kits sold online range wildly from $20 to $150+ — with quality varying just as wildly.
The honest takeaway: you don’t have to spend a fortune to see real results. OTC strips, used consistently, work. But the most reliable results with the least risk of complications still come from working with a dental professional.
How Much Is Teeth Whitening — Is It Worth the Price?
This is slightly different from “how much does it cost” — this is about value.
For mild to moderate surface staining, a $40 box of whitening strips absolutely delivers value. You’ll see a noticeable difference. For someone whose staining is heavier, whose lifestyle involves daily coffee and the occasional glass of red wine, and who wants results that actually last — professional or dentist-supervised treatment is worth considering, even at a higher upfront cost.
The calculation changes if you have restorations. Crowns, veneers, and tooth-colored fillings don’t respond to whitening agents — they stay the same color while your natural teeth get lighter, which can create a noticeable mismatch. In that situation, spending $1,000 on in-office whitening without first consulting your dentist about your existing restorations could leave you worse off than when you started. Worth knowing before you book.
Do Teeth Whitening Strips Work?
Yes — with an important qualifier.
Whitening strips that contain hydrogen peroxide genuinely work. They penetrate enamel and break down the same chromophores that professional treatments target, just at a lower concentration and over a longer timeline. Multiple clinical studies have confirmed that OTC peroxide-based strips produce measurable, visible whitening in most users.
The qualifier is that they work on extrinsic staining and mild intrinsic staining. If your discoloration is caused by tetracycline, trauma, or aging-related dentin darkening, strips will produce limited results. Also, strips need consistent use over the full recommended cycle — one application isn’t going to do much.
The other thing worth noting: not all strips are equal. Strips that list hydrogen peroxide or sodium percarbonate as the active whitening ingredient are the ones with actual evidence behind them. Products that omit peroxide entirely and rely only on “natural” ingredients are generally not going to whiten meaningfully.
How Long Does Teeth Whitening Last?
This is a question without a single clean answer, because it depends on why your teeth are stained and what you do after whitening.
As a general framework: in-office professional whitening results can last anywhere from one to three years. Dentist-supervised at-home tray results tend to last in a similar range, with some studies suggesting slightly better longevity because of the gradual, deeper penetration of carbamide peroxide. OTC strip results are usually visible for six to twelve months before noticeable fading occurs.
But here’s the honest part most articles skip: how long results last depends more on your habits than on the treatment you chose. Someone who gets professional whitening and then drinks three cups of black coffee a day without rinsing will see results fade much faster than someone who uses whitening strips but diligently rinses after every coffee and has regular dental cleanings. Your dentist can give your teeth a clean slate — only you can maintain it.
Should I Brush My Teeth Before Using Whitening Strips?
Yes — and this one actually matters more than people realize.
Brushing before applying whitening strips removes the thin layer of plaque and surface debris sitting on your teeth. That matters because the whitening gel in the strips needs direct contact with your enamel to work. If there’s a film of plaque between the strip and your tooth surface, you’re essentially whitening your plaque, not your teeth.
However — and this is the critical detail — do not brush immediately before applying strips if your toothpaste contains sodium lauryl sulfate (SLS), which is a surfactant found in many standard toothpastes. SLS can temporarily interfere with the peroxide in whitening strips and reduce their effectiveness. If your toothpaste contains SLS, brush at least 30 minutes before applying your strips, or use an SLS-free toothpaste.
The cleaner the tooth surface when you apply the strip, the better the contact, and the better the results.
Are Whitening Strips Bad for Your Teeth?
Used as directed, no — peroxide-based whitening strips from established brands have decades of research supporting their safety.
The most common side effect is temporary tooth sensitivity during or after the whitening cycle. This is caused by peroxide temporarily penetrating through the enamel to the nerve tissue, which can feel like a short, sharp twinge when eating or drinking something cold. For most people this resolves within a day or two after stopping use.
Gum irritation is the other common issue, usually caused by strips that aren’t fitted properly and allow gel to contact the gum tissue. This is irritating but not damaging — again, it resolves quickly.
Where problems occur is with misuse: leaving strips on longer than recommended thinking it’ll accelerate results, using strips daily for extended periods beyond the suggested cycle, or using poorly formulated products with excessively high peroxide concentrations. These practices genuinely can cause enamel softening and increased long-term sensitivity.
The short version: follow the instructions on the package. Whitening strips are a cosmetic tool, not an extreme sport.
Should I Brush My Teeth After Using Whitening Strips?
Yes, but gently — and with a few minutes of patience first.
After removing whitening strips, your enamel pores are temporarily slightly more open from the peroxide exposure. This is completely normal and temporary, but it does mean your teeth are a touch more vulnerable to surface abrasion in the immediate aftermath.
Wait 5–10 minutes after removing strips before brushing. When you brush, use gentle pressure and a soft-bristled brush. This removes any residual gel while avoiding unnecessary abrasion on temporarily sensitized enamel.
Avoid consuming anything dark-colored — coffee, tea, red wine, dark sauces — for at least an hour after your whitening session. The same temporary porosity that makes post-strip teeth a bit sensitive also makes them slightly more prone to picking up new staining in the short window immediately following treatment.
What Teeth Whitener Works Best?
Honestly? The one you’ll actually use consistently.
That’s not a cop-out — it’s genuinely the most accurate answer. A $900 in-office treatment you do once and then never maintain will look worse after 18 months than a $50 strip kit used consistently with good oral hygiene habits.
With that said, here’s the practical ranking by effectiveness for most people:
If speed is your priority and you want dramatic results for a specific occasion, professional in-office bleaching delivers the fastest visible change.
If you want the best balance of effectiveness, longevity, and safety, dentist-supervised custom tray bleaching is what most dental professionals would recommend for their own families.
If you want a solid DIY option that actually works, OTC whitening strips with a confirmed hydrogen peroxide active ingredient are the most evidence-backed consumer choice.
For maintenance and preventing new staining, a whitening toothpaste used daily keeps your baseline from slipping without the repeated cost of full treatment cycles.
The most honest advice: visit your dentist, describe what you’re hoping to achieve, and let them look at what you’re actually dealing with before committing to a treatment. It takes 15 minutes and saves you from spending money on the wrong approach.
Do You Brush Your Teeth After Whitening Strips?
Yes — you should brush after whitening strips, just not immediately and not aggressively.
Remove the strips, rinse your mouth with water to clear residual gel, wait a few minutes, then brush lightly with a soft-bristled brush. This step matters: residual whitening gel left sitting on your teeth beyond the treatment window isn’t doing any additional whitening — the active compounds have already been expended — and it can contribute to prolonged gum contact if any gel is near the gumline.
Keep it gentle. Think of post-strip brushing as a rinse with texture, not a scrub.
Do You Brush Your Teeth Before or After Whitening Strips?
Both — at different times and for different reasons.
Before strips: Brush to clean your teeth and maximize direct contact between the gel and your enamel. Wait 30 minutes if your toothpaste contains SLS, or switch to an SLS-free formula. Clean teeth = better whitening contact = better results.
After strips: Brush gently after removing the strips to clear any remaining gel. Wait 5–10 minutes first to let your enamel settle from the peroxide exposure. Use a soft brush and light pressure.
The sequence matters. Pre-strip brushing is about setting up ideal conditions for the treatment to work. Post-strip brushing is about clean removal and not introducing abrasion to temporarily sensitized enamel. Both steps serve a real purpose.
What No One Talks About: Managing Sensitivity the Right Way
Tooth sensitivity during a whitening cycle is the number one reason people quit before finishing — which means they’ve spent the money, put in the effort, and don’t get the result. It’s worth knowing how to actually manage it.
Desensitizing toothpaste is your best friend here. Products containing potassium nitrate or stannous fluoride help calm the nerve response that causes sensitivity. Use it for one to two weeks before starting a whitening cycle, and continue using it throughout. This primes your teeth to handle peroxide exposure with significantly less discomfort.
Take breaks during your whitening cycle. If a daily strip schedule is causing significant sensitivity, use the strips every other day instead. The total treatment will take longer, but you’ll actually finish it — and your results will likely be just as good.
Avoid cold foods and drinks on heavy whitening days. The sensitivity from whitening is most triggered by temperature changes, particularly cold. A bowl of ice cream after your nightly whitening strip is a recipe for a sharp, unpleasant evening.
If sensitivity is severe, stops being temporary, or involves persistent aching rather than occasional twinges — stop whitening and see a dentist. Severe sensitivity can indicate an underlying issue like a small crack or receding gums that whitening is aggravating, and that’s worth addressing before continuing any treatment.
The Habits That Quietly Undo All Your Whitening Work
You can do everything right and still wonder why your results aren’t lasting. Often the answer is in the daily habits happening between whitening sessions.
Coffee is the most common culprit. You don’t have to give it up — but drinking it through a straw (yes, really) dramatically reduces the surface contact time between the coffee and your enamel. Rinsing your mouth with water immediately after finishing your coffee achieves the same purpose. Small habits, real differences.
The 24 hours after any whitening treatment are when your enamel is most vulnerable to new staining. This is sometimes called the “white diet” window: stick to light-colored, non-acidic foods and drinks. Chicken, fish, rice, bananas, plain yogurt, and water. Avoid coffee, tea, wine, tomato sauce, and berries during that window.
Regular dental cleanings — every six months — do more for your long-term tooth brightness than most people realize. Professional polishing removes surface buildup that whitening treatments don’t address, and it keeps the underlying enamel in the best condition to respond to whitening when you choose to do it.
A Genuine Word on Realistic Expectations
There’s a version of “teeth whitening” that exists in advertising — perfectly luminescent, almost blue-white teeth that look airbrushed. That is not the goal. That is not even what those people’s teeth actually look like.
Realistic whitening results mean your teeth look like a clean, bright version of themselves — not a different person’s teeth. For most people, a successful whitening cycle lifts discoloration by several shades and produces a noticeable, genuinely pleasing result that other people might notice but can’t quite put their finger on. That’s actually the best kind of cosmetic change: it makes you look healthier and more refreshed without looking like you’ve done something.
If your expectations are grounded in what’s realistic for your specific starting point, you’ll be far happier with your results than if you’re chasing something that doesn’t exist outside of heavily filtered photography.
Home Remedies for Teeth Whitening: The Summary You Actually Need
Since this topic generates more confusion than almost anything else in oral health, here’s the plain-language bottom line:
Baking soda — mildly effective for surface stains, safe in moderation (once or twice a week), does not bleach or address deeper discoloration.
Oil pulling — good for oral hygiene broadly, not a whitening treatment in any meaningful clinical sense.
Activated charcoal — avoid regular use. Too abrasive, no fluoride, no meaningful clinical evidence of whitening, real risk of enamel damage with repeated use.
Diluted hydrogen peroxide rinse — the most legitimate home remedy from a chemistry standpoint. Effective at low concentrations, used sparingly. Don’t use undiluted.
Strawberry/lemon pastes — occasionally harmless, but acidic enough to warrant caution. Not a reliable whitening strategy.
Banana peel — essentially harmless, essentially ineffective. A gentle ritual, not a treatment.
Turmeric — despite what social media suggests, turmeric is a pigment-rich spice that can stain teeth. Do not put it on your teeth hoping for whitening. It will not end well.
The Bottom Line
Teeth whitening works. The science is solid, the options are real, and you don’t need to spend a fortune or put your enamel at risk to see a meaningful difference in your smile.
The most important thing is matching your expectations and your chosen method to your actual situation. Know what kind of staining you’re dealing with. Understand that home remedies have genuine limits. If you’re using strips, follow the instructions — both the “before” and “after” brushing steps. Manage sensitivity proactively instead of powering through and quitting. And if you’re spending real money on any whitening treatment, spend 20 minutes with your dentist first so you know you’re spending it on the right thing.
Your smile already works. Whitening is just giving it a little more room to shine.
Trusted Resources Worth Reading
These are authoritative, non-commercial sources where you can go deeper on the research and professional guidance behind everything covered in this article:
- American Dental Association (ADA) — The definitive professional source for evidence-based dental guidance, including clinical position statements on tooth bleaching safety and the ADA Seal program for evaluating whitening products.
- PubMed / National Library of Medicine — The world’s most comprehensive database of peer-reviewed medical and dental research. Search “tooth bleaching” or “carbamide peroxide” for access to primary clinical trials and systematic reviews.
- Mayo Clinic — Oral Health — Physician and dentist-reviewed guidance written for general audiences, covering everything from whitening safety to recognizing when tooth discoloration might signal an underlying health issue.
- Medical News Today — Dental Health — Evidence-reviewed health journalism covering current research on whitening methods, ingredient safety, and oral care practices in language that doesn’t require a dental degree.
- World Health Organization — Oral Health — WHO’s global oral health data, including the wider context of dental care access, oral disease burden, and international safety standards relevant to cosmetic dental products.
- WebMD — Oral Health Center — One of the most-referenced general health platforms online, with a dedicated oral care section covering whitening options, product reviews, and expert interviews aimed at helping readers make informed decisions.
Nothing in this article is dental advice and none of it is meant to replace a real conversation with your own dentist. It’s meant to help you walk into that conversation more informed. Your specific teeth, your specific history, your specific goals — those deserve personalized professional input, not just an article on the internet.
Natural home remedies, skincare secrets, dental & eye health tips, and real product reviews to help you stay healthy the natural way.