
Home Health Remedy – Natural Path to Better Wellness
  • Home
  • About Us
  • Product Reviews
  • HEALTH & FITNESS
    • Slider #1
      • BEAUTY
      • BLOOD SUGAR & DIABETES
      • DENTAL HEALTH
      • DIETARY SUPPLEMENTS
      • EYE HEALTH
    • Slider #2
      • FUNGAL INFECTION
      • HEARING HEALTH
      • JOINTS PROBLEMS
      • MEDITATION
      • MEN’S HEALTH
    • Slider #3
      • MENTAL HEALTH
      • NUTRITION
      • PROSTATE HEALTH
    • Slider #4
      • SPIRITUAL HEALTH
      • WEIGHT LOSS
      • WOMEN’S HEALTH
      • HAIR PROBLEM
  • Contact Us For More Information
Home Health Remedy – Natural Path to Better Wellness
  • Home
  • About Us
  • Product Reviews
  • HEALTH & FITNESS
    • Slider #1
      • BEAUTY
      • BLOOD SUGAR & DIABETES
      • DENTAL HEALTH
      • DIETARY SUPPLEMENTS
      • EYE HEALTH
    • Slider #2
      • FUNGAL INFECTION
      • HEARING HEALTH
      • JOINTS PROBLEMS
      • MEDITATION
      • MEN’S HEALTH
    • Slider #3
      • MENTAL HEALTH
      • NUTRITION
      • PROSTATE HEALTH
    • Slider #4
      • SPIRITUAL HEALTH
      • WEIGHT LOSS
      • WOMEN’S HEALTH
      • HAIR PROBLEM
  • Contact Us For More Information
Home Health Remedy – Natural Path to Better Wellness
  • Home
  • About Us
  • Product Reviews
  • HEALTH & FITNESS
    • Slider #1
      • BEAUTY
      • BLOOD SUGAR & DIABETES
      • DENTAL HEALTH
      • DIETARY SUPPLEMENTS
      • EYE HEALTH
    • Slider #2
      • FUNGAL INFECTION
      • HEARING HEALTH
      • JOINTS PROBLEMS
      • MEDITATION
      • MEN’S HEALTH
    • Slider #3
      • MENTAL HEALTH
      • NUTRITION
      • PROSTATE HEALTH
    • Slider #4
      • SPIRITUAL HEALTH
      • WEIGHT LOSS
      • WOMEN’S HEALTH
      • HAIR PROBLEM
  • Contact Us For More Information
Copyright 2021 - All Right Reserved
Category:

BEAUTY

Your blog category

Man holding one side of his painful jaw with text about common causes and warning signs of one-sided jaw pain.
BEAUTY

Jaw Pain on One Side: Common Causes and When to Worry

You sit down for breakfast, take a bite of toast, and feel it: a dull, throbbing ache beside your ear, an uncomfortable tenderness along your cheek, or a sharp twinge whenever your back teeth meet. When jaw pain appears out of nowhere on just one side of your face, it is completely natural to feel a spike of anxiety. Your mind might jump to worst-case scenarios, leaving you wondering if a major medical emergency is unfolding.

Fortunately, the reality is usually much more manageable. Jaw pain on one side is an incredibly common symptom, and more often than not, it stems from highly treatable issues like an irritated jaw joint, nighttime teeth grinding, or a localized dental problem.

However, because the anatomy of the face is so densely packed, figuring out exactly why your jaw hurts can feel like a game of diagnostic telephone. Your jaw joints, chewing muscles, teeth, nerves, sinuses, and salivary glands live in close quarters. When one structure becomes inflamed, the pain can easily radiate, making a problem in an upper molar feel like an earache or a strained muscle feel like a deep bone ache.

This comprehensive guide is designed to help you decode what your body is trying to tell you. We will break down why jaw pain frequently strikes only one side, explore the most common culprits, look at how to tell different types of pain apart, and clarify exactly when you can manage it at home versus when it is time to seek professional care.

Why Does Jaw Pain Choose a Side?

To understand why pain favors one side of the face, it helps to look at how your lower jaw functions. The jawbone, or mandible, connects to your skull through two temporomandibular joints (TMJs), which sit directly in front of your ears. Think of them as a pair of highly sophisticated hinges that slide and rotate to let you talk, chew, yawn, and swallow.

These joints do not always share the workload equally. If you have a habit of chewing your food primarily on the right side, clenching your jaw unevenly when you are stressed, or sleeping in a position that puts prolonged pressure on one cheek, you can easily strain the muscles and ligaments on just one side.

Furthermore, if you have a missing tooth or a poorly aligned bite, your jaw muscles may overcompensate on one side to keep your teeth meeting properly, leading to localized fatigue and inflammation.

Beyond joint mechanics, many anatomical issues are naturally isolated to one specific location:

  • Dental issues: A cavity, cracked root, or erupting wisdom tooth typically affects one specific tooth at a time.
  • Infections: A blocked salivary gland, ear infection, or localized sinus infection will usually flare up on either the left or right side, sending referred pain directly into that side of the jaw.

Because your facial nerves share interconnected pathways, your brain cannot always pinpoint the exact origin of the distress. That is why tracking your specific triggers, the timing of the pain, and any accompanying symptoms is the most effective way to narrow down the cause.

Comparing the Roots of One-Sided Jaw Pain

Before diving into the detailed explanations, it can be incredibly helpful to see how these potential causes stack up against one another. The table below outlines how different issues tend to present themselves, giving you a quick reference point for your symptoms.

Possible causeTypical pain patternOther useful cluesSensible next step
TMD or muscle strainDull ache near the ear; worsens when chewing, yawning, or speakingJaw clicking or popping, stiffness, limited movement, tension headachesSchedule a visit with a dentist or primary-care doctor if it persists
Teeth grinding (bruxism)Widespread soreness or tightness across the jaw, usually worst after wakingFlattened or chipped teeth, morning headaches, tight temple musclesMention it to your dentist and ask whether a custom nightguard is appropriate
Cavities or dental abscessLocalized, sharp, or throbbing pain that often flares when bitingSensitivity to hot or cold, localized gum swelling, bad taste, feverContact your dentist promptly for an evaluation
Impacted wisdom toothDeep, radiating ache at the back of the jawboneSwollen or bleeding gums behind the last molars, difficulty opening wideSchedule a dental exam to assess the tooth’s position
Sinus or ear conditionFull, heavy pressure or ache, often affecting the upper jaw and cheekboneNasal congestion, ear fullness, recent cold, respiratory infection, feverConsult a primary-care doctor or ENT specialist
Salivary gland blockageSharp pain or sudden swelling under the jaw or near the ear during mealsSwelling that visibly increases while eating, dry mouth, localized tendernessSee a doctor or dentist to check for salivary stones
Trigeminal neuralgiaSudden, severe, electric-shock-like jolts lasting a few secondsTriggered by light touch, washing the face, shaving, or brushing the teethSeek a medical evaluation from a doctor or neurologist
Facial injury or dislocationSharp, immediate pain following an impact or unusually wide yawnBruising, rapid swelling, crooked bite, inability to close the mouthVisit an urgent-care clinic or emergency department
Heart-related referred painSudden discomfort, pressure, or tightness radiating into the jaw or neckChest pain, shortness of breath, sweating, nausea, lightheadednessCall emergency services immediately

The Nine Common Causes of One-Sided Jaw Pain

1. Temporomandibular Disorders

Temporomandibular disorders are an umbrella term for problems affecting the jaw joints and the complex web of muscles that control them. You will often hear people refer to this simply as “TMJ,” although technically, TMJ is the name of the joint itself, while TMD refers to the actual condition.

When TMD causes jaw pain on one side, the discomfort usually settles directly in front of the ear. It tends to behave like a sports injury: the more you use the joint, the more it hurts. Chewing a tough piece of meat, talking during a long phone call, or opening wide to yawn can cause the ache to flare up.

Many people with TMD notice that their jaw clicks, pops, or makes a grating sound when they move it. It is important to know that a painless click is generally nothing to worry about because many joints make noise without indicating a functional problem.

However, if the clicking is accompanied by pain, a feeling that the jaw is catching, or a restriction in how wide you can open your mouth, the joint requires professional attention. TMD can be triggered by several factors, including physical trauma, arthritis within the joint, stress-induced muscle tension, or chronic habits such as biting your nails and chewing gum.

2. Chronic Teeth Grinding and Clenching

If you wake up in the morning and notice that the side of your face feels incredibly sore, tight, or exhausted—as if you spent the entire night chewing bubble gum—you might be dealing with sleep bruxism. Bruxism is the involuntary grinding, gnashing, or clenching of your teeth, and it frequently happens while you are asleep.

Even though you grind with both sides of your mouth, the structural alignment of your bite might mean that one side takes the brunt of the physical force. Over time, this immense, repetitive pressure strains the masseter muscle, the primary chewing muscle running along the side of your jaw, resulting in one-sided soreness.

Aside from morning jaw fatigue, clues that point to bruxism include frequent tension headaches that start in the temples, increased tooth sensitivity, and physical signs your dentist can spot, such as flattened tooth surfaces, micro-cracks in your enamel, or indentations along the sides of your tongue.

Daytime clenching is also common, often happening as an unconscious physical reaction to intense concentration, driving, or emotional stress.

If you notice an actual sore, lump, or raised area rather than simple tooth indentations, this guide explains how to evaluate a bump inside the tongue according to its location, appearance, symptoms, and duration.

3. Cavities, Cracked Teeth and Abscesses

Not all dental issues present themselves as a straightforward, easily identifiable toothache. Sometimes, a problem deep within a tooth can manifest as a vague, radiating ache across the entire lower or upper quadrant of your jaw.

A deep cavity, a hidden fracture running down the root of a molar, or an infection at the very tip of a tooth root can cause severe, one-sided jaw pain. This type of pain is often distinct from muscular soreness; it is usually described as deep, throbbing, and persistent.

It will often intensify significantly when you bite down, consume hot or cold foods, or lie flat in bed at night due to the increased blood pressure in your head.

If an infected tooth is left untreated, a dental abscess can form, creating a pocket of pus that builds pressure inside the jawbone. If you notice a small, pimple-like bump on your gums, a foul taste in your mouth, facial swelling, or a fever alongside your jaw pain, it is a clear sign that you need prompt dental intervention.

Furthermore, neglecting oral hygiene can lead to significant plaque and tartar accumulation. When tartar hardens along the gumline over a long period, it can form what is known as a calculus bridge on teeth—a dense, continuous crust that connects multiple teeth.

While a calculus bridge does not directly cause sudden jaw-joint pain, it traps harmful bacteria against your gums, potentially contributing to periodontal disease, gum recession, bone loss, and localized gum abscesses that can make the surrounding area ache.

If you notice heavy, chalky, or brown deposits along your teeth that cause your gums to bleed, arrange professional dental scaling instead of trying to scrape the deposits away yourself. Makeshift tools can permanently damage your enamel and delicate gum tissues.

4. Impacted Wisdom Teeth and Localized Gum Inflammation

Your wisdom teeth, or third molars, are the last teeth to emerge, typically arriving in your late teens or early twenties. Because modern human jaws are often too small to comfortably accommodate these extra molars, they frequently become “impacted,” meaning they become stuck beneath the gumline or emerge at an awkward angle.

When a wisdom tooth tries to break through the gums but runs out of room, it can create a partial opening. This creates a pocket where food particles, plaque, and bacteria can become trapped. Because the area is at the very back of the mouth, it can be difficult to clean properly with a standard toothbrush or dental floss.

The resulting inflammation, known as pericoronitis, causes localized swelling, tenderness, and an unpleasant taste or odor from the back of the mouth.

Because wisdom teeth rarely erupt at exactly the same rate, this issue often starts on one side first. It can cause a deep, radiating ache at the corner of the jaw that makes opening the mouth or swallowing uncomfortable.

5. Sinus Infections and Ear Conditions

Sometimes, the source of jaw pain does not originate in the jaw or mouth. Due to the proximity of facial cavities and nerve pathways, problems in the respiratory tract or ears can easily masquerade as jaw pain.

Your maxillary sinuses are large, hollow spaces located directly above your upper teeth. When you develop a sinus infection or experience severe seasonal allergies, these cavities can become inflamed and filled with fluid.

Because the roots of your upper molars sit directly beneath—and may sometimes extend close to—the floor of the maxillary sinus, pressure buildup can cause the upper jaw and several teeth on that side to ache intensely.

This type of pain usually feels like heavy, dull pressure that worsens when you bend forward or tilt your head down. It is commonly accompanied by nasal congestion, a reduced sense of smell, facial pressure, or recent recovery from a cold.

Similarly, because your jaw joint sits directly beside your ear canal, a middle-ear infection or other ear problem can be felt as sharp or dull pain in the jaw.

If your jaw pain is accompanied by an earache, fluid draining from the ear, a feeling of fullness in the ear canal, marked dizziness, fever, or changes in your hearing, a medical examination focusing on the ear is the best path forward.

6. Blocked or Inflamed Salivary Glands

You have three major pairs of salivary glands located beneath your jaw and in front of your ears. These glands produce saliva, which travels through small tubes called ducts into your mouth.

Just as your kidneys can develop stones, your salivary glands can develop small, calcium-rich deposits known as salivary stones, or sialolithiasis.

If a stone grows large enough to block a salivary duct, fluid backs up inside the gland, causing swelling and localized pain. The defining characteristic of a salivary gland blockage is its timing: pain and swelling commonly flare around mealtimes.

When you see, smell, or taste food, your brain signals the glands to release saliva. If a duct is blocked, this sudden surge of fluid creates intense pressure and swelling under the corner of the jaw or near the ear.

The pain may settle an hour or two after you finish eating, only to return at the next meal. If the stagnant saliva becomes infected, you may experience persistent swelling, redness, fever, and a foul-tasting discharge in your mouth. These symptoms require prompt treatment from a doctor, dentist, or ear, nose, and throat specialist.

7. Physical Injuries, Arthritis and Acute Muscle Strain

Your jaw joint is susceptible to many of the same musculoskeletal problems as other joints in your body, such as your knees or shoulders.

A direct blow to the face from a sports injury, accidental fall, or vehicle accident can bruise the delicate tissues within the joint, strain the surrounding ligaments, or cause a fracture or dislocation of the mandible.

If you experience sudden, severe jaw pain immediately following an impact and notice that your teeth no longer line up properly when you close your mouth, seek emergency medical care.

Strain can also happen more subtly. If you undergo a lengthy dental procedure that requires keeping your mouth open for an hour or more, the muscles on one side can become overstretched and go into painful spasms afterward.

Chronic inflammatory conditions such as osteoarthritis or rheumatoid arthritis can also affect the temporomandibular joint. Over time, they may contribute to a persistent grinding ache, morning stiffness, reduced movement, or a crunchy sound known as crepitus when moving the jaw.

8. Neurological Conditions

While structural, muscular, and dental issues account for many cases of jaw pain, there are situations in which the problem originates from a malfunctioning nerve. The most notable condition in this category is trigeminal neuralgia.

The trigeminal nerve is the primary sensory nerve for your face. It divides into three main branches that cover the forehead, cheek, and lower jaw. If this nerve becomes compressed by a nearby blood vessel or affected by an underlying condition, it can begin sending abnormal pain signals.

Trigeminal neuralgia feels distinctly different from the dull, heavy, or throbbing ache of a muscle strain or cavity. It is characterized by sudden, unpredictable attacks of severe, sharp, electric-shock-like pain that typically last from a few seconds to a couple of minutes.

These jolts usually affect one side of the face and can be triggered by surprisingly light contact, such as a cool breeze hitting your cheek, washing your face, applying makeup, talking, smiling, or gently brushing your teeth.

Because nerve pain can closely imitate a severe toothache, anyone experiencing recurring electric-shock sensations needs a thorough medical evaluation.

9. Heart-Related Referred Pain

It surprises many people to learn that jaw pain can be a warning sign of a cardiovascular emergency, such as angina or a heart attack. When the heart muscle does not receive enough oxygen-rich blood, discomfort can spread into the neck, shoulders, back, arms, or jaw.

Popular media often portrays a heart attack as sudden chest pain on the left side. In reality, heart-related referred pain may spread into either side of the jaw and may present differently between individuals.

It is therefore essential to consider the complete pattern of symptoms. Isolated jaw pain that clearly changes when you chew, press on the joint, or move your mouth is less suggestive of a heart problem.

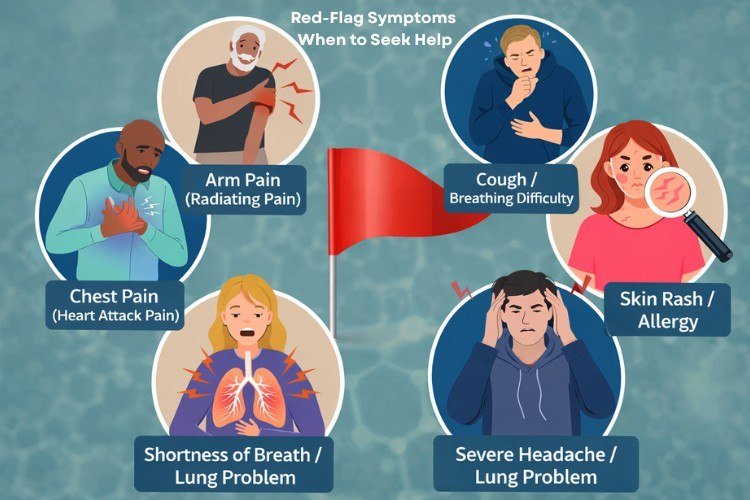
However, if jaw pain begins suddenly and is accompanied by heavy pressure, squeezing, or fullness in the chest, shortness of breath, unexplained sweating, nausea, dizziness, or sudden extreme weakness, it is a medical emergency. Call emergency services immediately and do not attempt to drive yourself to the hospital.

When to Worry: Recognizing the Warning Signs

When to worry about your Jaw pain on one side

Most cases of one-sided jaw pain can be safely evaluated during a routine appointment with a dentist or doctor. However, certain warning signs may indicate a serious condition that requires immediate attention.

Seek Emergency Care Immediately If:

  • Your jaw pain is accompanied by chest discomfort, crushing pain, pressure, or a squeezing sensation.
  • You experience unexplained shortness of breath or difficulty catching your breath.
  • You experience sudden sweating, nausea, dizziness, lightheadedness, or profound weakness.
  • You notice rapidly spreading swelling around your face, beneath your jaw, or down your neck.
  • You have difficulty swallowing your saliva or feel as though your throat is closing.
  • The pain started after significant physical trauma or a blow to the face.
  • Your jaw is stuck in an open or closed position and cannot move.

Schedule a Prompt Professional Appointment If:

  • The pain is severe, steadily worsening, or keeps returning after brief periods of relief.
  • You have a fever, visible pus around the gums, or a foul taste that does not go away.
  • The discomfort makes it difficult to chew food, drink liquids, or open your mouth for oral hygiene.
  • Your jaw joint repeatedly catches, clicks painfully, or feels increasingly locked and stiff.
  • You experience persistent numbness or tingling in your face, lips, or tongue.
  • You notice a new, firm, unexplained lump forming beneath your jaw or along your cheek.
  • Mild jaw pain on one side shows no signs of improvement after several days of gentle care.

Who Is the Best Specialist to See First?

If your jaw pain does not fall into an emergency category, you might wonder whether you should contact your dentist or primary-care doctor. The most appropriate starting point depends on the nature of your symptoms.

When to Call Your Dentist First

Dentists are experts not only in teeth but also in the functional relationship between the mouth, bite, chewing muscles, and jaw joints. Start with a dental evaluation if:

  • The pain feels localized to a specific tooth or quadrant of your mouth.
  • Your jaw throbs or aches specifically when you bite or chew.
  • Your teeth are highly sensitive to hot drinks, cold water, or sweet foods.
  • You notice swollen, bleeding, or tender gums around a particular tooth.
  • You frequently wake with a tight, sore jaw or temple headache.
  • Your jaw joint makes clicking or popping noises that have become uncomfortable.

Your dentist can examine your bite alignment, check the chewing muscles for tenderness, and take dental X-rays to look for hidden decay, fractures, bone loss, or impacted teeth.

When to Call Your Doctor First

Contact a primary-care doctor when your symptoms suggest a systemic condition or a problem outside the teeth and gums:

  • Your jaw ache is accompanied by facial pressure, nasal congestion, postnasal drip, or pain that worsens when you bend forward.
  • The pain is paired with an earache, fluid in the ear, hearing changes, or ringing.
  • You experience severe electric-shock-like bursts triggered by light touch.
  • You notice a tender lump beneath your jaw that becomes larger during meals.
  • Your jaw pain is part of a broader ache affecting multiple joints.

If the cause remains unclear after the initial evaluation, doctors and dentists can collaborate. A dentist may refer you to an oral surgeon or ENT specialist, while a doctor may refer you to a neurologist, orofacial pain specialist, or physical therapist.

Safe, Gentle Home Care for Mild Jaw Pain

If your jaw pain is relatively mild, has only been present for a few days, was not caused by an injury, and is free of warning signs, conservative self-care may help.

What to Do

Switch to Soft Foods

Give your jaw muscles a break. For a few days, build meals around easy-to-chew foods such as scrambled eggs, yogurt, oatmeal, mashed potatoes, soups, smoothies, and well-cooked pasta. Take smaller bites to avoid opening your mouth excessively wide.

Apply Temperature Therapy

If your jaw feels tight, stiff, and muscularly sore, apply a warm compress wrapped in a thin towel to the side of your face for about 15 minutes.

If you are dealing with recent swelling or an acute ache, use an ice pack wrapped in cloth for 10–15 minutes. Do not place ice directly against your skin.

Follow the “Lips Together, Teeth Apart” Rule

Under normal circumstances, your upper and lower teeth should not remain firmly pressed together throughout the day unless you are chewing.

Check in with yourself periodically. If you notice that you are clenching while typing, driving, exercising, or feeling stressed, consciously relax your jaw and allow the teeth to separate.

Use Nonprescription Relief Carefully

If nonprescription pain medicine is normally safe for you, it may help reduce short-term discomfort. Follow the product label and consider speaking with a healthcare professional if you have existing medical conditions, take other medications, or are unsure which option is appropriate.

What to Avoid

Avoid Hard and Chewy Foods

Temporarily avoid tough meats, crunchy vegetables, whole apples, hard bread crusts, nuts, sticky candy, and chewing gum. Continuous chewing places additional stress on an irritated joint.

Do Not Force or Test the Joint

It can be tempting to repeatedly open your mouth in front of a mirror to see whether the jaw still clicks. Constantly testing an irritated joint may keep it inflamed, much like repeatedly placing weight on a sprained ankle.

Avoid DIY Dental Treatment

Never place an aspirin tablet directly against an aching gum because it can damage the delicate oral tissue. Do not attempt to drain gum swelling, use sharp tools to scrape tartar, or depend on whitening products while dealing with unexplained pain.

While some people use home methods for cosmetic stains, it is important to understand their limits. For example, anyone using sodium bicarbonate should review the benefits and risks of brushing teeth with baking soda.

Baking soda may help remove certain surface stains, but it cannot cure a dental infection, soothe an injured jaw joint, or treat an inflamed nerve. Depending on cosmetic home methods for a structural or biological problem may delay the professional treatment you need.

Practical Ways to Protect Your Jaw

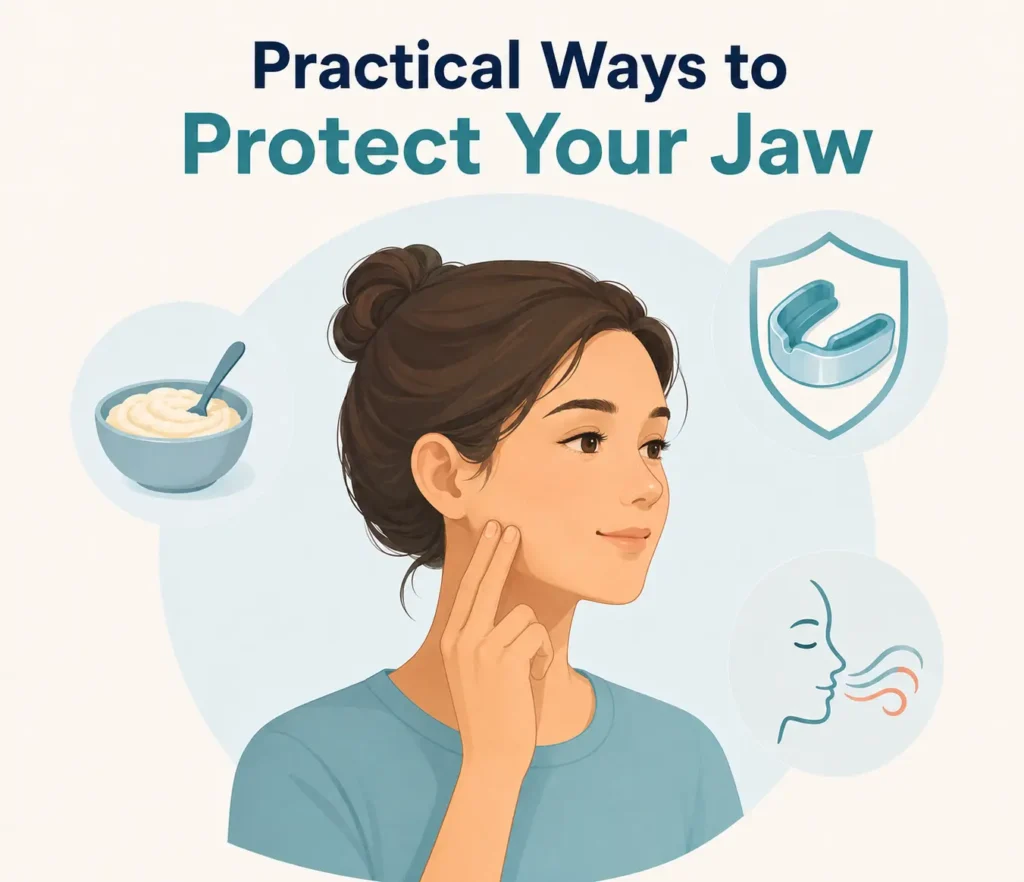
Practical Ways to Protect Your Jaw

Although you cannot prevent every possible cause of jaw pain, several everyday habits can reduce the likelihood of painful flare-ups.

Maintain Consistent Oral Hygiene

Brush your teeth twice daily with fluoride toothpaste, clean between your teeth with floss or an interdental brush, and attend regular dental examinations and professional cleanings.

Finding a small cavity or early gum disease during a routine visit can prevent it from developing into a deeper infection that causes severe tooth and jaw pain.

Protect Your Mouth During Activities

If you participate in contact sports such as basketball, soccer, martial arts, or hockey, wear a properly fitted athletic mouthguard. It can cushion the teeth and absorb some of the force from an impact.

Address Stress Physically

Emotional stress causes many people to clench their jaws or grind their teeth without realizing it. Finding a healthy outlet for anxiety may help protect the facial muscles.

Consider progressive muscle relaxation before bed, regular physical activity, gentle stretching, breathing exercises, or brief breaks during the workday to release tension building in your shoulders, neck, and jaw.

Frequently Asked Questions

Is Jaw Pain on One Side Always Related to TMJ?

No. While temporomandibular disorders are a common cause of one-sided jaw pain, they are far from the only explanation.

A deep cavity, cracked molar, impacted wisdom tooth, sinus infection, ear problem, blocked salivary gland, arthritis, or nerve condition can create a similar ache. A proper examination considers all the surrounding structures to find the source.

Why Does My Jaw Hurt on One Side When I Open My Mouth Wide?

When pain flares specifically during wide movements, such as yawning or taking a large bite, it may point toward a mechanical issue within the jaw joint or a strain in the surrounding chewing muscles.

This is especially likely when you also experience painful clicking, stiffness, or a feeling that the jaw is tracking sideways. However, a severe dental infection or impacted wisdom tooth can also make opening the mouth uncomfortable because of localized swelling.

How Long Is It Safe to Wait Before Seeking Professional Help?

If you experience warning signs such as chest pressure, shortness of breath, rapidly increasing facial swelling, fever, or difficulty swallowing, do not wait. Seek urgent medical care.

If your jaw pain is mild, dull, and free of warning signs, it may be reasonable to use gentle home care and monitor it for a few days. If it shows no clear improvement after five to seven days, steadily worsens, or repeatedly returns, arrange an appointment with your dentist or doctor.

Can a Hidden Tooth Problem Cause Jaw Pain Without a Classic Toothache?

Yes. The nerves supplying your teeth are closely connected with the nerves running through the jaw.

When a tooth has deep decay, a cracked root beneath the gumline, or a low-grade infection around the root, the discomfort can spread outward. Instead of feeling like one sore tooth, it may present as a vague or throbbing ache across part of the upper or lower jaw.

Dental X-rays and a clinical examination may be needed to identify the source.

Perspective for Long-Term Relief

At the end of the day, jaw pain on one side is a symptom, not a final diagnosis. Because your face is a complex intersection of joints, muscles, teeth, and nerves, the most valuable clues lie in the behavior of your pain: what triggers it, when it feels worst, and which other symptoms accompany it.

An ache that flares in front of your ear after chewing a tough meal tells a different story from sudden swelling under your jaw during dinner or deep throbbing that keeps you awake at night.

Most conditions responsible for one-sided jaw pain are treatable and manageable once they are correctly identified. Give a mild, new ache a few days of gentle rest, soft foods, and mindful care.

However, if the discomfort refuses to improve, disrupts your ability to eat or sleep, or presents any warning signs, listen to your body and arrange a professional evaluation. Getting a clear answer from a dentist or doctor is the safest way to address the pain and protect your health.

More Oral-Health Articles

  • Explore additional dental-health and wellness information at Home Healthy Remedy.
  • Learn what causes a calculus bridge on teeth and why professional removal is recommended.
  • Check the location, appearance, symptoms, and duration of a bump inside the tongue.
  • Review the benefits and potential risks of brushing teeth with baking soda.

References

  1. National Institute of Dental and Craniofacial Research — TMD (Temporomandibular Disorders)
  2. Cleveland Clinic — Jaw Pain: Common Causes and How to Treat It
  3. Mayo Clinic — TMJ Disorders: Symptoms and Causes
  4. MedlinePlus — Jaw Injuries and Disorders
  5. NHS — Dental Abscess
  6. NHS — Trigeminal Neuralgia
  7. American Heart Association — Warning Signs of a Heart Attack

July 25, 2026 0 comment
0 FacebookTwitterPinterestEmail
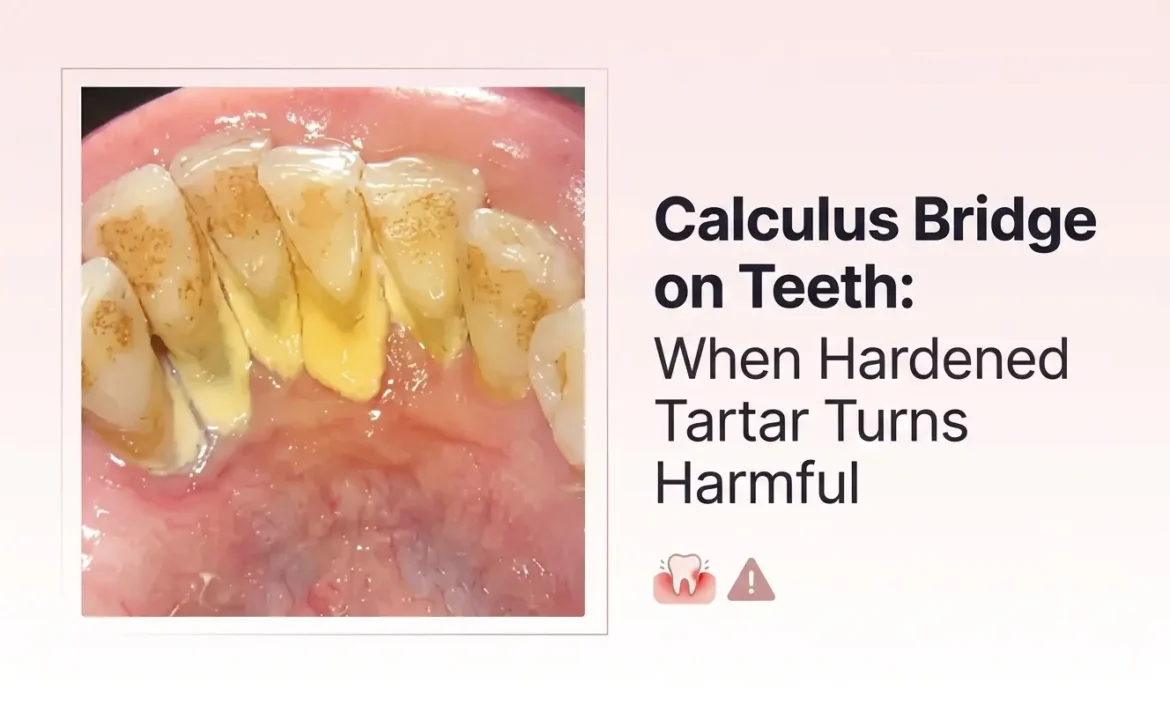
A clean blog header image featuring a dental photo on the left showing severe tartar build-up (calculus bridge) on the lower teeth. The right side contains the text 'Calculus Bridge on Teeth: When Hardened Tartar Turns Harmful' against a soft pink gradient background, with small icons of an inflamed tooth and a warning sign below.
BEAUTY

Calculus Bridge on Teeth: When Hardened Tartar Turns Harmful

Maybe you noticed it while flossing, or caught a glimpse in the mirror after your morning coffee: a hard, yellowish-brown crust that seems to stretch across the back of your lower front teeth, almost gluing them together. It doesn’t move when you brush, and floss won’t slide through.

What you’re likely looking at is a calculus bridge — a stretch of hardened dental deposits large enough to connect two or more neighboring teeth. It can look alarming, but it’s also a well-understood dental issue with a straightforward solution. This article covers what a calculus bridge is, how it forms, what it can look and feel like, the oral-health risks it may carry, and what typically happens when a dentist removes it — plus practical ways to lower your chances of it coming back.

Quick Answer

A calculus bridge is a connected mass of hardened dental calculus (tartar) that spans across two or more adjacent teeth, usually near the gumline. It forms when bacterial plaque isn’t removed and gradually mineralizes with minerals from saliva. Because it’s calcified and firmly attached, a calculus bridge generally can’t be brushed away and typically requires professional dental scaling.

Key Takeaways

  • A calculus bridge develops when soft plaque is left long enough to harden into calcified deposits that spread and connect.
  • It’s most often found behind the lower front teeth and along the gumline.
  • Left in place, it may contribute to gum inflammation, bad breath, and, in some cases, more advanced gum problems over time.
  • Hardened calculus can’t be removed with brushing or home remedies; professional dental scaling is generally needed.
  • Consistent brushing, interdental cleaning, and routine dental visits are the most reliable prevention.
  • See a dentist for hard deposits that won’t brush away, ongoing bleeding gums, or persistent bad breath.

What Is a Calculus Bridge?

Plaque and dental calculus aren’t the same thing. Plaque is the soft, sticky bacterial film that forms on teeth daily — the kind a toothbrush is built to remove. Calculus is what happens when that plaque isn’t cleared and minerals in saliva harden it onto the tooth. Once calcified, it’s a firm, cement-like deposit that clings to enamel and root surfaces.

A calculus bridge is simply an extensive version of this process. Instead of staying confined to one tooth, the mineralized plaque spreads until deposits on neighboring teeth merge into a single crust — most often behind the lower incisors. It differs from ordinary tartar mainly in scale: a small patch on one tooth is common and easily managed, while a calculus bridge on teeth reflects a longer stretch of buildup across multiple surfaces.

How Does It Form?

A calculus bridge builds up gradually:

  1. Bacterial plaque forms on teeth throughout the day.
  2. If it isn’t brushed or flossed away, it stays on the surface.
  3. Saliva minerals harden the plaque into calculus, sometimes within days.
  4. The rough, hardened surface lets more plaque attach on top of it.
  5. Over repeated cycles, deposits thicken and spread, eventually bridging adjacent teeth.

Contributing factors can include inconsistent brushing, skipped flossing, crowded teeth that are harder to clean, smoking or tobacco use, dry mouth, sugary or starchy diets, and missed professional cleanings — though none of these guarantees a calculus bridge will form. For most people it’s a combination of a few factors over time.

What Does It Look and Feel Like?

  • Yellow, brown, white, or dark grey/black coloration
  • A rough, crusty, or stone-like texture
  • Hard buildup concentrated near the gumline
  • Deposits most common behind the lower front teeth
  • Floss that won’t pass between certain teeth, or shreds when tried
  • Visible material that appears to link two or more teeth together

Color and texture vary by diet, tobacco use, and how long the deposit has been present, so appearance alone isn’t a reliable measure of severity — a dental exam is.

Common Symptoms and Warning Signs

The calculus itself often isn’t painful, which is part of why it can go unnoticed. But it’s frequently accompanied by:

  • Gums that bleed while brushing or flossing
  • Swollen, tender, or reddened gums
  • Persistent bad breath
  • Gum recession
  • Sensitivity to hot, cold, or sweet foods
  • Discomfort while chewing
  • Visible gaps once the deposits are removed
  • Teeth that feel smoother or different once a calculus bridge is gone

Symptoms vary between individuals, so having one or two of these signs doesn’t automatically mean the situation is serious — but they’re worth mentioning at a check-up.

Not Every Oral Change Comes From Tartar

Not everything unusual in your mouth is tartar-related. Small, temporary tongue bumps often have different causes, and understanding why lie bumps may appear overnight can help you tell the difference.

Likewise, a firm or unusual lump on the tongue itself is a separate issue from tooth deposits. Reviewing possible causes of a bump inside the tongue can help you decide whether it’s worth flagging at your next visit.

Why It Can Become Harmful

The rough, porous surface of a calculus bridge gives bacteria an easy place to cling to, which can encourage further plaque buildup on top of it. Over time, this ongoing irritation near the gumline is associated with gingivitis — gum inflammation marked by redness, swelling, and bleeding.

Left unaddressed, gingivitis may, in some individuals, progress toward periodontal pockets, further gum recession, and — in more advanced or long-standing cases — loss of the bone supporting the teeth, which has been linked to loosening teeth and eventual tooth loss. This is a possible progression, not an inevitable one; many people have a calculus bridge removed with no lasting gum damage. Dentists generally recommend addressing hardened buildup rather than leaving it in place indefinitely.

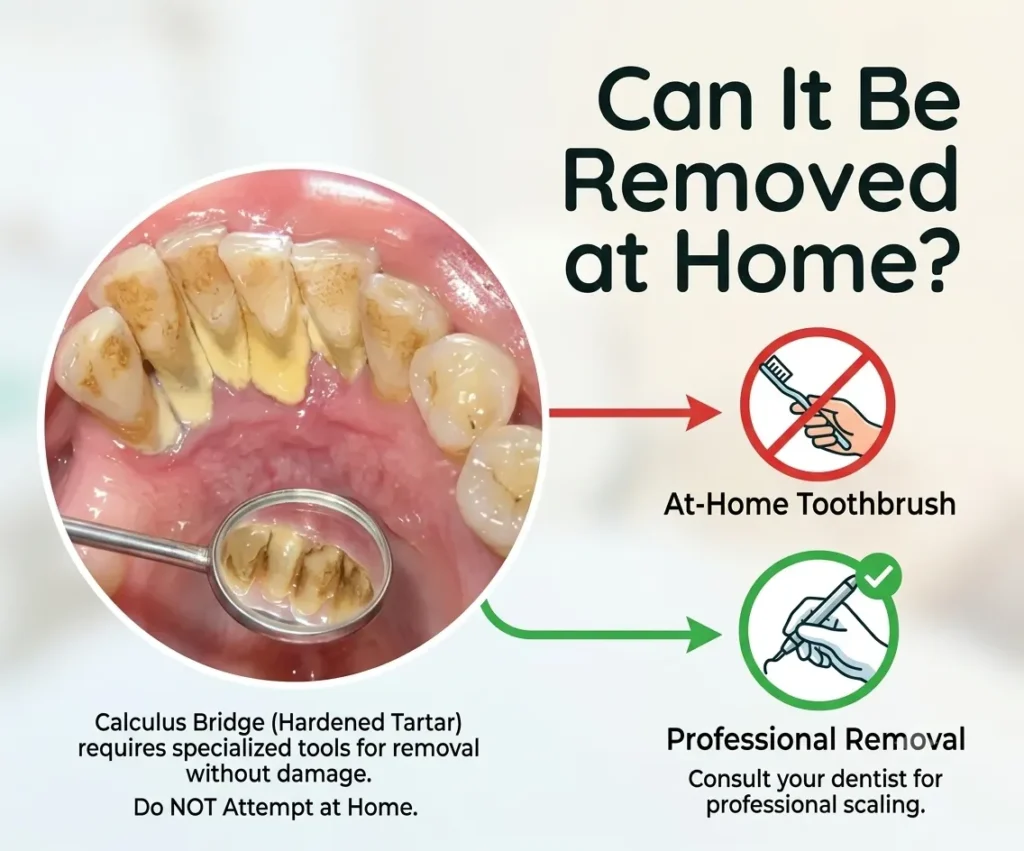
Can It Be Removed at Home?

"Infographic titled 'Can It Be Removed at Home?' contrasting a 'No' symbol for at-home toothbrushing against a 'Yes' symbol for professional dental removal, next to a close-up photo of severe tartar buildup."

No, not safely. Once plaque mineralizes into calculus, it bonds too tightly for a toothbrush, floss, or mouthwash to break down. Baking soda pastes or vigorous brushing may polish the surface slightly but won’t remove the hardened material underneath.

Avoid trying to scrape it off yourself. Metal picks, needles, tweezers, or other sharp household tools can injure gums, scratch enamel, cause bleeding, or introduce infection — and it’s easy to leave hardened calculus behind at or below the gumline even after a determined attempt. Acidic “natural” tartar removers can also damage enamel without fully clearing the deposit.

How Dentists Remove It

  • Exam: the dentist or hygienist checks the extent of buildup and gum health.
  • Gum assessment: pocket depths may be measured around affected teeth.
  • Dental scaling: ultrasonic and/or manual instruments carefully break up and remove the hardened deposits.
  • Polishing: smooths the tooth surface and lifts surface staining.
  • Deep cleaning or root planing: used when buildup extends below the gumline, to smooth root surfaces and support gum reattachment.
  • Follow-up care: may be recommended if signs of gum disease are present.

The exact process and number of visits depends on how extensive the buildup is, so it’s hard to generalize — some people find it only mildly uncomfortable, while others with sensitive gums may want a topical numbing gel. Your dental team can advise on your specific case.

What to Expect After Removal

It’s common to notice temporary sensitivity, tender gums, or teeth that feel or look slightly longer once a calculus bridge is gone — the deposits were simply filling in small gaps that are now visible again. None of this usually means the cleaning caused damage; it reflects the natural tooth and gum contours reappearing.

If teeth look more yellow or stained afterward, that’s typically surface staining rather than new damage, and it’s separate from tartar itself. If appearance is a concern, understanding teeth-whitening options can help — though whitening addresses stains, not hardened calculus, so the two shouldn’t be confused.

Calculus Bridge vs Ordinary Tartar

FeatureOrdinary Tartar BuildupCalculus Bridge
ExtentLocalized, one tooth or surfaceExtensive, spans multiple teeth
AppearanceSmall patches or thin filmThick, connected crust
Teeth involvedUsually one or twoThree or more neighboring teeth
Cleaning difficultyFloss may still passFloss often can’t pass at all
Gum involvementOften minimalMore often associated with irritation
Typical treatmentStandard cleaningScaling, possibly deep cleaning/root planing

Prevention Tips

  • Brush twice daily for two minutes, angling bristles toward the gumline
  • Use fluoride toothpaste
  • Floss or use an interdental cleaner daily
  • Consider interdental brushes for larger gaps or dental work
  • Clean carefully along the gumline, where calculus tends to start
  • Replace your toothbrush every three to four months
  • Keep up with routine dental exams, generally every six months unless advised otherwise
  • Follow the cleaning schedule your dentist recommends
  • Avoid tobacco use
  • Talk to a dentist or doctor about managing chronic dry mouth
  • Don’t rely on whitening products as a substitute for plaque control

For broader day-to-day guidance beyond tartar prevention, this collection of everyday oral-health information covers related home-health topics.

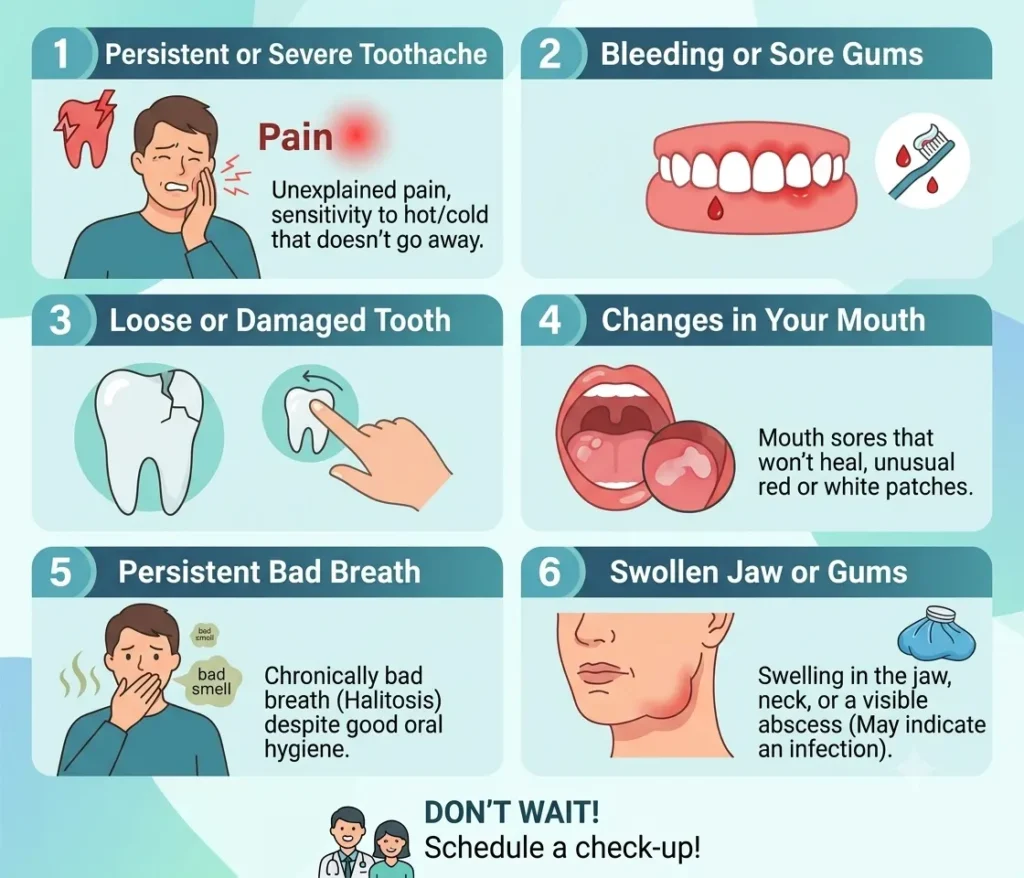
When to See a Dentist

Book an appointment if you notice hard deposits that won’t brush away, gums that bleed regularly, persistent bad breath, gum swelling or recession, pus near the gumline, loose teeth, or pain while chewing.

Infographic listing 6 reasons to see a dentist: toothache, bleeding gums, damaged teeth, mouth sores, bad breath, and jaw swelling.

Some symptoms call for urgent care rather than a routine visit: rapidly increasing facial swelling, difficulty swallowing, trouble breathing, or bleeding that won’t stop. Seek prompt medical or dental attention right away in those situations.

FAQs

Is a calculus bridge the same as tartar? It’s made of the same material as ordinary tartar, but the term describes deposits extensive enough to connect two or more neighboring teeth.

Can a calculus bridge fall off on its own? Unlikely — calculus bonds tightly to tooth surfaces and generally stays in place until professionally removed.

Can brushing remove hardened dental calculus? No. Brushing and flossing prevent new buildup, but existing calculus needs professional scaling.

Does calculus bridge removal hurt? It varies. Many people feel only mild pressure, though those with sensitive gums or heavier buildup may find it more uncomfortable; numbing options are available if needed.

Why do gaps appear after tartar removal? Calculus can fill in small spaces between teeth as it builds up. Once removed, those natural spaces become visible again — it isn’t a sign of new damage.

Can a calculus bridge cause bad breath? Yes, it’s possible. Bacteria in and around hardened calculus can contribute to persistent bad breath, which often improves after cleaning.

How quickly can dental calculus form? Plaque can begin hardening within days if not removed, though a noticeable calculus bridge usually takes weeks to months to build up.

Can a calculus bridge return after cleaning? Yes, particularly without consistent daily hygiene and routine dental visits afterward.

Conclusion

A calculus bridge can look concerning the first time you spot it, but it’s a well-recognized dental issue with a clear path forward. It builds up gradually from everyday plaque that hardens and spreads when it isn’t consistently removed, and while it may be associated with gum irritation or other oral-health concerns, professional cleaning is generally effective at addressing it.

Rather than reaching for a sharp tool or a home remedy, the safest step is scheduling a visit with a dentist, who can assess the buildup and recommend the right approach for your situation. Everyone’s mouth is a little different, so what works for one person’s prevention routine may need small adjustments for another — a dental professional is best placed to guide that.


References

Calculus Bridge: Causes, Side Effects And Treatments

Calculus Bridge: Side Effects, Treatment, and Prevention

Calculus Bridge: Doctor Explains Causes, Symptoms, Treatment, and Prevention

Calculus (dental)

July 17, 2026 0 comment
0 FacebookTwitterPinterestEmail
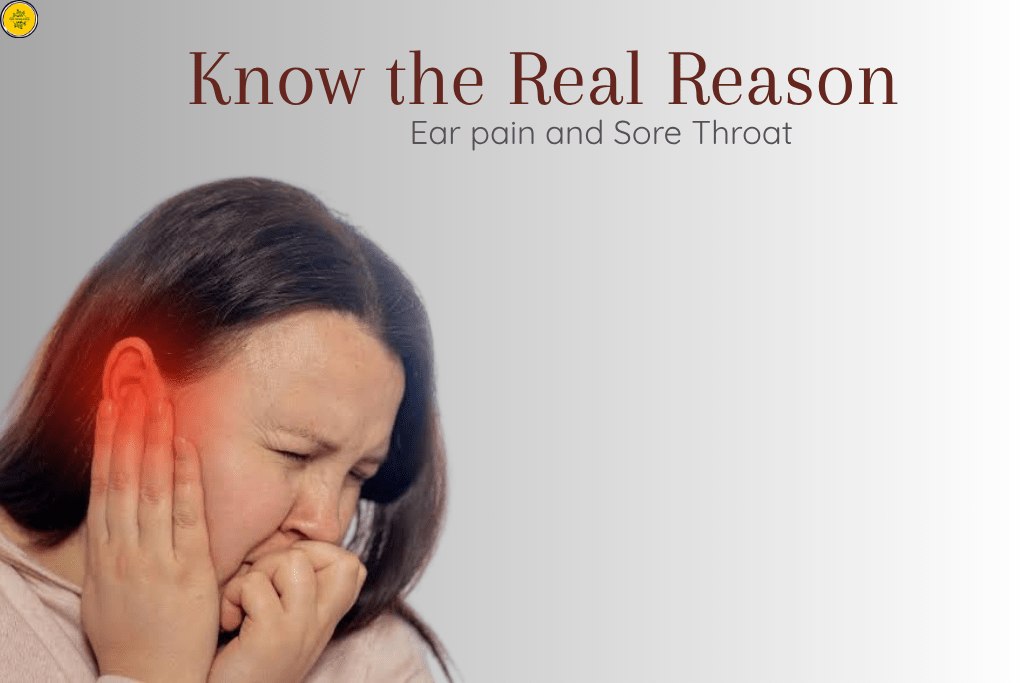
Ear Pain and Sore Throat
BEAUTY

Why Does My Ear Hurt When I Have a Sore Throat? Causes Explained

Why does my ear hurt when I have a sore throat? It’s one of the most common questions people ask when a scratchy, painful throat is suddenly joined by a dull ache or pressure in the ear. It’s a strange but incredibly common combination. Because the throat and ears don’t seem directly connected on the surface, this pairing can feel confusing or even alarming. The good news is that in most cases, there’s a simple anatomical explanation. This article breaks down why does my ear hurt when I have a sore throat, what’s actually happening inside your body, and when the combination is worth a call to your doctor.

Quick Overview

If you’re asking why your ear hurts when you have a sore throat — or searching “ear hurt when I have a sore throat” — the short answer is referred pain. The throat and middle ear share nerve pathways and are physically connected by a narrow channel called the Eustachian tube. When your throat becomes inflamed or infected, nearby nerves and structures can send pain signals that your brain interprets as coming from the ear, even when the ear itself isn’t infected.

In other cases, an infection actually spreads from the throat into the ear, causing a true ear infection alongside the sore throat — but either way, the root of why does my ear hurt when I have a sore throat almost always starts in the throat.

Key Takeaways

  • The main answer to why does my ear hurt when I have a sore throat is usually “referred pain,” not a separate ear problem.
  • The throat and middle ear are physically linked through the Eustachian tube and share overlapping nerve supply.
  • Common causes behind why does my ear hurt when I have a sore throat include viral infections, strep throat, tonsillitis, sinus infections, allergies, and acid reflux.
  • Most cases resolve within a week to ten days with rest, hydration, and basic symptom relief.
  • Pain lasting more than two to three weeks, one-sided pain, or pain with high fever, drainage, or trouble breathing needs medical evaluation.

What Is Referred Ear Pain?

To understand why does my ear hurt when I have a sore throat, you first need to understand referred pain. Referred pain happens when discomfort is felt in a location different from where the actual problem is occurring. In the case of a sore throat, the pain doesn’t start in the ear at all. Instead, irritation or inflammation in the throat activates nerves that also supply sensation to the ear, so your brain registers the pain as coming from your ear canal or middle ear.

According to otolaryngologists, when someone has pain in both the ear and throat at the same time, the source is usually the throat, not the ear. This is different from a standalone ear infection, where the problem genuinely originates inside the ear itself.

Why Does This Connection Matter?

If you’ve been asking yourself “why does my ear hurt when I have a sore throat,” understanding the answer matters because it changes how you approach treatment. If you assume your ear pain means you have a separate ear infection, you might reach for ear drops or worry about hearing damage when the real issue is throat inflammation that needs its own care.

Recognizing the throat-ear connection also helps you watch for warning signs that suggest something more serious, like a true secondary ear infection or a condition that needs antibiotics. Knowing the difference can save you an unnecessary trip to the pharmacy for the wrong remedy, or help you realize when a doctor’s visit really is warranted — which is exactly why “why does my ear hurt when I have a sore throat” is worth understanding properly.

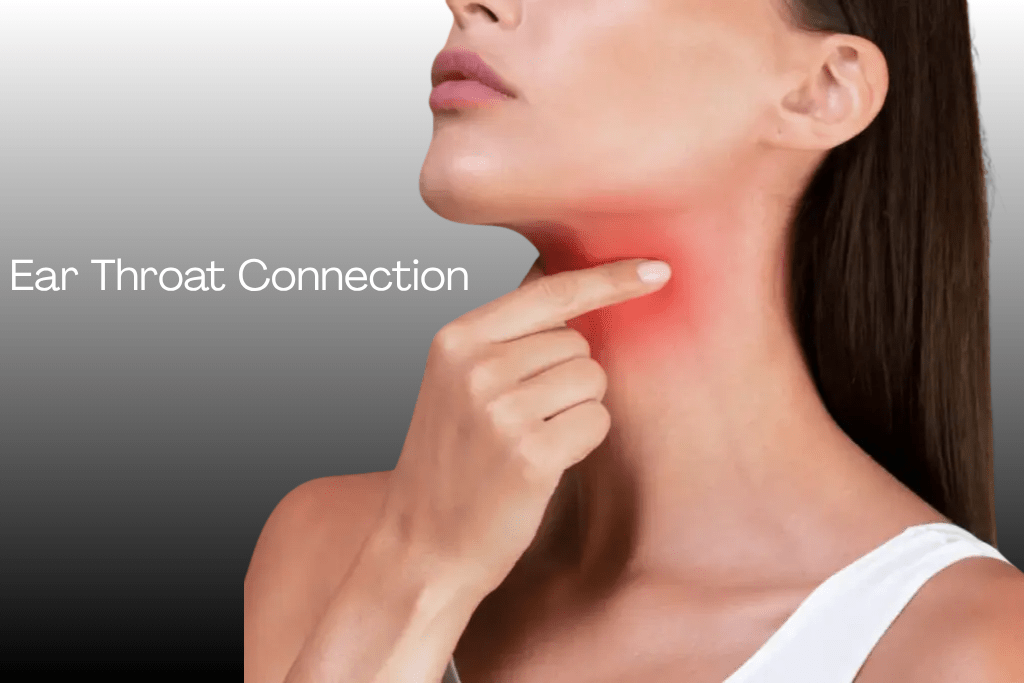
ear hurt when I have a sore throat

How Does It Work?

To answer “why does my ear hurt when I have a sore throat,” it helps to look at the anatomy involved. The throat and ears are linked by the glossopharyngeal nerve, along with other cranial nerves that share sensory pathways between the throat, tonsils, and ears. When tissue in the throat becomes inflamed, irritated nerve endings can trigger signals that travel along these shared pathways and register in the brain as ear pain, a process sometimes described by the medical community as otalgia.

There’s also a direct physical connection. The Eustachian tube runs from the middle ear down to the back of the throat, helping regulate air pressure and drain fluid. This tube sits close to the tonsils. When the throat or tonsils swell from infection, that swelling can block or irritate the Eustachian tube opening. This can cause pressure to build in the middle ear, or in some cases let bacteria or viruses travel upward from the throat into the ear itself, causing an actual infection rather than just referred discomfort — the physical explanation behind why does my ear hurt when I have a sore throat.

Main Causes or Contributing Factors

There are several reasons your ear hurts when you have a sore throat, ranging from everyday viruses to less obvious triggers like reflux. Here’s a closer look at each one.

Viral Infections

One of the most common answers to why does my ear hurt when I have a sore throat is a simple virus. The common cold, flu, and other everyday viruses are among the most frequent culprits behind a sore throat that comes with ear discomfort. These viral infections typically cause inflammation throughout the throat and ears, resulting in soreness alongside referred pain. As the infection lingers, fluid can sometimes build up behind the eardrum, a condition doctors call serous otitis media, which adds a feeling of fullness or muffled hearing to the mix.

Bacterial Infections Like Strep Throat and Tonsillitis

Another common reason behind why does my ear hurt when I have a sore throat is a bacterial infection. Strep throat, caused by Streptococcus bacteria, often brings on a sudden, severe sore throat that can radiate into the ears. Tonsillitis, an inflammation of the tonsils that sit close to the Eustachian tube openings, works similarly. Bacteria from a throat infection can sometimes travel into the eustachian tubes and middle ear, leading to an actual ear infection rather than just referred pain. This is one reason bacterial throat infections are taken more seriously than mild viral ones — left untreated, they can genuinely spread.

Sinus Issues, Allergies, and Reflux

Congestion and reflux are less obvious answers to why does my ear hurt when I have a sore throat, but they’re just as common. Sinus infections and seasonal allergies cause postnasal drip, where mucus drains down the back of the throat, irritating it and clogging the Eustachian tubes at the same time. Allergens like pollen and dust can trigger inflammation of the membranes lining the nasal cavities and ears, and the resulting postnasal drip can lead to throat irritation and ear pressure. Separately, acid reflux and GERD can send stomach acid up into the throat, irritating tissue there and, for some people, triggering referred pain that reaches the ears too.

Common Signs or Effects

Recognizing the signs helps confirm why does my ear hurt when I have a sore throat. When the answer to “why does my ear hurt when I have a sore throat” applies to you, several other symptoms tend to show up alongside the pain. You may notice a scratchy or burning throat sensation, difficulty or pain when swallowing, a feeling of pressure or fullness in one or both ears, mild hearing changes, swollen glands in the neck, low-grade fever, headache, and general fatigue.

The intensity and exact pattern of symptoms depend heavily on the underlying cause behind why does my ear hurt when I have a sore throat, so it’s worth paying attention to what accompanies the pain rather than focusing on the ear and throat alone.

Referred Ear Pain vs. True Ear Infection

If your ear hurts when you have a sore throat, it’s worth knowing whether it’s referred pain or a true infection, since the two can feel almost identical but aren’t the same thing — and one sometimes leads to the other. This table breaks down the answer to why does my ear hurt when I have a sore throat side by side with a true ear infection.

FeatureReferred Pain (Throat-Related)True Ear Infection (Otitis Media)
MeaningEar pain caused by irritation elsewhere, usually the throatInfection or fluid buildup directly inside the middle ear
Common CausesViral pharyngitis, tonsillitis, sinusitis, GERDBacteria or viruses trapped behind the eardrum, often following a cold
Main SignsEar discomfort that tracks with sore throat and swallowingEar pain, muffled hearing, sometimes fluid drainage or fever
DurationImproves as the throat heals, usually within a weekCan last several days to two weeks; may need antibiotics
Key DifferenceNo active infection inside the ear itselfActive infection or trapped fluid in the middle ear
When to Seek HelpIf pain persists beyond 7–10 days despite throat improvingIf there’s fever, drainage, sudden hearing changes, or symptoms in a young child

Viral vs. Bacterial Sore Throat

Since the right treatment depends on which type you’re dealing with, it helps to know the general differences before deciding whether why does my ear hurt when I have a sore throat needs antibiotics or just time.

FeatureViral Sore ThroatBacterial Sore Throat (e.g., Strep)
MeaningCaused by viruses such as cold or flu virusesCaused by bacteria, most often Streptococcus
Common CausesCommon cold, flu, mononucleosisStrep throat, less commonly other bacteria
Main SignsGradual onset, runny nose, cough, mild feverSudden onset, white patches on tonsils, high fever, usually no cough
DurationUsually resolves in 5–7 days on its ownImproves within 24–48 hours of starting antibiotics
Key DifferenceAntibiotics don’t help; rest and fluids doRequires antibiotics to clear and avoid complications
When to Seek HelpIf symptoms worsen or last beyond a weekAnytime strep is suspected, to confirm with a rapid test

What Does Current Research Suggest?

Medical research offers a clear, consistent answer to why does my ear hurt when I have a sore throat. Clinical guidance from otolaryngology specialists consistently points to referred pain as the dominant explanation when ear and throat pain occur together, particularly because of the shared nerve supply running through the throat and middle ear. Research and clinical observation also back up the idea that upper respiratory viral infections are the single most common trigger, since colds and flu are far more frequent than bacterial throat infections in the general population.

At the same time, medical sources are consistent in flagging that persistent, one-sided pain lasting several weeks deserves closer investigation, since in rare cases lingering throat and ear pain can signal something more serious that needs a specialist’s evaluation rather than home care.

Practical Steps to Consider

If your ear hurts when you have a sore throat right now, these steps can help ease both symptoms at once.

Step One: Manage the Underlying Throat Irritation

If why does my ear hurt when I have a sore throat is the question on your mind, this step matters most, since ear pain in this situation usually traces back to the throat. Treating the throat directly often eases both symptoms. Gargling warm salt water, sipping tea with honey, using throat lozenges, and staying well hydrated can calm inflammation. Running a humidifier or taking a warm shower to add moisture to the air may also help loosen mucus and soothe irritated tissue.

Step Two: Address Ear Pressure and Discomfort

A warm compress held against the outer ear can ease aching without needing to put anything inside the ear canal. Over-the-counter pain relievers like ibuprofen or acetaminophen can reduce both throat pain and the referred ear discomfort at the same time, since they work on inflammation broadly rather than treating why does my ear hurt when I have a sore throat as two separate problems.

Step Three: Watch, Rest, and Reassess

Give your body time, since most viral causes resolve within about a week on their own. Track your symptoms day to day, noting whether pain is improving, staying the same, or getting worse, and whether new symptoms like fever, drainage, or facial swelling appear. If nothing improves within seven to ten days, or if symptoms escalate quickly, it’s time to move from home care to a medical evaluation.

Common Mistakes

When the answer to why does my ear hurt when I have a sore throat applies to you, a few common mistakes can slow down recovery. One frequent mistake is treating the ear pain as its own isolated problem and using ear drops when the real issue is inflammation in the throat. Another is putting cotton swabs or other objects into the ear canal to try to relieve pressure, which can push earwax deeper or damage the eardrum.

People also sometimes wait too long to seek care for a suspected bacterial infection like strep throat, which can lead to complications if antibiotics aren’t started when needed. Finally, many people ignore persistent one-sided pain because they assume it’s “just” a cold, when lingering unilateral symptoms are exactly the kind of pattern that warrants a professional look at why does my ear hurt when I have a sore throat.

Myths and Facts

Myth: Ear pain during a sore throat always means you have an ear infection. Fact: Most of the time it’s referred pain from the throat, not a true infection inside the ear itself — this is the real answer to why does my ear hurt when I have a sore throat for most people.

Myth: If your ear hurts, you need antibiotics right away. Fact: Many causes, including the common cold, are viral and resolve without antibiotics; these are only useful for confirmed bacterial infections behind why does my ear hurt when I have a sore throat.

Myth: Ear pain in this context means you’re going deaf or damaging your hearing. Fact: Temporary muffled hearing or fullness can occur from fluid or pressure, but this typically resolves once the underlying cause of why does my ear hurt when I have a sore throat clears.

Myth: Cotton swabs help relieve the pressure or discomfort. Fact: Swabs and other objects can push wax deeper and even injure the eardrum; they should be avoided entirely.

When to Seek Professional Advice

When To Seek Medical Help

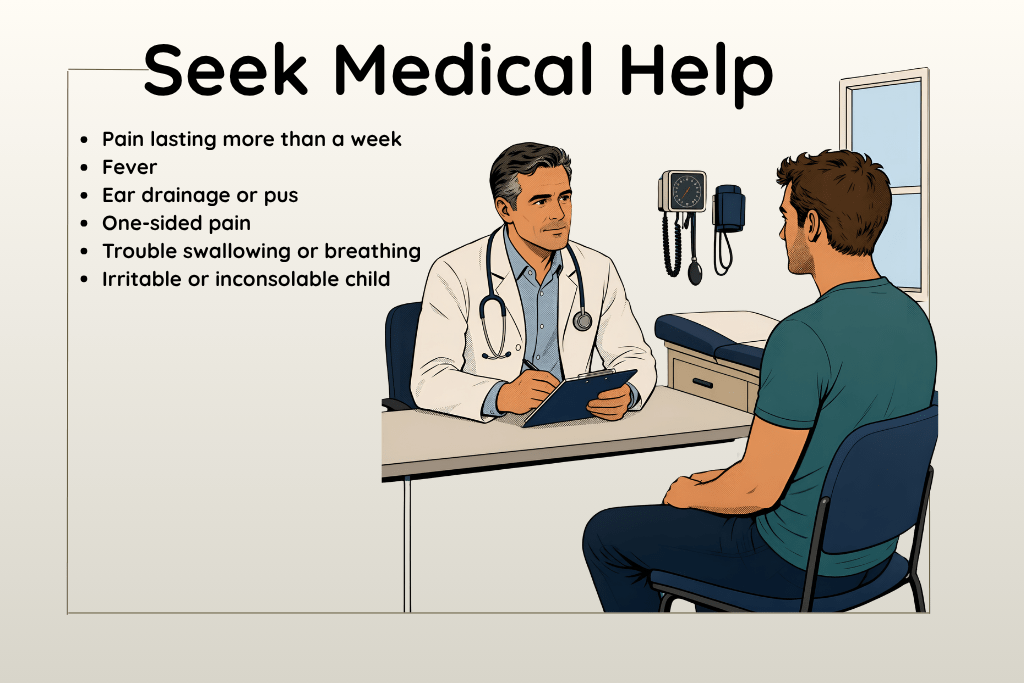
If you’re wondering why does my ear hurt when I have a sore throat and it’s not improving, most cases still clear up with rest and basic home care within a week or so. However, you should contact a healthcare provider if pain is severe or doesn’t improve after several days, if it’s clearly worse on one side only, or if symptoms last beyond two to three weeks.

Seek care as well if you develop a high fever, notice drainage or pus from the ear, have significant trouble swallowing or breathing, notice a new rash, or if a young child becomes unusually irritable or inconsolable. Persistent one-sided throat and ear pain in adults, especially those with a history of smoking or heavy alcohol use, deserves a specialist evaluation, since it can occasionally signal a more serious underlying condition behind why does my ear hurt when I have a sore throat.

FAQs

Why does my ear hurt when I have a sore throat, even without an ear infection? This is referred pain, caused by shared nerves between the throat and ear, and it’s actually the most common answer to why does my ear hurt when I have a sore throat.

Why does swallowing make the ear pain worse? Swallowing engages muscles and nerves near the Eustachian tube and throat, which can intensify referred pain signals reaching the ear — another piece of why does my ear hurt when I have a sore throat during meals.

Is it strep throat if my ear hurts too? Not necessarily, but strep throat is a well-known cause of this combination, especially when paired with sudden fever, painful swallowing, and swollen tonsils. A rapid strep test from a doctor is the only way to confirm it.

How long should I wait before seeing a doctor if why does my ear hurt when I have a sore throat keeps bothering me? Give home care about seven to ten days for viral causes. Seek care sooner if pain is severe, one-sided, or paired with high fever, drainage, or breathing trouble.

Can allergies alone cause both a sore throat and ear pain? Yes. Postnasal drip from allergies irritates the throat, while the same inflammation can clog the Eustachian tubes and create ear pressure or pain — yet another explanation for why does my ear hurt when I have a sore throat.

Final Thoughts

If you were searching for why does my ear hurt when I have a sore throat, it can feel worrying, but in most cases it comes down to the close anatomical relationship between your throat and ears rather than two separate problems. Understanding referred pain can help you treat the actual source of discomfort instead of chasing symptoms individually, and knowing the warning signs helps you recognize when it’s time to move beyond home remedies. Listen to your body, give straightforward viral causes time to resolve, and don’t hesitate to reach out to a healthcare provider when why does my ear hurt when I have a sore throat feels severe, one-sided, or lingering.

Quick Recap: Why Does My Ear Hurt When I Have a Sore Throat?

To sum up why does my ear hurt when I have a sore throat, here’s the short version:

  • Referred pain is the top reason why does my ear hurt when I have a sore throat — nerves shared between the throat and ear carry the signal to the wrong place.
  • Viral infections like colds and flu are the most common trigger behind why does my ear hurt when I have a sore throat.
  • Bacterial infections such as strep throat and tonsillitis are another frequent answer to why does my ear hurt when I have a sore throat.
  • Sinus issues, allergies, and reflux round out the list of common reasons why does my ear hurt when I have a sore throat.
  • Most people who ask why does my ear hurt when I have a sore throat find relief within a week using simple home care.
  • If why does my ear hurt when I have a sore throat persists beyond two to three weeks, it’s time to see a doctor.
  • Understanding why does my ear hurt when I have a sore throat helps you treat the real source of the discomfort instead of just the symptom.

References

These sources were used to research why does my ear hurt when I have a sore throat for this article:

  • Home Healthy Remedy: Ear Infection – How to Get Fast Relief
  • Verywell Health: Throat and Ear Pain Causes
  • Healthline: Sore Throat and Ears
  • MD Now Urgent Care: What to Do When You Have a Sore Throat and an Earache
  • Cleveland Clinic: Why You Shouldn’t Ignore Ear and Throat Pain
  • The Well by Northwell: Why Does My Ear Hurt When I Swallow?

July 8, 2026 0 comment
0 FacebookTwitterPinterestEmail
Coconut Oil for Teeth
BEAUTY

How to Use Coconut Oil for Healthier Teeth in 2026

Oral care trends keep evolving, but few natural remedies have stood the test of time like coconut oil for teeth. Long before commercial mouthwashes existed, ancient Ayurvedic practices relied on oils to cleanse the mouth and support gum health. Today, oil pulling has made a strong comeback as more people search for natural teeth whitening, holistic oral care, and chemical-free alternatives to conventional dental products.

In this guide, we’ll break down everything you need to know about using coconut oil for teeth a healthier, brighter smile — from the science behind it to a step-by-step routine you can start today.

What Is Coconut Oil Pulling?

coconut oil for teeth

Oil pulling is an ancient practice that involves swishing oil around your mouth for several minutes to remove bacteria, plaque, and toxins. While sesame oil was traditionally used, coconut oil pulling has become the modern favorite because of its pleasant taste and powerful antimicrobial properties.

The Science Behind Oil Pulling

Coconut oil is rich in lauric acid, a medium-chain fatty acid known for its antibacterial and anti-inflammatory effects. When you swish the oil, it binds to the bacterial biofilm on your teeth and gums, helping to loosen and remove harmful microbes like Streptococcus mutans, one of the primary bacteria responsible for cavities and plaque buildup.

Why It’s Trending in 2026

With the rise of clean beauty and natural wellness routines, oil pulling fits perfectly into the broader holistic health movement. Search interest in terms like “natural oral care,” “chemical-free mouthwash,” and “DIY teeth whitening” continues to climb as people look for sustainable, minimal-ingredient alternatives to mainstream dental products.

Benefits of Coconut Oil for Teeth

Coconut oil offers a range of benefits that go beyond simple freshening of breath.

1. Reduces Harmful Bacteria

The antimicrobial properties of lauric acid help reduce the population of bacteria that cause plaque, cavities, and bad breath.

2. Supports Gum Health

Many users report reduced gum inflammation and less bleeding when brushing, thanks to coconut oil’s soothing, anti-inflammatory qualities. This makes it a popular complementary step for people managing gingivitis or early-stage gum sensitivity.

3. Freshens Breath Naturally

Unlike alcohol-based mouthwashes that can dry out the mouth, coconut oil offers a gentle, natural breath freshener without stripping your mouth’s natural moisture balance.

4. May Support Whiter Teeth

While not a substitute for professional whitening treatments, consistent use may contribute to a brighter smile by reducing surface bacteria and plaque that dull enamel over time — a key reason it’s tied to the natural teeth whitening trend.

5. Chemical-Free and Affordable

Coconut oil is inexpensive, widely available, and free from sulfates, alcohol, and artificial additives commonly found in commercial mouthwashes — a major draw for the clean living community.

How to Use Coconut Oil for Teeth

Getting started with coconut oil for teeth pulling is simple and requires no special equipment.

Step-by-Step Routine

  1. Choose high-quality oil — Use organic, unrefined, cold-pressed coconut oil for the best results.
  2. Take a tablespoon — Scoop about one tablespoon of coconut oil (it will melt quickly in your mouth due to body heat).
  3. Swish gently — Move the oil around your mouth, pulling it between your teeth, without swallowing.
  4. Spit it out — Always spit into a trash can, not the sink, since the oil can solidify and clog pipes over time.
  5. Rinse and brush — Rinse your mouth with warm water, then brush your teeth as usual.

Tips for Beginners

If a full session feels difficult at first, start with just 5 minutes and gradually build up to the recommended duration. Adding a drop of peppermint essential oil can also make the experience more refreshing.

Best Time to Use Coconut Oil

coconut oil for teeth

Timing matters when it comes to maximizing the benefits of oil pulling.

Morning Routine (Recommended)

The most popular and effective time is first thing in the morning, before eating or drinking anything. This is when bacteria levels in the mouth are highest after a night’s sleep, making it the ideal window to pull out toxins and buildup.

On an Empty Stomach

Practicing oil pulling on an empty stomach is preferred, as this aligns with traditional Ayurvedic guidance and avoids interfering with digestion or food residue in the mouth.

Consistency Over Timing

While mornings are ideal, the most important factor is consistency. Establishing a daily habit — even if it fits better into your evening routine — will yield better long-term results than sporadic use.

How Long to Swish Coconut Oil

Duration plays a key role in how effective your coconut oil for teeth pulling routine will be.

Recommended Duration

Most dental wellness experts recommend swishing for 15 to 20 minutes. This extended time allows the oil to fully bind with bacteria and break down plaque.

Starting Slow

If 15–20 minutes feels unrealistic at first, begin with 5-minute sessions and gradually increase the duration over one to two weeks as your jaw and mouth adjust.

Signs You’re Doing It Right

The oil should turn thin, milky white, and slightly frothy by the end of your session — a sign that it has mixed with saliva and pulled bacteria from your mouth.

Coconut Oil vs Traditional Mouthwash

A common question people ask is how coconut oil pulling compares to standard antiseptic mouthwash.

Ingredients

Traditional mouthwashes often contain alcohol, artificial dyes, and synthetic preservatives, while coconut oil is a single, natural ingredient.

Effectiveness Against Bacteria

Some studies suggest coconut oil pulling can be comparably effective at reducing certain oral bacteria as chlorhexidine-based mouthwashes, though more extensive clinical research is still needed to confirm long-term results.

Sensitivity and Side Effects

Traditional mouthwash can cause a burning sensation, dry mouth, or irritation for people with sensitive gums. Coconut oil, by contrast, is gentle and rarely causes discomfort.

Which Should You Choose?

Rather than an either-or decision, many dental wellness advocates recommend using coconut oil pulling as a complementary practice alongside — not a replacement for — brushing, flossing, and regular dental checkups.

Pros and Cons of Coconut Oil for Teeth

Like any wellness practice, coconut oil pulling comes with both advantages and limitations.

Pros

  • Natural and chemical-free ingredient list
  • May help reduce plaque and bacteria
  • Supports fresher breath
  • Gentle on gums and enamel
  • Affordable and easy to incorporate into daily routines

Cons

  • Requires time commitment (15–20 minutes daily)
  • Not a proven substitute for fluoride treatment or professional whitening
  • Limited large-scale clinical studies compared to conventional dental products
  • Can feel unpleasant for beginners unaccustomed to the texture

Can Coconut Oil Whiten Teeth?

This is one of the most searched questions related to coconut oil for teeth, and the answer is nuanced.

What the Evidence Suggests

Coconut oil doesn’t contain bleaching agents like hydrogen peroxide, which are used in professional whitening treatments. However, by reducing plaque and surface bacteria, it may help teeth appear naturally brighter and cleaner over time.

Realistic Expectations

If you’re looking for dramatic, fast whitening results, coconut oil pulling isn’t a quick fix. It works best as part of a broader natural oral care routine, gradually improving the appearance of your smile rather than delivering instant results like whitening strips.

Combining with Other Natural Methods

Some people pair coconut oil pulling with baking soda or activated charcoal for enhanced whitening effects, though these should be used cautiously and not too frequently, as abrasive ingredients can wear down enamel if overused.

Common Mistakes to Avoid

Even a simple practice like oil pulling can be done incorrectly. Avoid these common pitfalls:

1. Swallowing the Oil

The oil accumulates bacteria and toxins during swishing — swallowing it defeats the purpose and may upset your stomach.

2. Spitting Into the Sink

Coconut oil solidifies at cooler temperatures and can clog your drain over time. Always spit into a trash can or tissue instead.

3. Using Refined or Low-Quality Oil

Refined coconut oil may contain additives or lose some of its beneficial properties during processing. Stick to organic, cold-pressed varieties.

4. Skipping Regular Brushing

Oil pulling is a complementary practice, not a replacement for brushing and flossing. Skipping your regular oral hygiene routine can undo any benefits.

5. Expecting Overnight Results

Consistency is key. Expecting instant whitening or bacteria elimination after one session often leads to disappointment and giving up too soon.

6. Swishing Too Aggressively

Vigorous swishing can tire out jaw muscles and even cause mild soreness. Keep movements gentle and relaxed throughout the session.

Frequently Asked Questions About Coconut Oil for Teeth

Is coconut oil pulling safe for daily use?

Yes, for most people, daily use is considered safe. However, those with existing dental work like crowns or fillings should consult their dentist first.

Can children do oil pulling?

Oil pulling is generally recommended for adults and older children who can reliably avoid swallowing the oil. Always consult a pediatric dentist before starting.

How soon will I see results?

Most people notice fresher breath within a few days, while improvements in gum health and plaque reduction may take several weeks of consistent use.

Does coconut oil pulling replace brushing and flossing?

No. It should be used as an additional step, not a replacement for standard oral hygiene practices.

What type of coconut oil is best?

Organic, unrefined, cold-pressed coconut oil is best, as it retains the highest concentration of lauric acid and other beneficial compounds.

Can oil pulling help with bad breath?

Yes, many users report noticeably fresher breath, as the practice helps remove bacteria that contribute to bad odor.


Final Thoughts: Coconut oil pulling is a simple, natural, and affordable addition to your oral care routine that aligns with the growing demand for holistic wellness and chemical-free dental care in 2026. While it shouldn’t replace brushing, flossing, or regular dental visits, it can be a valuable complementary habit for fresher breath, healthier gums, and a naturally brighter smile.

July 8, 2026 0 comment
0 FacebookTwitterPinterestEmail
Neck Pain Relief in 60 Seconds Using This Simple Trick
BEAUTY

Neck Pain Relief in 60 Seconds Using This Simple Trick

Introduction: The One-Minute Fix That Actually Works

You woke up this morning and you could barely turn your head. Or maybe it started slowly during a long work meeting — that familiar tightness crawling up from your shoulders, settling like a vice around the base of your skull. Sound familiar? You’re not alone.

Neck pain relief is something that millions of people around the world search for every single day. According to recent global health research, neck pain relief is one of the leading causes of disability worldwide, affecting roughly 30% of the adult population at any given time. It does not discriminate — it hits office workers, athletes, parents, students, and seniors alike. The good news? There is a simple, science-backed trick that can begin delivering neck pain in as little as 60 seconds — and this comprehensive guide is going to walk you through it step by step, along with every supporting strategy you need to stay pain-free for the long term.

Whether you are dealing with acute muscle strain, chronic stiffness, a high stress level causing tension, or a nerve that needs calming, this article covers it all. From proven home remedies to professional-grade techniques, from managing your stress level to achieving nerve calm — everything you need is right here.

So, let us dive in.

What Is Neck Pain? Understanding the Root of the Problem

Before you can achieve genuine neck pain relief, you need to understand what is actually happening inside your body. The neck, or cervical spine, is made up of seven vertebrae (C1 through C7) that support the full weight of your head — roughly 10 to 12 pounds. This delicate column of bones is surrounded by muscles, tendons, ligaments, and nerves that work together to give you mobility and stability.

When any of these structures become irritated, compressed, or inflamed, the result is pain. The pain can range from a dull, nagging ache to sharp, shooting discomfort that travels down the arm — a condition known as cervical radiculopathy, or more commonly, a pinched nerve.

Common Causes of Neck Pain

1. Poor Posture (Tech Neck) One of the most prevalent causes in the modern era. A 2024 cross-sectional study found that 64.6% of heavy smartphone users reported regular neck pain. When your head tilts forward even 15 degrees, the effective load on your cervical spine nearly doubles. At 60 degrees of forward tilt — a common phone-browsing angle — your neck is bearing the equivalent of 60 pounds of pressure.

2. Muscle Strain and Tension Repetitive movements, sleeping in an awkward position, or sitting at a desk for hours without a break can cause the muscles around the cervical spine to become tight and fatigued.

3. Stress Level This is one factor that is dramatically underestimated. Elevated stress level causes your body to hold tension — particularly in the neck, shoulders, and upper back. When your stress level spikes, so does the cortisol in your body, which triggers muscle guarding. Chronic stress essentially keeps your neck muscles in a permanent state of low-level contraction. This is why stress level management is a core pillar of any serious neck pain relief strategy.

4. Cervical Disc Degeneration The discs between your vertebrae act as shock absorbers. With age or repetitive strain, they can dehydrate and degenerate, reducing the space between vertebrae and placing pressure on surrounding nerves.

5. Pinched Nerve (Cervical Radiculopathy) When a nerve root in the cervical spine becomes compressed — either by a herniated disc, bone spur, or inflamed tissue — it triggers pain, numbness, or tingling that radiates down the arm. Achieving nerve calm in this situation requires targeted, gentle techniques to decompress the affected area.

6. Injury and Whiplash Sudden impact — from a car accident, a fall, or a sports collision — can overstretch and tear the soft tissues in the neck, causing acute and sometimes chronic pain.

The 60-Second Trick for Immediate Neck Pain Relief

This is the centerpiece of everything. The technique is called the Cervical Chin Tuck with Isometric Resistance, and it has been validated by physical therapists and supported by clinical research as one of the most effective tools for immediate and sustainable neck pain relief.

Here is exactly how to perform it:

Step-by-Step: The 60-Second Neck Pain Relief Trick

What you need: A wall or the back of a chair. That is it.

Step 1 — Sit or stand with your spine tall. Relax your shoulders down and away from your ears. Do not hunch. Your ears should be directly above your shoulders.

Step 2 — The Chin Tuck. Gently pull your chin straight backward — as if you are making a “double chin.” Do NOT tilt your head down. This movement decompresses the cervical vertebrae and activates the deep cervical flexor muscles, which are the most important stabilizers of the neck.

Step 3 — Apply Isometric Resistance. Place two fingers against your forehead and gently push forward while resisting with your neck — do not allow your head to move. Hold for 5 seconds, then release.

Step 4 — Side Resistance. Place your palm flat against the right side of your head. Push gently outward while resisting with your neck. Hold 5 seconds. Repeat on the left side.

Step 5 — Gentle Rotation. Slowly turn your head to the right as far as comfortable. Hold 5 seconds. Return to center. Then to the left. Hold 5 seconds.

Step 6 — Shoulder Roll Finish. Roll your shoulders backward in a slow, deliberate circle five times.

Total time: Under 60 seconds. Done correctly, this sequence decompresses compressed cervical vertebrae, activates stabilizing muscles, improves blood circulation, and begins the process of nerve calm by reducing mechanical pressure on irritated nerve roots.

Repeat this three to five times throughout your day — especially after long periods of sitting, screen use, or whenever your neck begins to tighten.

Home Remedies for Neck Pain Relief: 10 Proven Strategies

Long-term neck pain relief rarely comes from a single intervention. The most effective approach combines the 60-second trick above with consistent use of evidence-backed home remedies. These home remedies are not folk tales — many of them are supported by peer-reviewed clinical research.

1. Heat Therapy

Applying a warm compress, heating pad, or taking a warm shower is one of the oldest and most effective home remedies for neck pain relief. Heat loosens tight muscles, improves blood circulation, and reduces stiffness. Apply heat for 15 to 20 minutes at a time, two to three times per day.

Pro tip: Use a microwavable wheat bag or a warm, damp towel. The moist heat penetrates deeper into muscle tissue than a dry heating pad.

2. Cold Therapy

For acute injuries or inflammation, cold therapy is your best home remedy. Cold narrows blood vessels, reduces swelling, and numbs sharp pain. Apply an ice pack wrapped in a thin cloth for 10 to 15 minutes every few hours during the first 48 hours after an injury.

Alternating heat and cold — known as contrast therapy — can provide additional benefits by creating a pumping action in blood vessels that flushes out inflammatory chemicals.

3. Essential Oil Massage

Among the most soothing home remedies, essential oil massage addresses both physical tension and the psychological stress level that contributes to neck pain. Research supports the use of several oils:

  • Lavender oil: Its calming properties ease muscle tension and promote nerve calm, making it ideal for pain linked to a high stress level.
  • Peppermint oil: Contains menthol, which provides a cooling sensation, stimulates blood circulation, and acts as a natural analgesic.
  • Eucalyptus oil: Possesses anti-inflammatory properties that can reduce swelling and relieve discomfort.

Dilute 3 to 5 drops of your chosen essential oil in a carrier oil (coconut or olive oil), and massage gently into the neck and upper shoulders in slow, circular motions for 5 to 10 minutes.

4. Apple Cider Vinegar Compress

Apple cider vinegar contains antioxidants and anti-inflammatory agents that can help relieve stress and tension in the neck muscles. Soak a cloth in apple cider vinegar, apply it to the painful area, and leave for one to two hours. This is one of the home remedies that has been used for generations and continues to deliver results.

5. Ergonomic Adjustments

One of the most overlooked home remedies is adjusting your environment. Your monitor should be at eye level so your neck stays neutral. Your chair should support your lower back. Your phone should be lifted to eye level rather than forcing you to look down. These simple changes can eliminate the root cause of neck pain rather than just managing the symptoms.

6. Cervical Pillow

A poor sleeping position is responsible for a significant number of morning neck pain relief cases. Using a cervical or contour pillow that supports the natural curve of the neck can dramatically reduce nighttime strain. Clinical research has confirmed that appropriate pillow use can support spinal alignment, reduce muscle strain, and improve sleep quality in people with chronic neck pain.

7. Yoga for Neck Pain

Yoga integrates physical postures, breathwork, and mindfulness — making it one of the most comprehensive home remedies for neck pain relief. Specific poses that target the cervical region include:

  • Marjariasana (Cat-Cow Pose): Stretches the spine and relieves cervical tension.
  • Balasana (Child’s Pose): Gently decompresses the neck and promotes nerve calm by calming the nervous system.
  • Bhujangasana (Cobra Pose): Opens the chest and counteracts forward head posture.
  • Savasana (Corpse Pose): Activates the parasympathetic nervous system, directly lowering stress level and reducing muscle guarding.

8. Hydration

The intervertebral discs in your spine are largely composed of water. Dehydration causes them to shrink and lose their shock-absorbing capability. Drinking at least 8 to 10 glasses of water daily is a foundational home remedy that most people ignore entirely.

9. Anti-Inflammatory Diet

What you eat has a direct impact on inflammation levels throughout your body, including in the cervical spine. Foods rich in omega-3 fatty acids (salmon, walnuts, flaxseed), turmeric, ginger, and dark leafy greens can reduce systemic inflammation and support natural neck pain relief. Conversely, processed foods, refined sugars, and excessive caffeine can spike inflammation and increase pain sensitivity.

10. Acupuncture

A comprehensive systematic review and meta-analysis, covering 26 randomized controlled trials with 3 participants and published in 2025, found that acupuncture demonstrated significantly greater reductions in pain intensity compared to inert treatment. When conventional home remedies reach their limits, acupuncture is one of the most evidence-backed natural alternatives available.

Stress Level and Neck Pain: The Hidden Connection

If you have ever noticed that your neck pain gets worse during a particularly demanding week at work or after a family conflict, there is a very real physiological reason for that. The connection between stress level and neck pain is not just psychological — it is deeply physical.

When your stress level rises, your body releases cortisol and activates the sympathetic nervous system (the “fight or flight” response). One of the immediate effects of this activation is muscle tension — especially in the muscles of the neck, shoulders, and jaw. Your body is preparing to defend itself or run, and it does this by tightening the muscles around your most vulnerable areas.

The problem is that in modern life, stressors are constant and chronic. Your stress level rarely drops long enough for those muscles to fully relax. The result is a cycle of continuous low-grade tension that, over time, builds into chronic neck pain.

A 2025 longitudinal study found that low sleep quality and insufficient physical activity — both of which are strongly linked to elevated stress level — were significant risk factors for the development and persistence of neck pain.

Practical Ways to Lower Your Stress Level and Get Neck Pain Relief

Practical Ways to Lower Your Stress Level and Get Neck Pain Relief

Deep Breathing (Box Breathing): Inhale for 4 counts, hold for 4, exhale for 4, hold for 4. This pattern directly activates the parasympathetic nervous system, lowering your stress level within minutes and triggering muscle relaxation throughout the body — including the neck.

Mindfulness Meditation: Even 10 minutes of daily meditation has been shown to reduce cortisol levels and improve pain perception. Apps like Headspace or Calm make this accessible to beginners.

Progressive Muscle Relaxation (PMR): This technique involves consciously tensing and then releasing each muscle group in the body, starting from the feet and moving upward to the neck and face. It is particularly effective for neck pain because it trains you to recognize and release neck tension you may not even realize you are holding.

Journaling: Writing about your stressors for 15 to 20 minutes before bed can help “offload” mental tension, lowering your overnight stress level and reducing the chance that you wake up with a stiff neck.

Nature Exposure: Research published in environmental psychology journals consistently shows that spending time in natural environments significantly reduces cortisol levels and stress level within 20 minutes — often more effectively than indoor relaxation techniques.

Managing your stress level is not a soft, supplementary strategy — it is a core clinical intervention for long-term neck pain relief.

Nerve Calm: Addressing Cervical Nerve Compression

When neck pain comes with tingling, numbness, or shooting pain down the arm, it is a signal that a nerve root in the cervical spine is being compressed or irritated. Achieving nerve calm in this scenario requires a careful, targeted approach — neither aggressive stretching nor complete rest is appropriate.

Understanding Cervical Radiculopathy

The most common cause of cervical nerve involvement is disc herniation, where the soft inner material of an intervertebral disc pushes outward and presses on a nerve root. Bone spurs from degenerative disc disease can do the same. The affected nerve root determines where the pain, tingling, or numbness travels:

  • C5 nerve root: Shoulder and upper arm
  • C6 nerve root: Thumb and index finger
  • C7 nerve root: Middle finger
  • C8 nerve root: Ring and little finger

Techniques for Nerve Calm

1. Neural Mobilization (Nerve Flossing) This is a gentle technique used to relieve nerve tension by moving the nerve through its surrounding tissues. A 2024 systematic review and meta-analysis confirmed the effectiveness of neural mobilization for reducing pain intensity in adults with musculoskeletal pain. To perform basic cervical nerve flossing:

  • Sit or stand with good posture.
  • Extend your arm to the side with your palm facing upward.
  • Gently extend your fingers downward and bend your neck away from your extended arm.
  • Hold briefly, then return to neutral.
  • Repeat 15 times. Perform slowly and stop if symptoms increase.

2. Cervical Traction Gentle traction — either performed manually by a physical therapist or using an over-the-counter cervical traction device — creates space between the cervical vertebrae, relieving pressure on compressed nerve roots and promoting nerve calm.

3. Ice Before Heat for Nerve Pain When nerve irritation is acute, cold is more effective than heat for reducing inflammation around the nerve root. Apply cold for the first 48 to 72 hours before transitioning to heat therapy.

4. Positional Relief Lying on your back with a small rolled towel under your neck for support can decompress cervical discs and provide nerve calm by restoring the natural cervical lordosis.

5. Anti-inflammatory Supplements Turmeric (curcumin), magnesium, and omega-3 fatty acids have all been studied for their nerve-calming and anti-inflammatory effects. Magnesium, in particular, plays a role in nerve transmission and muscle relaxation — making it especially relevant for promoting nerve calm.

Important: If neurological symptoms (weakness, severe numbness, loss of bladder or bowel control) are present, seek immediate medical evaluation. These can indicate a more serious condition requiring professional intervention beyond home management.

Exercise and Physical Therapy: Building a Pain-Free Neck

Beyond the 60-second trick, a consistent exercise routine is one of the most powerful long-term strategies for neck pain relief. Clinical guidelines consistently rank exercise therapy among the first-line treatments for both acute and chronic neck pain relief.

The Best Exercises for Neck Pain Relief

1. Side Neck Release Targets the sternocleidomastoid and upper trapezius muscles. Sit up straight, slowly tilt your head toward one shoulder, bringing your ear toward your shoulder. Use your hand to apply gentle pressure. Hold 15 to 30 seconds. Repeat on both sides three times.

2. Neck Rotations From a neutral position, slowly turn your head 45 degrees to the left. Hold 5 seconds. Return to center. Repeat to the right. Perform 10 repetitions on each side. This exercise improves range of motion and relieves rotational stiffness.

3. Shoulder Blade Squeezes Sit or stand with your arms at your sides. Squeeze your shoulder blades together as if trying to hold a pencil between them. Hold 5 seconds. Release. Repeat 10 times. This targets the rhomboids and middle trapezius, which are often weak in people with forward head posture.

4. Levator Scapulae Stretch Sit up straight. Place your right hand behind your head. Gently pull your head down and to the right at a 45-degree angle. Hold 30 seconds. This stretches the levator scapulae — a muscle that is almost always involved in neck pain and stiffness.

5. Wall Angels Stand with your back flat against a wall, arms in a “goalpost” position. Slowly slide your arms upward along the wall without allowing your back or head to peel away from it. This exercise restores thoracic mobility and relieves the compensation patterns that lead to cervical pain.

6. Isometric Neck Strengthening This is the foundational movement from the 60-second trick. Regular practice — 2 sets of 10 repetitions, twice daily — has been shown in clinical studies to significantly reduce neck pain and disability over a 6-week period.

Pros and Cons of Common Neck Pain Relief Methods

Understanding the advantages and limitations of each approach helps you make smarter decisions about your care.

MethodProsCons
60-Second Chin Tuck + Isometric ExerciseFree, fast, no equipment, clinically validated, addresses root causeRequires consistency; improper form can worsen symptoms
Heat TherapyImmediate muscle relaxation, improves circulation, easy at homeNot suitable for acute injuries; can worsen inflammation if used too early
Cold TherapyReduces inflammation, numbs sharp pain, ideal post-injuryTemporary relief only; risk of frostbite if ice contacts skin directly
Essential Oil MassageLowers stress level, promotes nerve calm, natural and soothingEvidence is largely anecdotal; not a standalone treatment for structural issues
Over-the-Counter NSAIDs (Ibuprofen)Fast-acting, reduces inflammation and painSide effects with long-term use; does not address the root cause
Physical TherapyComprehensive, customized, targets root causesRequires appointments; cost and time investment
AcupunctureStrong clinical evidence for pain reduction; promotes nerve calmNeedle aversion; cost; variable quality between practitioners
Cervical PillowSupports spinal alignment during sleep, long-term benefitInitial adjustment period; finding the right pillow is trial and error
Yoga & MeditationAddresses both physical pain and stress level; holistic approachRequires learning and consistent practice; not an immediate fix
Cervical TractionDecompresses discs, effective for pinched nerveRequires correct device and guidance; not suitable for all neck conditions
Chiropractic / Manual TherapyImmediate pain relief from cervical manipulation; evidence-supportedShould be performed only by a licensed professional; rare adverse events
Apple Cider Vinegar CompressNatural, anti-inflammatory home remedy, low costLimited clinical evidence; primarily anecdotal support

When Home Remedies Are Not Enough: Red Flags to Watch For

While the vast majority of neck pain resolves with consistent use of the strategies outlined in this guide, there are situations where professional medical evaluation is not optional — it is essential.

Seek immediate medical attention if you experience:

  • Severe, sudden neck pain following an accident or fall
  • Pain accompanied by fever, chills, or unexplained weight loss
  • Shooting pain, numbness, or weakness down one or both arms that is worsening
  • Loss of bladder or bowel control
  • Severe headache at the back of the skull
  • Neck pain that is progressively worsening despite rest and home treatment
  • Pain that prevents you from sleeping or functioning in daily life

These symptoms can indicate conditions such as cervical myelopathy (spinal cord compression), meningitis, or a fracture — none of which should be managed with home remedies alone.

5 Big Resource Sites for Neck Pain Relief Research

For readers who want to go deeper into the science behind neck pain relief, these five authoritative sources are the gold standard:

1. National Center for Biotechnology Information (NCBI) / PubMed

URL:https://www.ncbi.nlm.nih.gov

The world’s largest repository of peer-reviewed biomedical research. PubMed hosts thousands of studies on neck pain relief, cervical spine conditions, manual therapy, exercise interventions, and more. Search “neck pain” and filter by systematic reviews for the highest-quality evidence.

Why it matters: Every major evidence claim about neck pain — from the effectiveness of acupuncture to the role of isometric exercise — can be traced back to studies indexed here. A 2025 systematic review with network meta-analysis on musculoskeletal manipulations for neck pain, published with data from January 2013 to May 2025, is just one example of the cutting-edge research available.

2. Cleveland Clinic Health Library

URL:https://my.clevelandclinic.org

One of the most respected medical centers in the United States, Cleveland Clinic provides patient-friendly breakdowns of neck pain causes, treatment options, when to see a doctor, home care strategies, and more — all written and reviewed by board-certified physicians.

Why it matters: Bridges the gap between clinical research and practical patient education. Ideal for people who want medically accurate information explained in accessible language.

3. Mayo Clinic

URL:https://www.mayoclinic.org

Mayo Clinic’s patient resources on neck pain cover everything from anatomy and causes to diagnosis, home remedies, medications, physical therapy, alternative treatments, and surgical options. Their information is consistently up to date and reviewed by specialists.

Why it matters: Trusted by both patients and healthcare providers globally. Particularly strong on helping patients understand when self-care is sufficient and when professional intervention is needed.

4. Spine-Health (Veritas Health)

URL:https://www.spine-health.com

A specialized resource dedicated entirely to spine and neck conditions, run by physicians and reviewed by a peer board. Covers cervical anatomy, specific conditions (herniated discs, radiculopathy, degenerative disc disease), exercise guides, surgery information, and patient forums.

Why it matters: The level of specificity here is unmatched for patient education. If you need to understand the difference between C5 and C6 radiculopathy, or want to know whether your symptoms suggest a structural problem, this is the resource.

5. WebMD — Neck Pain Center

URL:https://www.webmd.com

WebMD’s neck pain section is one of the most visited health resources on the internet. It covers symptoms, causes, home care, physical therapy, medications, and step-by-step exercise guides reviewed by certified physical therapists.

Why it matters: Highly accessible, well-organized, and frequently updated. The exercise guides — including nodding, side-to-side tilts, and chin tucks — are presented with clear, practical instructions that anyone can follow without prior knowledge of anatomy.

Building a Daily Routine for Lasting Neck Pain Relief

Consistency is the most underrated element of any neck pain relief strategy. Here is a simple daily routine that incorporates everything covered in this guide:

Morning (5 minutes):

  • Perform the 60-second chin tuck and isometric routine immediately after waking
  • Follow with 3 gentle neck rotations on each side
  • Apply a warm compress for 10 minutes while you have your morning drink

Midday (2 minutes):

  • Perform the 60-second trick again at your desk
  • Do 10 shoulder blade squeezes
  • Check your posture — ears over shoulders, screen at eye level

Evening (10 minutes):

  • Do 10 minutes of gentle yoga — Cat-Cow, Child’s Pose, or a neck-focused YouTube routine
  • Practice 5 minutes of box breathing to lower your stress level
  • Apply lavender essential oil massage to the neck and shoulders
  • If you have nerve irritation, perform gentle cervical nerve flossing

Before Bed:

  • Use a cervical pillow to maintain spinal alignment overnight
  • Avoid screen time 30 minutes before sleep (reduces stress level and improves sleep quality)
  • Practice a 5-minute body scan or progressive muscle relaxation to achieve nerve calm before sleep

The Psychological Side of Neck Pain Relief

There is a phenomenon in pain medicine called pain catastrophizing — the tendency to exaggerate the threat of pain and feel helpless in the face of it. Research consistently shows that people who catastrophize their pain have worse outcomes than those who approach it with confidence and active coping.

Understanding that neck pain relief is achievable — that your body has the capacity to heal, that the 60-second trick works, that home remedies deliver real results, that lowering your stress level directly reduces your pain — is itself therapeutic.

The brain plays a profound role in pain perception. Techniques like mindfulness, cognitive behavioral therapy (CBT), and acceptance-based approaches have all been shown in clinical trials to reduce the experience of chronic neck pain independently of any physical intervention.

This is not to say the pain is “in your head.” It is absolutely real. But the path to lasting neck pain relief runs through both the body and the mind. Managing your stress level, cultivating nerve calm through breathwork, and building a consistent physical routine creates a comprehensive healing environment that pills and single-point treatments simply cannot replicate.

Summary: Your Complete Neck Pain Relief Action Plan

Let us bring everything together. Here is your complete, evidence-based neck pain relief action plan:

Immediately: Perform the 60-second chin tuck and isometric technique. Apply heat or cold as appropriate for your situation.

Daily: Use the morning, midday, and evening routine outlined above. Practice stress level reduction techniques every day — not only when pain peaks.

Weekly: Perform 3 to 5 yoga or dedicated neck exercise sessions. Consider a professional massage or chiropractic adjustment if chronic tension persists.

Ongoing: Address the root causes — improve your ergonomic setup, switch to a cervical pillow, manage your stress level, stay hydrated, and eat an anti-inflammatory diet.

If symptoms worsen: Do not push through severe or worsening pain. Seek professional evaluation, especially if you experience numbness, weakness, or shooting pain down the arm — these are signs that nerve calm cannot be achieved through home care alone.

The journey to lasting neck pain relief is not always a straight line, but with the right tools, the right knowledge, and the right consistency, it is absolutely achievable.

Frequently Asked Questions (FAQ)

Q: Can neck pain relief happen in 60 seconds?

A: Yes — the chin tuck with isometric resistance technique can deliver immediate reduction in neck tension and begin decompressing cervical vertebrae in under 60 seconds. It is not a permanent cure, but it provides genuine, rapid relief.

Q: Are home remedies effective for neck pain?

A: Absolutely. Heat therapy, cold therapy, essential oil massage, anti-inflammatory diet, cervical pillows, and yoga are all home remedies with clinical or strong empirical support for neck pain relief.

Q: How does stress level affect neck pain?

A: Elevated stress level triggers the release of cortisol and activates the sympathetic nervous system, causing muscle tension — especially in the neck and shoulders. Lowering your stress level through breathing, meditation, and exercise is a critical component of neck pain relief.

Q: What does nerve calm mean and how do I achieve it?

A: Nerve calm refers to reducing the irritation and compression of cervical nerve roots. It is achieved through techniques like neural mobilization (nerve flossing), cervical traction, correct sleeping positions, ice therapy for acute flare-ups, and anti-inflammatory supplements like magnesium and omega-3.

Q: When should I see a doctor for neck pain?

A: If you experience weakness, severe or spreading numbness, shooting pain that does not improve, pain after a trauma, or symptoms that are progressively worsening, see a doctor immediately.

Conclusion

Neck pain relief does not have to involve expensive treatments, complicated protocols, or long waits for specialist appointments. The 60-second trick alone — the cervical chin tuck with isometric resistance — is a clinically supported, immediately accessible technique that can begin shifting your pain within moments of starting.

Combined with proven home remedies, a proactive approach to lowering your stress level, targeted strategies for achieving nerve calm, and the consistency of a daily routine, you have everything you need to reclaim a pain-free neck.

Start with the 60-second trick right now. Then build from there.

Your neck pain relief journey begins at this moment.


Disclaimer: This article is for informational purposes only and does not constitute medical advice. Always consult a qualified healthcare professional before beginning any new treatment, especially if you have a diagnosed spinal condition, neurological symptoms, or if your pain is severe or worsening.

May 26, 2026 0 comment
0 FacebookTwitterPinterestEmail
How to Fix Severely Chapped Lips Overnight
BEAUTY

How to Fix Severely Chapped Lips Overnight

Introduction

If you have ever woken up with painfully dry, peeling, or bleeding lips, you know how frustrating chapped lips can be. They sting when you eat, crack when you smile, and seem to get worse no matter what you try. The good news is that you do not have to live with the discomfort. With the right combination of home remedies and targeted overnight treatments, you can wake up to softer, smoother, healthier lips — sometimes in as little as 24 hours.

Chapped lips are one of the most common skin complaints worldwide, affecting people of every age, gender, and climate. Whether your dry lips are triggered by cold winter air, sun damage, dehydration, or even cold and flu symptoms, the healing process follows the same principles. In this comprehensive guide, you will learn exactly why your lips crack and peel, what works to heal them overnight, which home remedies are truly effective, and how to prevent the problem from coming back.

This post covers everything — from the science behind lip skin to the best overnight treatments, DIY scrubs, and medical-grade solutions — all designed to help you get rid of chapped lips fast. We will also walk you through a detailed pros and cons table so you can choose the best treatment for your situation.

Let’s get started.

What Are Chapped Lips? Understanding the Basics

Chapped lips, medically referred to as cheilitis, occur when the delicate skin on your lips becomes dry, cracked, flaky, or sore. Unlike the rest of your facial skin, your lip skin is extremely thin — it has no sweat glands and very few oil (sebaceous) glands. This means your lips have almost no natural defense against moisture loss. They rely entirely on external factors, such as the products you apply and the amount of water you drink, to stay hydrated.

The result? Lips are one of the first parts of your body to show dehydration, exposure to harsh elements, or nutritional imbalances. When the lip barrier breaks down, you experience that familiar tight, dry, peeling sensation that we all recognize as chapped lips.

What makes the condition particularly bothersome is the cycle it creates. Chapped lips feel uncomfortable, so people instinctively lick them. But saliva contains digestive enzymes that actually break down the thin lip barrier further, making chapped-lips worse — not better. Breaking this cycle is the first step toward healing.

Why Do Chapped Lips Happen? Common Causes

Understanding the root cause of your chapped lips is key to choosing the right treatment. Here are the most well-documented triggers:

1. Cold Weather and Dry Air

Cold air holds less moisture than warm air. In winter, both outdoor cold and indoor heating strip moisture from your lips rapidly. This is the most classic reason people develop severely chapped-lips during autumn and winter months.

2. Sun Exposure (UV Damage)

The sun is just as damaging to lips as it is to skin. UV rays break down the thin lip skin, leading to sunburned, swollen, and peeling lips — a form of chapped-lips that many people overlook. Always wear an SPF lip balm when outdoors.

3. Dehydration

When your body is dehydrated, your skin — including your lips — is one of the first places to show it. Not drinking enough water is a leading cause of persistent chapped-lips that does not resolve no matter how much balm you apply.

4. Lip Licking

As mentioned, saliva dries out your lips more than it moisturizes them. The enzymes in saliva begin breaking down skin tissue, making chapped-lips a self-perpetuating problem for habitual lip-lickers.

5. Cold and Flu Symptoms

This is an often-overlooked trigger. When you have a cold or flu, nasal congestion forces you to breathe through your mouth. Constant mouth breathing dries out your lips dramatically. Additionally, fever causes general dehydration that worsens chapped-lips significantly. The combination of blocked nose, fever, and constant tissue use around the nose area makes cold and flu symptoms one of the most common contributors to severely dry and sore lips during illness. Applying a nourishing lip balm as part of your sick-day care routine can make a real difference in comfort and healing speed.

6. Nutritional Deficiencies

Deficiencies in vitamins B2 (riboflavin), B6, B12, iron, and zinc can cause persistent chapped-lips that do not heal with standard balms. If your lips are constantly chapped year-round without obvious environmental triggers, a blood test may reveal the underlying deficiency.

7. Allergic Reactions and Irritants

Certain ingredients in lipsticks, glosses, toothpastes (especially those with sodium lauryl sulfate), mouthwashes, and even some foods can trigger an allergic contact reaction on the lips. This presents as chapped-lips with redness, swelling, and persistent peeling.

8. Medications

Some prescription medications, including retinoids, diuretics, antihistamines, and chemotherapy agents, cause severe dryness as a side effect — including severely chapped-lips.

9. Mouth Breathing (Including During Illness)

Whether caused by a stuffy nose from cold and flu symptoms or simply a habit during sleep, breathing through your mouth dries out the delicate lip tissue and is a major but underappreciated cause of waking up with chapped-lips every morning.

10. Hormonal Changes

Hormonal fluctuations during menstruation, pregnancy, or menopause can affect skin hydration levels, making chapped-lips more frequent during these phases.

Symptoms of Severely Chapped Lips

Mild chapped lips feel dry and slightly tight. But when the condition is severe, symptoms can escalate significantly. Here is what to watch for:

  • Dry, flaky, or peeling skin on the lips
  • Cracking or fissures, especially at the lip corners
  • Redness and swelling around the lip area
  • Soreness, tenderness, or pain when eating or speaking
  • Bleeding cracks (especially in the center of the lower lip)
  • A burning or stinging sensation when eating citrus, spicy, or salty foods
  • Tight, shrunken feeling even after applying balm
  • Crusting or scabbing over the lip surface

If you experience white patches, persistent ulcers, or chapped lips that do not heal within 2–3 weeks despite consistent care, see a dermatologist. These symptoms may indicate a more serious condition such as angular cheilitis, actinic cheilitis, or even an autoimmune disorder.

How to Fix Severely Chapped Lips Overnight: Step-by-Step

Here is an actionable overnight routine you can start tonight. Consistency is everything — follow these steps every evening until your chapped lips are fully healed.

Step 1: Hydrate Before Bed

Drink at least one to two glasses of water before you sleep. Lip skin reflects your overall hydration level, and you cannot moisturize your way out of dehydration. Internal hydration is foundational to healing chapped lips overnight.

Step 2: Gently Exfoliate (Only If Safe to Do So)

If your lips are flaking but not cracked or bleeding, a gentle exfoliation removes the dead skin layer that prevents balms from penetrating. Use one of the following:

  • A soft, damp toothbrush — gently circular motions for 30 seconds
  • A homemade sugar scrub (1 teaspoon sugar + 1 teaspoon honey + a few drops of coconut oil)

Important: Do NOT exfoliate if your lips are cracked, bleeding, or infected. Exfoliation on broken skin causes further damage and can introduce bacteria.

Step 3: Apply a Thick Overnight Treatment

After exfoliating (or if your lips are too tender to exfoliate, skip to this step directly), apply a thick, occlusive overnight treatment. The best options are:

  • Pure petroleum jelly (Vaseline): The gold standard for sealing moisture in and protecting damaged lip skin overnight
  • Thick coconut oil layer: Anti-inflammatory, antibacterial, and deeply moisturizing — ideal for healing chapped lips naturally
  • Castor oil: Thick and viscous; excellent for forming a protective barrier on severely dry lips
  • Medical-grade lip ointments (such as Aquaphor Lip Repair): Contain petrolatum, shea butter, and vitamins for accelerated healing
  • Overnight lip masks containing hyaluronic acid, peptides, or ceramides for deeper repair

Apply generously — do not just swipe lightly. For severely chapped lips, you want a thick coating that stays on all night.

Step 4: Use a Humidifier in Your Bedroom

Running a humidifier while you sleep adds moisture to the air, which significantly reduces overnight lip dryness — especially in winter when indoor heating dries the environment. This is one of the simplest, most effective changes you can make to prevent and heal chapped lips consistently.

Step 5: Sleep on Your Back

Sleeping face-down can expose your lips to pillow friction and dry air circulation, undoing your overnight treatment. Try to sleep on your back to keep the lip treatment in place throughout the night.

Home Remedies for Chapped Lips That Actually Work

Home remedies have been used for generations to treat chapped lips, and modern dermatology has confirmed the effectiveness of several kitchen-cabinet ingredients. Here are the best evidence-backed home remedies to heal and nourish dry, cracked lips:

1. Coconut Oil

Coconut oil is arguably the most versatile of all home remedies for chapped-lips. It contains medium-chain fatty acids that deeply penetrate the thin lip skin, providing both immediate hydration and long-term moisture retention. Its natural anti-inflammatory and antibacterial properties also help prevent infection in cracked lips. Apply pure, organic coconut oil with a clean finger or cotton swab up to four times a day.

2. Honey

Raw honey is a powerhouse ingredient for chapped-lips. It is a natural humectant — it draws moisture from the air and holds it against your skin. Honey also has powerful antibacterial properties that can prevent cracked lip skin from becoming infected. Apply a layer of raw honey to your lips for 10–15 minutes, then rinse off gently. For an intensive overnight treatment, combine honey with coconut oil and leave it on all night.

3. Aloe Vera

Aloe vera gel contains enzymes, vitamins, and anti-inflammatory compounds that make it one of the most soothing home remedies for irritated chapped-lips. It is particularly effective when lips are sunburned, red, or inflamed. Apply fresh aloe vera gel (from a leaf) or pure store-bought organic gel two to three times a day. Because aloe vera has mild exfoliating enzymes, limit use to no more than three applications daily.

4. Castor Oil

Castor oil is unusually thick and viscous, making it excellent for coating severely chapped-lips with a lasting protective barrier. It also has humectant properties that pull moisture into the skin. Castor oil is a common ingredient in professional lip care products for good reason — mix it with a few drops of peppermint oil for a pleasant-feeling overnight treatment.

5. Sugar Lip Scrub

Making a DIY lip scrub is one of the simplest home remedies for chapped-lips with flaking skin. Combine one tablespoon of sugar (or sea salt) with one tablespoon of honey or coconut oil. Gently massage the scrub onto your lips in small circular motions for about one minute, then rinse or wipe away. Follow immediately with a thick moisturizer. Use this scrub once every two to three days — not daily.

6. Cucumber Slices

Cucumber has a high water content and cooling, anti-inflammatory properties. Pressing a slice of cucumber against your lips for five to ten minutes can soothe burning, chapped-lips and add temporary hydration. This is a particularly gentle home remedy for very sensitive or inflamed lip skin.

7. Green Tea Bags

Green tea is rich in tannins and antioxidants. A warm (not hot) used green tea bag pressed gently against chapped-lips for five minutes can reduce inflammation and provide temporary relief. The gentle warmth also softens hardened, flaking skin.

8. Vitamin E Oil

Breaking open a vitamin E capsule and applying the oil directly to chapped-lips is a well-loved home remedy that is backed by dermatological evidence. Vitamin E accelerates skin cell regeneration, reduces oxidative damage, and forms a thin protective barrier on cracked lip skin. Apply at night for best results.

9. Shea Butter

Pure shea butter is packed with fatty acids and vitamins A and E. It creates an occlusive layer on the lips that locks in moisture for hours — making it one of the most effective natural home remedies for severely chapped-lips that feel rough and tight all day.

10. Ghee (Clarified Butter)

In traditional Ayurvedic medicine, ghee has long been used on chapped-lips as a natural emollient. Its rich lipid profile closely mirrors the natural oils in healthy skin, making it easy for lip tissue to absorb. Apply a small amount at night before bed.

Chapped Lips and Cold and Flu Symptoms: The Hidden Connection

Chapped Lips and Cold and Flu Symptoms: The Hidden Connection

Many people notice that their lips become dramatically worse during illness — and there are very real reasons why cold and flu symptoms and severely chapped lips go hand-in-hand.

When nasal congestion from cold and flu symptoms forces you to breathe through your mouth, the continuous airflow across your lips evaporates moisture rapidly. Fever adds another layer of dehydration, pulling fluids from every tissue in your body, including the delicate skin of your lips. Antihistamines and decongestants used to treat cold and flu symptoms are also notorious for causing dry mouth and lips as side effects.

During illness, it is easy to forget basic lip care when you are focused on recovering. But protecting your lips during a cold or flu actually reduces discomfort significantly — sore, cracked lips make it harder to eat, drink, and recover.

Tips for managing chapped lips during cold and flu symptoms:

  • Apply a thick lip balm every hour during the day
  • Use a cool-mist humidifier in your bedroom and recovery space
  • Increase your water intake substantially — aim for eight to ten glasses per day
  • Avoid mouth breathing when possible by using saline nasal spray to reduce congestion
  • Apply petroleum jelly or coconut oil before bed for overnight repair
  • Avoid wiping your lips with tissues (which are often very drying and irritating to already chapped lips)

Taking care of chapped lips is not vanity during illness — it is a genuine comfort measure that supports overall recovery.

What Ingredients Should You Look for in a Lip Balm?

Not all lip balms are created equal. For healing severely chapped lips, look for products containing:

Healing and Moisturizing Ingredients:

  • Petroleum jelly / petrolatum (best occlusive agent)
  • Shea butter
  • Beeswax
  • Dimethicone
  • Hyaluronic acid
  • Ceramides

Natural Oil Options:

  • Coconut oil
  • Castor oil
  • Sweet almond oil
  • Jojoba oil

Vitamins:

  • Vitamin E (tocopherol)
  • Vitamin C
  • Vitamin A (in small amounts)

Protective:

  • SPF 30 or higher (zinc oxide or titanium dioxide)

Avoid products with these irritating ingredients:

  • Fragrance or artificial flavors
  • Menthol, camphor, or eucalyptus (feel refreshing but are drying long-term)
  • Phenol
  • Salicylic acid (on broken, cracked lips)
  • Cinnamon or citrus oils

Pros and Cons of Common Chapped Lips Treatments

TreatmentProsCons
Petroleum Jelly (Vaseline)Best-in-class occlusive barrier; seals moisture effectively; inexpensive; widely available; fragrance-freeDoes not add moisture on its own — needs to be applied over hydrated lips; feels greasy; may not appeal cosmetically
Coconut OilNatural; anti-inflammatory; antibacterial; pleasant texture; doubles as a makeup removerCan go rancid; may trigger acne in some people if transferred to facial skin; shorter-lasting than petroleum jelly
HoneyNatural humectant; antibacterial; healing; gentle enough for sensitive lipsSticky; needs to be rinsed off; not ideal for use on-the-go; raw honey can cause reactions in rare cases
Aloe Vera GelSoothing and anti-inflammatory; great for sunburned lips; light textureMild exfoliating enzymes limit use to 2–3 times/day; not as occlusive as oil-based treatments
Sugar Lip ScrubRemoves dead skin effectively; improves balm absorption; easy to DIYShould NOT be used on broken, cracked, or bleeding lips; overuse can cause micro-abrasions
Medical Lip Ointments (Aquaphor, etc.)Clinically proven; combines petroleum jelly with vitamins; fast healingSlightly more expensive than plain petroleum jelly; may still contain some sensitizing additives
Overnight Lip Masks (Laneige, etc.)Luxurious texture; hyaluronic acid and peptides for deep repair; stays on well overnightExpensive; may contain fragrance or flavors that irritate some users; results vary by brand
SPF Lip BalmPrevents sun-induced chapping; essential for outdoor useSPF chemicals (oxybenzone) can cause reactions in sensitive individuals; needs frequent reapplication
Vitamin E OilAccelerates healing; antioxidant protection; skin regenerationCan feel very heavy; high-concentration versions may cause breakouts on surrounding skin
HumidifierAddresses root cause (dry air); improves overall skin hydration; no topical side effectsRequires maintenance (regular cleaning to prevent mold); upfront cost; only helpful indoors
Shea ButterRich in natural fatty acids; very nourishing; longer-lasting than lighter oilsHeavier texture; may feel too thick for daytime use; quality varies widely by brand
DIY Castor Oil TreatmentThick, long-lasting barrier; excellent for overnight useVery thick texture; can be difficult to spread; distinct smell some users find unpleasant

When to See a Doctor About Chapped Lips

Most cases of chapped lips resolve within one to two weeks with consistent home care. However, you should consult a dermatologist or primary care physician if:

  • Your chapped lips have not improved after two to three weeks of consistent treatment
  • You have persistent swelling, white patches, or ulcers that do not heal
  • The corners of your mouth are cracked and oozing (this may indicate angular cheilitis, which requires antifungal or antibiotic treatment)
  • You suspect an allergic reaction to a product
  • You experience chapped lips alongside other systemic symptoms (fatigue, hair loss, mouth sores) that may suggest a nutritional deficiency or autoimmune condition
  • Your lips are severely swollen, as this could indicate an allergic reaction requiring medical attention

Your doctor may perform allergy testing, a skin biopsy, or blood tests to rule out underlying conditions like anemia, thyroid dysfunction, or inflammatory bowel disease — all of which can cause chronic chapped lips.

How to Prevent Chapped Lips Year-Round

Prevention is far easier than treatment. Here is how to keep your lips healthy in every season:

Daily Habits:

  • Drink at least eight glasses of water daily — dehydration is the number one preventable cause of chapped lips
  • Apply an SPF lip balm every morning, even in winter (the sun reflects off snow and can burn chapped lips badly)
  • Never leave the house in cold, windy weather without lip protection
  • Breathe through your nose whenever possible
  • Avoid touching, licking, picking, or biting your lips

Nighttime Routine:

  • Apply a thick emollient (petroleum jelly or coconut oil) every night before sleep as a simple, effective prevention habit
  • Run a humidifier in your bedroom during dry months

Diet and Nutrition:

  • Eat a balanced diet rich in B vitamins, iron, and zinc to prevent nutritional deficiency-related chapped lips
  • Foods like lean meat, eggs, leafy greens, nuts, and seeds support healthy skin — including lip skin

Seasonal Adjustments:

  • Switch to heavier, richer lip balms in winter
  • Use lighter SPF formulas in summer
  • During cold and flu symptoms season (autumn and winter), keep a dedicated lip balm with you at all times and apply frequently when you are unwell

The Best Products for Overnight Chapped Lips Repair

Based on dermatologist recommendations and consumer evidence, these are among the best products for fixing severely chapped-lips overnight:

  1. Aquaphor Lip Repair — Contains petrolatum, shea butter, and chamomile essence. One of the most recommended products by dermatologists for chapped-lips.
  2. Vaseline Petroleum Jelly — The simplest, purest occlusive option. Apply thickly over hydrated lips for maximum overnight repair.
  3. Laneige Lip Sleeping Mask — A popular overnight lip mask containing hyaluronic acid and berry antioxidant complex. Beloved for texture and results.
  4. Burt’s Bees Overnight Intensive Lip Treatment — Natural ingredients including sweet almond oil and rosehip seed oil; fragrance-free.
  5. CeraVe Healing Ointment — Ceramide-enriched; excellent for very sensitive or atopic skin prone to chapped-lips.
  6. Blistex Medicated Lip Ointment — Useful during cold and flu symptoms when lips are severely chapped and sore; contains analgesic properties for pain relief.
  7. Pure Organic Coconut Oil — Best natural option among home remedies; effective, inexpensive, and multipurpose.

Frequently Asked Questions About Chapped Lips

Q: How long does it take to heal severely chapped lips overnight?

With consistent treatment (thick occlusive balm, hydration, and humidifier), mild-to-moderate chapped-lips can show significant improvement after just one night. Severely cracked lips typically take three to seven days of consistent nightly treatment to fully heal.

Q: Can chapped lips be a sign of illness?

Yes. Persistent chapped-lips can indicate dehydration, vitamin deficiency, thyroid disorders, autoimmune diseases, or skin conditions like eczema. Cold and flu symptoms also frequently cause severely dry, cracked lips due to mouth breathing, fever, and dehydration.

Q: Is it bad to peel the skin off chapped lips?

Yes. Picking or peeling skin off chapped-lips causes deeper cracks, potential bleeding, and increases the risk of infection. Always exfoliate gently with a scrub rather than picking.

Q: Can you use Vaseline on severely chapped lips every night?

Absolutely. Petroleum jelly is one of the safest, most effective treatments for chapped-lips and is recommended by dermatologists as a nightly occlusive treatment. It has no known side effects on the lips.

Q: Are chapped lips contagious?

No. Chapped-lips caused by dryness, environment, or dehydration are not contagious. However, cold sores (caused by the herpes simplex virus) can look similar and ARE contagious — it is important to know the difference.

Q: Does drinking more water cure chapped lips?

Hydration is necessary but not always sufficient on its own. You also need a barrier treatment (lip balm or occlusive) to prevent moisture from evaporating. Think of water as the fuel and lip balm as the seal.

5 Big Resource Sites for Further Reading on Chapped Lips

For evidence-based, expert-reviewed information on chapped-lips, these five authoritative resources are the most reliable:

  1. Cleveland Clinic — my.clevelandclinic.org One of the most trusted medical institutions in the United States, Cleveland Clinic provides a comprehensive, medically reviewed overview of cheilitis and chapped-lips — including causes, symptoms, diagnosis, and treatment options.
  2. Healthline — healthline.com Healthline is one of the most visited health information websites in the world. Their articles on home remedies for chapped-lips are written and reviewed by registered nurses and medical professionals, providing practical, actionable advice.
  3. American Academy of Dermatology (AAD) — aad.org The AAD is the leading professional organization for dermatologists in the US. Their patient-facing guidelines on healing dry, chapped-lips are among the most authoritative sources available on the topic.
  4. WebMD — webmd.com WebMD covers chapped-lips in the context of cold and flu symptoms and overall wellness, offering medically reviewed guidance on managing lip care during illness and in everyday life.
  5. Neosporin / Johnson & Johnson — neosporin.com Neosporin’s consumer health resources provide product-agnostic information on causes and remedies for chapped-lips, including the clinical evidence behind their overnight lip repair products.

Quick Summary Checklist: Fix Chapped Lips Tonight

✅ Drink 1–2 extra glasses of water before bed

✅ Gently exfoliate with a sugar scrub (only if lips are not cracked or bleeding)

✅ Apply a thick layer of petroleum jelly, coconut oil, or an overnight lip mask

✅ Turn on a humidifier in your bedroom

✅ Stop licking, picking, or biting your lips — starting right now

✅ Sleep on your back to prevent pillow friction

✅ In the morning, apply an SPF lip balm before going outside

✅ Repeat every night until chapped-lips are fully healed

Conclusion

Chapped-lips are uncomfortable, frustrating, and surprisingly stubborn — but they are also highly treatable. Whether your dry, cracked lips are caused by cold winter air, sun exposure, dehydration, nutritional gaps, or the drying effects of cold and flu symptoms, the right combination of home remedies, overnight treatments, and lifestyle changes can deliver visible results fast.

The most important takeaway from this guide is that fixing severely chapped-lips overnight requires a two-pronged approach: internal hydration (drinking enough water) combined with an external barrier treatment (petroleum jelly, coconut oil, or a quality overnight lip mask). Without both, neither alone will produce lasting results.

Start your overnight routine tonight. Be consistent for at least three to five days, and you will notice a significant improvement. For chronic or unexplained chapped-lips, do not hesitate to consult a dermatologist — your lips may be trying to tell you something important about your overall health.

Soft, healthy, healed lips are closer than you think.

Medically supported by research from Cleveland Clinic, Healthline, American Academy of Dermatology, WebMD, and Neosporin health resources.

May 22, 2026 0 comment
0 FacebookTwitterPinterestEmail
How to Grow Hair Faster for Men: Facts and Myths
BEAUTY

How to Grow Hair Faster for Men: Facts and Myths

For many men, thicker and Grow Hair Faster isn’t just about appearance — it’s about confidence, youthfulness, and self-image. With countless products, oils, supplements, and viral “miracle” remedies flooding the market, it’s easy to feel overwhelmed. From claims that shaving makes hair grow back thicker to promises of overnight regrowth solutions, the internet is packed with advice — but not all of it is true.

The reality is that hair growth is influenced by genetics, hormones, nutrition, scalp health, and lifestyle habits. While you can’t magically double your natural growth rate, you can take practical steps to support stronger, healthier hair. Understanding the difference between scientifically backed facts and common myths is the first step toward real results.

In this guide, we’ll break down what actually works, what doesn’t, and how men can create the right conditions for optimal hair growth. Instead of chasing hype, you’ll learn how to focus on proven strategies that support long-term hair health — because real growth starts with the right knowledge.

Grow Hair Faster Truths Every Man Should Know

When it comes to growing hair faster, many men fall for quick-fix promises, miracle oils, or viral hacks that claim instant results. The truth is, hair growth is a biological process influenced by genetics, hormones, nutrition, and overall health. On average, men’s hair grows about half an inch per month, and there’s no proven way to dramatically speed up that rate overnight. However, you can create the right environment for healthier, stronger growth.

One major truth every man should understand is that consistency matters more than shortcuts. A balanced diet rich in protein, iron, zinc, and vitamins like biotin and vitamin D supports hair follicles from within. Poor sleep, chronic stress, and smoking can weaken hair growth cycles and increase shedding. Scalp health is equally important—keeping the scalp clean, gently massaging it to improve circulation, and avoiding harsh chemical treatments can make a noticeable difference over time.

Another important fact is that not all hair loss is permanent. Early thinning caused by stress or nutrient deficiencies can sometimes be reversed with lifestyle improvements. However, male pattern baldness is largely genetic and may require targeted treatments rather than home remedies alone.

The biggest takeaway? Patience and science-backed habits outperform myths every time. Instead of chasing overnight miracles, focus on long-term scalp care, proper nutrition, and healthy routines. Real hair growth isn’t instant—but with the right approach, it can definitely improve.

Grow Hair Faster for Men: Science vs. Hype

When it comes to growing hair faster, men are often bombarded with bold claims — miracle oils, overnight growth serums, and viral social media hacks. But real hair growth doesn’t happen instantly. On average, hair grows about 0.5 inches per month, and this rate is largely influenced by genetics, hormones, age, and overall health. Understanding what is backed by science versus what is pure hype can save time, money, and frustration.

Here’s what actually works — and what doesn’t:

  • Genetics matter most – Your DNA plays a major role in hair thickness and growth speed. No product can completely override genetic patterns.
  • Proper nutrition supports growth – Protein, iron, zinc, and biotin are essential for healthy follicles. Deficiencies can slow growth.
  • Scalp health is crucial – A clean, well-circulated scalp promotes better follicle function. Regular massage may improve blood flow.
  • Stress impacts hair cycles – High stress can push hair into a shedding phase (telogen effluvium). Managing stress helps maintain growth.
  • Minoxidil is clinically proven – Unlike many “miracle oils,” FDA-approved treatments like minoxidil have scientific backing.
  • Frequent haircuts don’t speed growth – Trimming prevents split ends but doesn’t affect follicle activity.
  • Oils alone don’t create new follicles – Natural oils may improve shine and scalp condition but cannot magically trigger rapid growth.

The Real Approach to Grow Hair Faster

Faster hair growth is not the result of miracle oils, overnight remedies, or viral beauty trends. Real results come from understanding how hair naturally grows and supporting that process with the right care and nutrients. Hair grows from follicles located beneath the scalp, and each strand follows a natural cycle that includes a growth phase (anagen), a resting phase (telogen), and a shedding phase. For men who want healthier and thicker hair, the main goal is to support the growth phase and maintain strong, active follicles.

Nutrition plays a crucial role in this process. Hair follicles rely on essential nutrients to stay healthy and productive. Important vitamins and minerals such as biotin, zinc, iron, vitamin D, and omega-3 fatty acids help support stronger hair strands and healthier scalp conditions. When the body lacks these nutrients, hair may grow more slowly, appear thinner, or become weak and brittle. Staying hydrated and maintaining a balanced diet also helps the body deliver nutrients more efficiently to the scalp.

Scalp health is another important factor for encouraging better hair growth. A clean scalp with proper blood circulation creates the right environment for hair follicles to thrive. Gentle scalp massages can help stimulate circulation, allowing oxygen and nutrients to reach the hair roots more effectively. At the same time, limiting harsh chemical products and excessive heat styling helps prevent unnecessary damage that can weaken hair over time.

Stress is also a major factor that many people overlook. Long-term stress can disrupt the natural hair cycle and push hair into the shedding phase earlier than normal. Managing stress through better sleep, relaxation techniques, and healthy daily routines can help maintain a balanced hair growth cycle.

Because it can sometimes be difficult to get every essential nutrient from food alone, some people consider adding a hair support supplement to their routine. Hairfortin, for example, is a capsule-based supplement designed to provide nutrients that support hair strength, scalp health, and the natural hair growth cycle. When used alongside healthy lifestyle habits, such capsules may help support stronger and fuller-looking hair.

Ultimately, consistency and patience matter more than quick fixes. On average, men’s hair grows about half an inch per month. While you can support the process with proper nutrition, scalp care, and helpful supplements like Hairfortin capsules, dramatic overnight results are unrealistic. The real formula for healthier hair growth is simple: nourish your body, care for your scalp, reduce stress, and stay consistent with healthy habits over time.

Hairfortin
Verified
Staff Pick

HairFortin Best For Hair Growth

HairFortin capsules support natural hair growth, strengthen hair follicles, improve scalp health, and help promote thicker, healthier, and stronger hair.
15.2K
Rating
0
Try HairFortin
On-Going Offer

Hair Growth Secrets: What Works & What Doesn’t

When it comes to growing hair faster, many men fall for quick fixes and viral trends that promise overnight results. The truth is, hair growth is a biological process influenced by genetics, hormones, nutrition, and overall health. On average, hair grows about half an inch per month, and while you can’t drastically speed up this rate, you can create the right conditions for healthier, stronger growth. What actually works? A nutrient-rich diet with adequate protein, iron, zinc, and biotin supports hair structure and follicle function. Regular scalp massages may improve blood circulation, helping deliver oxygen and nutrients to hair roots. Clinically proven treatments like minoxidil can also help stimulate follicles and extend the growth phase of hair.

On the other hand, what doesn’t work are miracle oils claiming instant regrowth, excessive shampooing to “cleanse” hair into growing faster, or shaving your head to make it grow back thicker. Hair thickness and growth rate are determined at the follicle level, not by trimming or shaving. Overusing harsh styling products, heat tools, or chemical treatments can actually slow growth by causing breakage. Stress, poor sleep, and crash dieting also negatively affect hair health. The real secret isn’t a magic product—it’s consistency. Supporting your body with balanced nutrition, proper scalp care, and evidence-based treatments gives your hair the best chance to grow stronger and healthier over time.

Debunking Hair Growth Myths for Modern Men

In today’s world of viral reels, influencer tips, and miracle oil ads, hair growth advice for men is everywhere — but not all of it is rooted in science. One of the most common myths is that shaving your head makes hair grow back thicker and faster. In reality, shaving only cuts hair at the surface and has no effect on the follicle beneath the scalp, where growth actually begins. Another popular belief is that wearing hats causes baldness. Unless a hat is extremely tight and constantly pulling on hair (a rare condition known as traction alopecia), hats do not damage hair follicles or slow growth.

Many men also assume that expensive shampoos alone can reverse thinning hair. While a healthy scalp environment is important, hair growth is largely influenced by genetics, hormones—particularly DHT—and overall health. Stress, poor nutrition, and lack of sleep can also impact hair cycles, pushing strands into a resting phase prematurely. Oiling the scalp is often promoted as a “guaranteed” solution, but while certain oils may improve scalp moisture and reduce breakage, they don’t magically activate dormant follicles.

Modern men need to separate marketing hype from medical facts. Real hair growth takes time, consistency, and sometimes professional treatment. A balanced diet rich in protein, proper scalp care, and evidence-based treatments are far more effective than quick-fix hacks trending online. Understanding the truth empowers men to make smarter decisions and avoid wasting money on myths that simply don’t deliver results.

From Bald Spots to Bold Growth: The Truth

Hair loss can feel frustrating, especially when bald spots start to appear earlier than expected. Many men immediately search for miracle oils, viral hacks, or overnight cures, hoping for fast results. The truth, however, is that hair growth is a biological process influenced by genetics, hormones, overall health, and lifestyle habits. Male pattern baldness is largely driven by sensitivity to DHT (dihydrotestosterone), a hormone that gradually shrinks hair follicles over time. While you cannot completely change your genetic blueprint, you can support healthier, stronger hair growth with the right approach.

Real progress comes from consistency and science-backed strategies. A balanced diet rich in protein, iron, zinc, and biotin plays a major role in strengthening hair follicles. Regular scalp care, gentle massage to improve blood circulation, and reducing stress levels can also support healthier growth cycles. Clinically proven treatments like minoxidil or doctor-recommended therapies may help slow thinning and encourage regrowth in some men — but results take patience.

It’s important to understand that hair typically grows about half an inch per month. There is no instant transformation. Sustainable growth requires time, proper care, and realistic expectations. Instead of chasing myths, focus on nourishing your body, protecting your scalp, and choosing evidence-based solutions. Bold growth doesn’t happen overnight — but with consistency and the right strategy, stronger and healthier hair is absolutely possible.

Men’s Hair Growth Guide: Facts Backed by Science

Hair growth in men is influenced by genetics, hormones, nutrition, and overall health—not miracle oils or overnight hacks. On average, hair grows about half an inch per month, and the growth cycle includes active (anagen), transitional (catagen), and resting (telogen) phases. Male pattern baldness is primarily linked to dihydrotestosterone (DHT), a hormone that shrinks hair follicles over time. While you can’t completely change your genetics, science shows that certain habits and treatments can support healthier, faster-growing hair.

Here’s what research actually supports:

  • Prioritize protein intake – Hair is made of keratin, a protein. Low-protein diets can slow growth and increase shedding.
  • Maintain essential nutrients – Iron, zinc, vitamin D, and biotin deficiencies may contribute to thinning hair.
  • Manage stress levels – Chronic stress can push hair into the shedding phase prematurely.
  • Use clinically proven treatments – Ingredients like minoxidil are FDA-approved to help stimulate growth in some men.
  • Improve scalp health – A clean, well-nourished scalp supports stronger follicles.
  • Avoid harsh styling and heat – Excessive heat or tight hairstyles can weaken roots and cause breakage.
  • Get quality sleep – Hormonal balance during sleep plays a key role in healthy hair cycles.

Stop Believing These Hair Growth Lies

Stop Believing These Hair Growth Lies

If you’ve been searching for ways to grow your hair faster, chances are you’ve come across countless “miracle” tips online. From shaving your head to make it grow back thicker to applying random kitchen ingredients overnight, many of these popular tricks are nothing more than myths. One of the biggest misconceptions is that cutting or shaving your hair changes its thickness or growth speed. In reality, hair grows from follicles beneath the scalp, and trimming only affects the visible shaft — not the root. Another common lie is that expensive oils alone can dramatically speed up hair growth. While natural oils like coconut or castor oil may improve scalp health and reduce breakage, they don’t magically increase your hair’s growth rate.

Many men also believe that wearing hats causes baldness. This is false unless the hat is extremely tight and constantly pulling on the hair, which can lead to traction alopecia over time. Genetics, hormones like DHT, stress, poor nutrition, and underlying health conditions play a much larger role in hair thinning. Even trendy social media “overnight growth hacks” fail to acknowledge that hair typically grows about half an inch per month — and no product can safely double that rate instantly.

Instead of falling for hype, focus on proven habits: maintaining a balanced diet rich in protein and vitamins, managing stress, keeping your scalp clean, and seeking professional advice if hair loss becomes noticeable. Understanding the facts empowers you to make smarter decisions and avoid wasting money on ineffective solutions.

The Ultimate Male Hair Growth Blueprint

The ultimate male hair growth blueprint isn’t about miracle oils or overnight transformations—it’s about understanding how hair actually grows and supporting that process from the inside out. On average, men’s hair grows about half an inch per month, but genetics, hormones, nutrition, and overall health play major roles in determining thickness, strength, and growth speed. The first step in accelerating healthy growth is optimizing scalp health. A clean, well-nourished scalp improves blood circulation to hair follicles, delivering oxygen and essential nutrients that fuel stronger strands. Gentle cleansing, regular scalp massage, and avoiding harsh chemical treatments can reduce inflammation and breakage.

Nutrition is equally critical. Protein, biotin, zinc, iron, and vitamins like D and B-complex support keratin production—the structural protein that makes up hair. Men who follow restrictive diets or experience chronic stress may notice slower growth or thinning due to nutrient imbalances and elevated cortisol levels. Prioritizing sleep, hydration, and stress management can significantly improve hair vitality over time.

Another key factor is hormonal balance, particularly dihydrotestosterone (DHT), which contributes to male pattern hair thinning. While you can’t change genetics, early intervention through clinically backed ingredients or professional guidance can slow hair loss and improve density. Consistency is the true secret: results typically take three to six months of disciplined care.

Hair Regrowth Decoded: Myths, Mistakes & Methods

Hair regrowth is often surrounded by confusion, exaggerated claims, and misleading marketing. Many men fall for quick-fix promises without understanding how hair biology actually works. In reality, hair growth depends on factors like genetics, hormones, scalp health, nutrition, and consistency in care. Separating myths from proven methods is essential if you want real, sustainable results. Here’s what you need to know:

  • Myth: Shaving makes hair grow back thicker.
    Shaving only cuts hair at the surface; it does not change follicle size or growth rate.
  • Myth: Expensive products guarantee faster growth.
    Price doesn’t equal effectiveness. Active ingredients and clinical evidence matter more.
  • Mistake: Ignoring scalp health.
    A clogged or inflamed scalp can slow growth. Regular cleansing and gentle exfoliation support healthier follicles.
  • Mistake: Inconsistent routine.
    Hair regrowth requires patience. Switching products too often prevents visible progress.
  • Method: Nutrient-rich diet.
    Protein, iron, zinc, and biotin help support strong hair structure and healthy follicles.
  • Method: Stress management.
    Chronic stress can disrupt the hair growth cycle, leading to shedding.
  • Method: Clinically backed treatments.
    Ingredients like minoxidil and certain natural DHT blockers have research supporting their effectiveness.

Men’s Hair Growth Hacks: Proven vs. Popular

When it comes to growing hair faster, men are constantly bombarded with trending “miracle” solutions on social media, YouTube, and ads. But not every popular hack is backed by science. Understanding the difference between proven methods and viral myths can save time, money, and frustration. Below are some of the most talked-about hair growth strategies — separated into what actually works and what’s mostly hype.

 Proven Hair Growth Methods

  • Balanced Nutrition: Adequate protein, iron, zinc, and biotin support healthy hair follicles. 
  • Scalp Care & Massage: Regular scalp massage improves blood circulation, which may support stronger hair growth over time.
  • Minoxidil Treatments: Clinically studied topical solutions that can help stimulate hair regrowth in men with thinning hair.
  • Stress Management: High stress can trigger hair shedding (telogen effluvium), so sleep and relaxation are crucial.
  • Consistent Routine: Gentle shampooing, avoiding harsh chemicals, and reducing heat styling help prevent breakage.

 Popular but Overhyped Hacks

  • Shaving Your Head Makes Hair Thicker: Hair may look thicker when it grows back, but shaving does not change follicle density.
  • Onion Juice Overnight Miracles: Limited evidence supports dramatic results, and irritation can occur.
  • Wearing Hats Causes Baldness: Normal hat use does not block follicles or stop hair growth.
  • Brushing 100 Times a Day: Excessive brushing can actually cause breakage and scalp damage.
  • Instant Growth Oils: No oil can drastically speed up hair growth overnight.

Frequently Asked Questions (FAQs)

1. How fast does men’s hair actually grow?
On average, men’s hair grows about 0.5 inches (1–1.25 cm) per month. Growth speed depends on genetics, age, health, and lifestyle habits.

2. Can I really make my hair grow faster?
You can’t dramatically change your natural growth rate, but you can optimize scalp health, nutrition, and reduce breakage to support maximum growth potential.

3. Does shaving your head make hair grow back thicker?
No. Shaving does not change follicle size or growth rate. Hair may feel thicker at first because it grows back with a blunt edge.

4. Do hair growth oils actually work?
Some oils (like rosemary or castor oil) may support scalp circulation and hydration, but they are not miracle cures. Consistency is key.

5. Is biotin necessary for hair growth?
Biotin helps if you have a deficiency, but taking extra won’t speed growth unless your body lacks it.

6. Can stress cause hair loss?
Yes. High stress can trigger temporary shedding (telogen effluvium). Managing stress supports healthier hair cycles.

7. How often should men wash their hair?
2–4 times per week works for most men, depending on scalp type. Overwashing can cause dryness and breakage.

8. When should I see a doctor about hair loss?
If you notice sudden thinning, excessive shedding, or patchy hair loss, consult a healthcare professional for proper evaluation.

Final Conclusion

Growing hair faster isn’t about chasing miracle products or believing every trend you see online. The real truth is that hair growth takes time, consistency, and proper care. While you cannot drastically change your natural growth rate, you can create the ideal environment for healthier, thicker-looking hair.

Focus on the fundamentals — balanced nutrition, scalp health, stress management, and gentle hair care habits. Avoid harsh chemicals, excessive heat styling, and over-washing, as these can weaken strands and slow visible progress. Remember, trimming doesn’t speed growth, and no supplement works overnight. Sustainable results come from long-term commitment.

If you’re experiencing noticeable thinning or hair loss, addressing the root cause early is important. Whether it’s genetics, hormonal imbalance, or lifestyle factors, understanding the reason behind the issue helps you choose the right solution.

At the end of the day, healthy hair growth is a marathon — not a sprint. Stay patient, stay consistent, and focus on proven strategies instead of myths. With the right approach, you can support stronger, healthier hair that looks and feels its best.

March 2, 2026 0 comment
0 FacebookTwitterPinterestEmail
How to Tell If Your Running Pace Is Ideal for You
BEAUTYHEALTH

How to Tell If Your Running Pace Is Ideal for You

If you’ve ever put on a new pair of shoes, run down the street, and then had to stop to catch your breath after only three blocks, you’re not alone. A lot of new and even experienced runners go through this. We leave the house with excitement, but our lungs and legs can’t keep up with how fast we run.

What occurred right away? You feel defeated, your chest hurts, and you may even tell yourself, “I’m just not built for running.”

But the truth is that you are designed to run. You haven’t found the right speed for you yet.

The key to being consistent, avoiding injuries, and really enjoying your miles is to find the right running pace. It’s important to know how to pace yourself, whether you want to finish a local 5K, train for a marathon, or improve your heart health to meet the World Health Organization‘s (WHO) recommendation of 150 to 300 minutes of moderate aerobic activity per week.

In this blog, we will go into detail about the science and strategy behind running paces. We will eliminate the confusing jargon in favor of proven, useful methods supported by leading health organizations such as the World Health Organization (WHO) and the Centers for Disease Control and Prevention (CDC). By the end of this blog, you’ll know how to listen to your body and find a sustainable, enjoyable running pace.

Why Pace Matters in Running

Pace isn’t just how fast you go; it’s also how well you balance. If you run too fast too soon, your body will warn you. You might feel too sore, worn out, or even like you want to skip your next run. If you always go too slowly, you might not push your heart and muscles hard enough to get better. The sweet spot is where effort feels steady but not too much.

The Centers for Disease Control and Prevention (CDC) says that you should do at least 150 minutes of moderate aerobic activity every week. That kind of running makes you breathe harder and sweat, but you don’t feel like you need to breathe. Studies show that at this level, it can lower the risk of heart disease by up to 30% and help people keep their weight in check.

The World Health Organization (WHO) says the same things and says that being active regularly lowers the risk of diabetes, some cancers, and early death.

Running at the right pace also helps prevent injuries. Pushing too hard too often can lead to shin splints or knee pain. Programs like NHS Couch to 5K prove that starting slow and building gradually works.

The key to getting results is to find a pace you can stick to.

The Myth of the “Universal” Perfect Pace

Before we discuss the mechanics of measuring your effort, we must dispel the most common misconception in the running community: the notion of a “good” or “perfect” pace.

When you scroll through fitness apps or talk to friends who run, it is incredibly easy to fall into the comparison trap. You might see someone casually logging a 7-minute mile and think your 12-minute mile is inadequate. This mindset is not just discouraging; physiologically, it is completely flawed.

Pace is highly individual. It is influenced by a massive variety of factors, including:

  • Genetics and natural biomechanics
  • Age and current fitness level
  • Weather conditions
  • Terrain like running on a flat track vs. rolling hills
  • Daily variables such as how much you slept, your stress levels, and your hydration

A beginner may run a maximum-effort sprint, while a competitive marathoner runs an “easy” recovery run. So, your ideal pace is not the number on your stopwatch or how hard you’re working. Finding your pace means matching your speed to your workout’s physiological goal.

Your goal for most runs should be building your “aerobic base”—teaching your heart to pump blood more efficiently, increasing muscle capillary density, and improving your lungs’ oxygen processing.

How do you find this perfect running pace? The Talk Test, Heart Rate Tracking, and the Rate of Perceived Exertion (RPE) are the three standard methods that health groups recommend. Let’s separate them.

Simple Ways to Know If Your Running Pace Is Right for You

1: The Talk Test (The Simplest Way)

If you hate tracking numbers and want to enjoy your run, the Talk Test is perfect. You use your ability to speak as a real-time monitor for how hard you are working. This test requires no equipment, and the CDC highly recommends it.

  • The “Easy” Pace (Conversation Zone): You should be able to speak in full, complete sentences without gasping for air. Attempt to pronounce the alphabet or discuss your breakfast aloud. If you can do it easily, you are at the perfect pace to build your endurance. You should spend about 80% of your weekly runs in this comfortable zone.
  • The “Hard” Pace (Speed Zone): If you can only say one or two words, like “Yes” or “Too quickly,” before you need to take a big breath, you are in the vigorous zone. This is for short, intense speed workouts, not your daily jog.

2: Heart Rate Training (For Data Lovers)

If you like exact numbers over guessing, a smartwatch can show you how hard your body is working right now by tracking your heart rate.

To find your estimated Maximum Heart Rate (Max HR), subtract your age from 220. A 40-year-old’s Max HR, for instance, is about 180 beats per minute (bpm).

  • The “Ideal” Everyday Pace: The CDC suggests staying between 64% and 76% of your Max HR for standard runs. For our 40-year-old, that’s a comfortable 115 to 136 bpm.
  • The Speedwork Pace: For tough, fast interval workouts, you will push into the 77% to 93% range of your Max HR.

A quick warning: smartwatches aren’t perfect and can sometimes glitch, especially in cold weather. If your watch says your heart rate is dangerously high, but you feel totally fine and could easily sing a song, trust your body more than the watch.

3: Rate of Perceived Exertion (Trust Your Gut)

No smartwatch? Do you find it awkward to talk to yourself while running alone? Try the Rate of Perceived Exertion (RPE). This is just a simple 0 to 10 scale used by health experts to rate how hard your workout feels.

  • 0 to 4: Everything from sitting on the couch to a brisk warm-up walk.
  • 5 to 6 (Moderate): You are breathing heavier and sweating a little, but the pace feels completely sustainable. This is the ideal range for an everyday run.
  • 7 to 8 (Vigorous): You are breathing hard and swiftly. You can only keep your pace up for a couple of miles.
  • 9 to 10 (Maximum): You are gasping for air or sprinting as fast as humanly possible.

When you are out for a run, do a quick mental check. Ask yourself, “How hard am I working on a scale of 0 to 10?” If your brain immediately says “8,” you need to slow down until you are back at a comfortable 5 or 6.

Signs Your Running Pace Is Not Ideal

Sometimes we don’t realize we’re pushing too hard until our body starts complaining. If your pace isn’t right for your current fitness level, here are some clear warning signs to watch for:

1. You Are Gasping for Air

If you are panting, feeling dizzy, or struggling to talk, you are going too fast. A good pace lets you breathe comfortably. Never be afraid to slow down and take a walk break.

2. Your Legs Feel Like Concrete

If your legs burn or feel incredibly heavy right at the start of your run, you likely sprinted out of the gate. Your muscles are overwhelmed.

3. You Are Sore for Days

A little bit of muscle tightness is normal. But if you can barely walk down the stairs for three days after a basic run, your intensity was way too high.

4. Your Heart Rate Spikes in the Morning

As soon as you wake up, check your pulse. If your heart rate is consistently 5 to 10 beats faster than normal when you’re resting, your body is stressed and needs more time to heal.

5. You Feel Completely Tired

A good workout should make you tired in your body but give you energy in your mind. You are overdoing it if a run makes you so tired that you can’t do anything else for the rest of the day.

6. You Start to Hate Your Runs

If every run feels like a terrible chore, you’re going too fast. Running will be hard at times, but you shouldn’t consider it a punishment every day.

Signs Your Running Pace Is Spot On

Even if you’re an experienced runner trying to improve your 5K time, you don’t need to destroy yourself in every workout. In fact, research shows that even about 50 minutes of running per week can significantly lower the risk of heart disease. More isn’t always better—smart pacing is what really matters. Here’s how experienced runners know they’re pacing themselves well:

You Finish Strong

One of the best signs is finishing your run faster than you started. This is called running “negative splits.” It simply means you didn’t go out too fast. You saved energy and had enough left to push at the end.

Your Easy Runs Actually Feel Easy

Strong runners don’t treat every run like a race. On leisurely days, they truly slow down. Their pace feels comfortable, controlled, and relaxed—not forced.

Your Races Feel Controlled

It’s normal to feel worn out near the finish line. But you shouldn’t feel like you completely crashed. A good race pace feels steady and strong, even if you slow slightly at the end.

You Know When to Rest

Smart runners listen to their bodies. If they feel overly worn out, unusually sore, or moody, or notice a higher morning heart rate, they ease off for a few days. Taking a lighter week isn’t weakness—it’s beneficial training.

When your pace is right, you feel challenged but in control.

Common Mistakes and How to Fix Them

Mistake 1: Sprinting Every Single Run. If you treat every neighborhood jog like an Olympic race, you will quickly burn out.

The Fix: Do a quick effort check during your first mile. Force yourself to stay in that easy, conversational zone.

Mistake 2: Running Through Bad Pain.

The Fix: Learn the difference between a workout burn and an actual injury. A dull, tired ache in your muscles is completely normal. But if you ever feel a sharp, stabbing pain, stop running immediately.

Mistake 3: Skipping Rest Days. Your body actually gets stronger while it rests, not while you run!

The Fix: Take at least one or two full days off from running each week. If you still want to sweat, try swimming or riding a bike to give your joints a well-deserved break.

Mistake 4: Staring at Your Watch. It is incredibly easy to obsess over the glowing numbers on your wrist.

The Fix: Ditch the gadgets once a week. Run purely by how your body feels instead of what the screen says.

Practical Steps to Find Your Running Pace

Are you prepared to set out and determine your optimal running pace? Here’s a simple way to do it—nothing complicated.

1. Don’t Skip the Warm-Up

Resist the urge to sprint out the door. Give your body a few minutes to wake up. Do some light leg swings or lunges, then walk briskly for about 5 minutes. This helps your heart and lungs ease into the run instead of shocking them.

2. Start Slower Than Feels “Right.”

Most runners start too fast. For the first 10–15 minutes, go slower than you think you need to. It might even feel almost too easy—that’s a positive sign.

3. Check Your Breathing

After you settle in, try saying a few full sentences out loud. If you’re out of breath and struggling to talk, slow down. Easy runs should actually feel effortless.

4. It’s Okay to Run-Walk

If steady running feels hard, mix it up. Jog for a minute, walk for two. There’s no shame in it. As you get fitter, you’ll naturally run longer.

5. Focus on Form, Not the Clock

A good pace is supported by good biomechanics. Keep your posture correct, look ahead, and take light steps. Don’t keep staring at your watch every minute.

6. Don’t Judge One Bad Day

Some runs feel harder. Maybe you didn’t sleep well, or it’s hot outside. That’s normal. Look at your progress over weeks, not one single run.

Note: Finding your pace takes patience—but once you do, running starts to feel enjoyable instead of forced.

Final Thoughts

Finding the right running pace for you is important. Forget about trying to look fast or keeping up with others; the real win is running in a way that truly helps your body get stronger and healthier.

You don’t have to keep up with someone else’s pace, be faster than anyone else, or reach certain goals. What matters is that you always stay consistent, keep your efforts in balance, and make progress safely. The World Health Organization (WHO) and the Centers for Disease Control and Prevention (CDC) both highlight the same basic ideas: stay active, don’t overdo it, and pay attention to your body.

If you can talk during most runs, recover quickly, and rarely have sore muscles, you’re likely going at the right pace.

You have to work hard for months or even years to be able to run. You should find a pace that you can enjoy and keep up with, not one that tires you out.

Get into a rhythm and enjoy running.

Frequently Asked Questions

How long does it take to find my ideal running pace?

The time spent finding an ideal running pace can be different because everyone’s body reacts differently. But it usually takes a few weeks of consistent, easy running for your body to adjust perfectly. Don’t rush; take it slow and listen to your breathing and focus on your efforts, not on the clock. 

Should I run every single day to get faster?

No, running every single day can lead to burnout or even injuries. Your muscles need time to recover their strength and overcome fatigue. It is advisable to allow yourself 1-2 days of rest each week to ensure proper recovery.

Why is my heart rate so high even when I run slowly?

Weather, stress, poor sleep, or even coffee can cause spikes in your heart rate. So, try to have a proper routine before and after running. More than numbers, trust your feelings and gut.

How do I know if I’m ready to run faster?

If your usual easy jogging or running starts to feel completely effortless and your heart rate stays lower than normal, then it’s time to advance to the next level.

February 25, 2026 0 comment
0 FacebookTwitterPinterestEmail
Daily Health Check Routine in Just 60 Seconds
BEAUTY

Daily Health Check : How to Build a Simple 60-Second Routine

In today’s fast-paced world, most people wait until something feels seriously wrong before paying attention to their health. We schedule meetings, check emails, and scroll social media daily—yet rarely pause for even a minute to check in with our own bodies. The truth is, many health problems begin with tiny warning signs that appear long before major symptoms show up. A slight change in energy, mood, breathing, sleep, or heart rate can quietly signal that your body needs attention.

The good news? Staying aware of your health doesn’t require complicated routines, expensive devices, or long appointments. In fact, just 60 seconds each day can make a meaningful difference. A short daily health check helps you notice patterns, catch early warning signs, and build a stronger connection with your body. Over time, this simple habit can improve your energy, reduce stress, and even help prevent long-term health issues.

Think of this routine as a daily system check for your body—similar to how you check your phone battery or car fuel before starting the day. It’s quick, easy, and designed for real life. No medical background required, no pressure, and no overwhelm.

Why a 60‑Second Daily Health Check Matters

We spend minutes every day checking our phone notifications, but how often do we check our own ‘internal’ notifications? While global health stats can feel overwhelming, the first line of defense against the world’s biggest health threats often starts with a single minute of your time.

According to the WHO, Noncommunicable Diseases (NCDs) like heart disease, stroke, cancer, chronic lung disease, and diabetes were responsible for at least 43 million deaths in 2021, around 75% of all non‑pandemic‑related deaths worldwide. Preventable risk factors like tobacco use, physical inactivity, unhealthy diets, and harmful alcohol use link to many of these deaths.

At the same time, around half of the world’s population lacks access to essential health services. This shows the importance of simple, safe self-care practices as a primary preventive measure. WHO defines self-care as the ability of individuals, families, and communities to promote health, prevent disease, maintain health, and cope with illness with or without a health worker’s support.

This short daily health check-up is a practical self-care habit. It will not diagnose diseases, but it can help you notice changes earlier, decide when to rest, when to call a doctor, and when to seek urgent medical help.

What This Routine Actually Is

Self-care, not self-diagnosis

WHO emphasizes that self-care interventions are evidence‑based tools that support, but do not replace, the health system. Examples include self-monitoring of blood pressure for hypertension and self-monitoring of blood glucose for diabetes, which the WHO notes are effective and recommended interventions in many contexts.

Your 60‑second check fits into this same idea: it is a structured self‑awareness exercise that helps you recognize symptoms earlier and seek timely care, not a way to “treat yourself” or delay professional help when it’s needed.

Why 60 seconds is enough to start

In one focused minute, you can quickly review:

  • Breathing and chest comfort
  • Pain or strange sensations
  • Energy, mood, and clarity of thinking
  • Skin color and visible swelling
  • A simple pulse check, if you’re comfortable doing it

This is not a full body examination, but it is more than most people do on a typical busy day. If done consistently, it helps you spot patterns—like slowly worsening breathlessness, new headaches, or mood changes—that are easy to ignore until they become serious.

Before You Start: A Few Ground Rules 

Know your personal “normal.”

Normal vital signs can vary from person to person, and what is “usual” for you matters when interpreting any changes in your body. For healthy adults, the typical range is:

  • Temperature: about 97.8–99.1 °F (36.5–37.3 °C)
  • Blood pressure: around 90/60 to 120/80 mm Hg
  • Pulse (heart rate): about 60–100 beats per minute at rest
  • Respiratory rate: roughly 12–18 breaths per minute at rest

It is said that the normal resting heart rate for adults is 60 to 100 beats per minute. Tachycardia is when the heart rate is quicker, and bradycardia is when it is slower.

If you have chronic conditions (like heart disease, lung disease, or diabetes), are pregnant, or are on regular medications, ask your doctor what “normal” looks like for you and which specific warning signs you should watch for.

Keep emergency numbers and key info ready.

Getting medical help quickly during an emergency can save a life. Keep the information easily accessible, such as:

  • Your local emergency number
  • Contact details for your main doctor or clinic
  • A list of your regular medicines and diagnoses
  • Any allergies

You do not need this list to do your 60‑second check, but it helps you act faster if you notice a serious health issue.

The 60‑Second Daily Health Check: Step-by-Step

You can perform this health checkup daily at the same time—many people find it easiest right after waking up or before going to bed. You can take whatever position is comfortable for you, breathe normally, and perform these steps.

Seconds 0–10: Notice your breathing and chest

Ask yourself:

  • Is my breathing easy, or am I unusually short of breath for this level of activity?
  • Do I feel any tightness, heaviness, or pain in my chest?

Trouble breathing and chest discomfort are two of the most important warning signs for serious illness. Breathing problems and chest pain lasting more than a couple of minutes are two of the key signals that you may need urgent medical care. The U.S. Centers for Disease Control and Prevention (CDC) also highlights trouble breathing and persistent pain or pressure in the chest as emergency warning signs in the context of COVID-19.

If you feel sudden or severe chest pain or severe shortness of breath, or you cannot complete a sentence without gasping during the health check routine, stop it and seek emergency care immediately.

Seconds 10–20: Scan for pain or unusual sensations

In the next 10-20 seconds, do a quick scan from head to toe:

  • Do I have any new or unusually severe headaches?
  • Any sharp, severe, or persistent pain anywhere (chest, abdomen, back, joints, limbs)?
  • Any numbness, tingling, or weakness that is new or one‑sided?

Any sudden or severe pain, such as stomach pain or pressure, as well as symptoms such as being unable to talk or experiencing sudden weakness, are indications that you should seek medical attention right away. Sudden weakness on one side of the body, difficulty speaking, or facial drooping are all symptoms of a stroke and require quick emergency care.

Mild, familiar aches (for example, muscle soreness after exercise) can usually be noted and rechecked later, but new, intense, or rapidly worsening pain should not be ignored.

Seconds 20–30: Check your energy, mood, and thinking

According to the WHO, self-care includes mental health and emotional well-being, not just physical health. In these 20-30 seconds, ask yourself:

  • Do I feel unusually exhausted today compared with recent days?
  • Is my mood noticeably lower, more anxious, or more irritable than usual?
  • Do I feel confused, “foggy,” or slow to think or respond?

Changes in mental status—such as unusual behavior, confusion, difficulty waking, or loss of consciousness—are major warning signs of a medical emergency. The CDC similarly includes new confusion and inability to wake or stay awake among emergency warning signs in its COVID-19 guidance.

You don’t need to rush to the hospital for every low‑energy day. Still, great or sudden changes in mood, thinking, or energy—especially if they are occurring with other symptoms like fever, chest pain, or stiff neck—require immediate medical attention.

Seconds 30–40: Look at your skin, eyes, and swelling

Take a quick visual check in good light:

  • Does my skin look its usual color, or does it appear more pale, gray, or bluish than normal?
  • Are my lips or nail beds unusually pale, gray, or blue?
  • Do I notice any new swelling in my legs, ankles, feet, hands, or face?

The CDC says that changes in skin color, lips, nail beds, and skin turning pale, gray, or blue can be signs of low oxygen levels that need to be taken care of right away. Bluish or gray skin (cyanosis) and sudden swelling of the face, eyes, or tongue are other serious warning signs.

Please consult a doctor promptly if you observe new or rapidly increasing swelling, particularly if it is accompanied by shortness of breath or chest pain.

Seconds 40–50: Quick pulse check (optional but useful)

If you feel comfortable and have no known symptoms, checking your pulse a few times a week can help you learn your normal resting heart rate. An adult’s normal resting heart rate range is 60–100 beats per minute. Many medical institutions support this range.

To check your pulse quickly:

  1. Put two fingers (not your thumb) on your neck or wrist.
  2. Then count beats for 15 seconds and multiply by 4 to estimate beats per minute.

If your pulse is regularly significantly faster or slower than your normal resting range, or if it feels like it’s skipping or racing unexpectedly, go to a doctor, especially if you also feel dizzy, have chest pain, or have trouble breathing.

Seconds 50–60: Decide what to do next

Use the final 10 seconds to make a simple decision:

  • Everything feels normal → carry on with your day.
  • Something feels “a bit off” but not severe → note it and recheck later or contact your usual clinician for advice.
  • Something feels clearly wrong or severe (especially breathing trouble, chest pain, sudden weakness, confusion, severe pain, or uncontrolled bleeding) → seek urgent or emergency care right away.

If you see any of the symptoms mentioned above or anything else, you should seek medical attention immediately.

Red-Flag Symptoms: When to Seek Help

Red-Flag Symptoms: When to Seek Help

A key benefit of a daily health check is that it trains you to recognize danger signs quickly. Below are several symptoms that should be treated as immediate medical emergencies:

  • Breathing problems or shortness of breath that is new, severe, or worsening
  • Chest pain or discomfort lasting more than a couple of minutes, or that comes and goes
  • Change in mental status: unusual behavior, confusion, difficulty waking up, or loss of consciousness
  • Severe abdominal pain or pressure
  • Uncontrolled bleeding or coughing/vomiting blood
  • Severe or persistent vomiting or diarrhea
  • Sudden injury from accidents, burns, smoke inhalation, or deep wounds
  • Inability to speak, sudden difficulty walking, or loss of balance may indicate a stroke.

The CDC also warns that trouble breathing, persistent chest pain or pressure, new confusion, inability to wake or stay awake, and pale, gray, or blue‑colored skin, lips, or nail beds are emergency warning signs in infectious illnesses such as COVID‑19.

If you notice any of these during your 60‑second check—or at any other time—treat it as urgent. Call your emergency number, and do not attempt to drive yourself if you feel very unwell.

When “Watch and Wait” Is Reasonable

Not every symptom and issue needs emergency medical care. WHO says on self-care that individuals can often safely manage minor symptoms at home, as long as they have access to accurate information and knowledge of when to get medical help.

It is often reasonable to monitor at home when:

  • Symptoms are mild (for example, a slight headache or a mild sore throat).
  • You have no major red‑flag signs like severe pain, breathing trouble, chest discomfort, confusion, or uncontrolled bleeding.
  • The symptom is not rapidly getting worse from hour to hour.
  • You can eat, drink, and move around more or less normally.

Even in these situations, your daily 60‑second check is useful. You can ask yourself, “Is this symptom the same, better, or worse than yesterday?” and decide whether it is time to call a clinician for non‑urgent advice or an appointment.

How This Simple Daily Routine Protects Your Health for Years

Noncommunicable diseases (NCDs) are a significant global problem. In 2021, NCDs caused approximately 43 million deaths, or nearly 75% of all non-pandemic deaths, according to the WHO.

Cardiovascular disease, cancers, chronic respiratory diseases, and diabetes were the most common NCDs. Some of the most important behavioral risk factors are smoking, not getting enough exercise, drinking too much alcohol, eating unhealthy foods, and being exposed to air pollution.

Heart disease and stroke are major causes of death globally. In the US, heart disease accounts for about one in four deaths, and stroke is a leading cause of death and disability. Almost half of all adults in the US, about 127.9 million people over the age of 20, are living with some type of heart problem, like high blood pressure, stroke, or heart failure.

According to the World Health Organization (WHO), exercising regularly, eating a healthy diet, not smoking, and drinking less alcohol are essential for lowering health risks. In fact, increasing physical activity alone has the potential to save millions of lives every year.

Your 60‑second health check routine connects directly to these big-picture issues by helping you:

  • Notice early signs of problems related to heart, lung, or metabolic health (like breathlessness, chest tightness, or swelling).
  • Stay more aware of your energy, mood, and stress levels, which are related to both mental health and chronic disease risk.
  • Notice small changes such as increasing resting heart rate or breathing problems, which could be signs of new health issues.

While early attention does not guarantee disease prevention, it increases the likelihood of identifying and treating problems before they cause major damage.

Final Thoughts

This 60‑second daily health check routine is simple: pause once a day to notice your breathing, chest, pain levels, energy, mood, skin, swelling, and maybe your pulse, then decide whether you need to take any actions or not. This small daily routine is in line with WHO’s broader vision of self-care—helping individuals promote health, prevent disease, and cope with illness alongside, not instead of, professional care.

In a world where chronic diseases cause tens of millions of deaths each year and many people struggle to have timely health care, early awareness and quick responses to warning signs can be very helpful. When combined with proven self-care behaviors like regular physical exercise, healthier eating, and avoiding harmful substances like alcohol and tobacco, this 60‑second daily health check routine becomes a realistic way to take an active role in protecting your health for the long term.

Frequently Asked Questions

How do I know if something I notice is serious enough to call a doctor?

Trust your gut feeling. If something really feels off, like chest pain that won’t stop, difficulty in breathing without doing anything, or sudden weakness on one side of your body, don’t wait; call for immediate medical help. And if signs are not severe, like a normal headache or low energy, monitor it for a couple of days, and if there is still no improvement, consult your doctor. It’s better to get checked and sit confused.

Is it possible for me to learn my own normal pulse or breathing rate at home?

It’s surprisingly simple. Just spend a week regularly checking your pulse, following the steps in the blog, and jotting down the numbers in your phone. Before you know it, you’ll discover your normal resting pulse—maybe it’s 70 beats a minute or perhaps 14 breaths.

What if I’m super busy—will I actually stick with this 60-second thing?

Life gets hectic for all of us, but this quick 60-second health check is super simple to fit in. Just do it when you wake up or right before you go to sleep. There’s nothing complicated about it, and hey, if you skip a day, no issue—start back tomorrow.

Can kids or older adults do this health check too?

Yes, anyone can do this 60-second health check routine. You have to adjust it according to individuals. The process is the same: take some of your time, notice changes, and get medical care if needed.

Why do this if I can use apps or wearables to track my health?

Apps and gadgets deliver useful information. But this habit helps you become more conscious of your body. It helps you pay attention to your real feelings, not just what a screen says. The best way to use them is combined.

February 19, 2026 0 comment
0 FacebookTwitterPinterestEmail
Understanding Normal Blood Sugar Levels
BEAUTY

Understanding Normal Blood Sugar Levels

Have you ever thought about what your normal blood sugar is, what it means, or why it is so important to keep your blood sugar levels balanced? Well, if you really are curious about all these things, you have come to the right place. In this short guide, you will get to know everything you might be curious about regarding blood sugar easily and simply.

What is Normal Blood Sugar?

Glucose, or blood sugar, is a form of sugar that moves through your blood and into your cells for energy production. Your body breaks down food into glucose (sugar) when you eat it, especially carbohydrates like bread, rice, fruits, and sweets. Insulin helps glucose get into your cells, where it is turned into energy for your body.

Glucose is like a fuel for your body; similar to how a car needs fuel to run properly, glucose powers your body to work effectively. Your brain uses 20% of glucose, which makes eating healthy meals regularly very important. Normal blood sugar means your glucose level is in a healthy range. Between 70 and 99 mg/dL when fasting and below 140 mg/dL two hours after eating is the normal blood sugar in general.

How Does Your Body Manage Blood Sugar?

When you eat something, your body converts it into glucose (or sugar), which increases your blood sugar levels. The pancreas, a small organ in your body, detects an increase in blood sugar levels and responds by releasing a hormone known as insulin. Insulin plays an important role in allowing processed glucose to enter your cells and produce energy.

Once glucose gets into your cells, two important things happen:

  • Some amount of glucose is used immediately for energy
  • Some of it is stored for later use

This whole process keeps your blood sugar from rising above dangerous levels. When your blood sugar drops, the pancreas releases another hormone called glucagon that tells your body to use stored glucose for energy. This procedure prevents your blood sugar levels from dropping below dangerous levels.

What Are Normal Blood Sugar Levels?

For Healthy Adults (Without Diabetes)

  • In fasting, blood sugar between 70 and 99 mg/dL is normal
  • Blood sugar levels of less than 140 mg/dL two hours after a meal are normal
  • Your body can handle this much blood sugar easily
  • 125 mg/dL or lower blood sugar is generally considered normal

For Children and Teenagers

Because kids’ and teens’ bodies are still growing, they have slightly different target ranges. Here are normal blood sugar levels:

For Children Ages 6-12:

  • In fasting (before breakfast), blood sugar between 70 and 120 mg/dL is normal
  • After eating, a level of less than 140 mg/dL is normal

For Teenagers:

  • In fasting, between 70 and 140 mg/dL is normal
  • After eating, a level of less than 140 mg/dL is normal

For Older Adults (Age 65+)

Older adults may have slightly different numbers:

  • Normal blood sugar in fasting is between 70 and 140 mg/dL
  • Blood sugar levels less than 160 mg/dL after eating are normal

The numbers shown might change depending on individual health conditions, so always consult your doctor for your accurate normal blood sugar.

Understanding the Different Blood Sugar Categories

According to health organizations, doctors usually put fasting blood sugar results into three main categories:

Normal Blood Sugar

  • Fasting Level: 99 mg/dL or below
  • It means your body is using glucose perfectly. Your pancreas is working great, and your cells are responding well to insulin.

Action Needed: No need to change anything. Maintain healthy eating and exercise habits.

Prediabetes (Early Warning)

  • Fasting Level: 100 to 125 mg/dL
  • It means your blood sugar levels are higher than normal, but not yet high enough to be diagnosed with diabetes. Consider this a yellow traffic light; it’s time to focus on your health.

Action Needed: This is the perfect time to make healthy lifestyle changes. Eating healthy, exercising regularly, and losing weight (if needed) can bring your levels back to normal.

Diabetes

  • Fasting Level: 126 mg/dL or above (on two separate tests)
  • It means that your pancreas is unable to produce enough insulin or that your cells aren’t responding to insulin. This situation needs immediate medical attention.

Action Needed: Talk with your doctor for a treatment plan.

Why Do Blood Sugar Levels Change?

Your blood sugar levels keep changing throughout the day, which is normal for everyone.

  • After eating, your blood sugar increases because your body converts the food into glucose.
  • Your cells use glucose to make energy in between meals. This results in your blood sugar dropping, which is completely normal.
  • During sleep, your blood sugar is usually at its lowest after you’ve slept and before you eat breakfast.
  • Doing physical activities makes your cells use glucose without the need for insulin, so your blood sugar may drop during an intense workout.
  • When you are stressed, some hormones are released, which can cause your blood sugar to fluctuate.
  • When you’re sick, sometimes it can affect how your body manages glucose, resulting in blood sugar changes.

All of these changes throughout the day are normal! Your body is constantly working to keep glucose in a healthy balance so it doesn’t cause you any problems.

What Else Do Doctors Check?

Doctors often use another test called HbA1c (also called hemoglobin A1c), besides testing your blood sugar level. This test gives an idea of your average blood sugar over the past 3 months. It’s like a report card of how you have managed blood sugar.

The A1C Ranges are for:

  • Normal is less than 5.7%
  • Prediabetes is 5.7% to 6.4%
  • Diabetes is 6.5% or higher

Your doctor might also use this test to diagnose diabetes or to see how well you’re managing your blood sugar if you already have diabetes.

How to Keep Your Blood Sugar Levels Healthy

You can keep your blood sugar levels in a healthy range with healthy lifestyle changes. Here are some tried-and-true ways to keep your blood sugar levels in a healthy range:

1. Eat Smart Carbohydrates

All carbohydrates are not the same. You should choose:

  • Whole grains like brown rice, whole wheat bread, and oats, instead of white bread and sugar
  • Vegetables like leafy greens, broccoli, carrots, and beans
  • Fruits such as apples, berries, and oranges are healthy options, but be mindful of portion sizes for high-sugar fruits.

2. Move Your Body Regularly

Health organizations recommend:

  • At least 150 minutes of moderate exercise every week
  • You can walk quickly, swim, ride a bike, dance, or play sports.

Exercise makes your cells better at using glucose, even when insulin isn’t around!

3. Maintain a Healthy Weight

If you’re overweight, even losing 5-10% of your body weight can significantly improve blood sugar management. Excess body weight makes it harder for your body to use insulin properly.

4. Eat Regular Meals

Skipping meals or eating irregularly can cause your blood sugar to fluctuate.

  • You should eat breakfast within 1-2 hours after waking up
  • You should eat meals every 3-5 hours
  • You should eat healthy snacks if you get hungry between meals

5. Limit Sugar and Salt

Try to stay away from:

  • Drinks with a lot of sugar, like soda, energy drinks, or fruit juices
  • Sweets and desserts
  • Salty processed foods
  • Fast Food

6. Stay Hydrated

To stay hydrated, drink enough water all day. It helps your kidneys get rid of extra sugar and keeps your body working properly.

7. Get Enough Sleep

Not getting enough sleep can affect how your body uses glucose.

  • 7–9 hours of sleep per night if you are an adult
  • 8–10 hours if you are a teenager
  • 9–12 hours if you are a child

8. Manage Stress

  • Meditate or breathe deeply
  • Do yoga
  • Be outside for a while
  • Do things you like
  • Spend time with your family and friends

Use these stress-relieving methods to help manage your stress levels.

9. Regular Check-ups

Visit your doctor for routine blood sugar checks, especially if:

  • You are either overweight or obese
  • Your family has a history of diabetes
  • You are older than 45
  • You don’t do as much physical activity

When Should You Get Your Blood Sugar Checked?

Blood sugar testing is recommended if you:

  • Are older than 45 years
  • Are you overweight or obese
  • Have a family history of diabetes
  • Have high blood pressure or high cholesterol
  • Have been diagnosed with prediabetes
  • Are pregnant
  • Feel symptoms like increased thirst, frequent urination, or unexplained fatigue

Frequently Asked Questions

What is normal blood sugar?

Normal blood sugar is the healthy amount of sugar present in your bloodstream. Your body uses this sugar or glucose, to power your proper functioning all day. 

Why does our body need blood sugar?

Blood sugar is like fuel that is necessary for your body to keep working properly without any issues. Without enough sugar or glucose, your body will feel weak and tired, and you won’t be able to do anything properly.

What is a healthy blood sugar level?

For most people, healthy blood sugar levels are between 70 and 140 mg/dL, depending on what and when they eat. These numbers will be different for everyone, so no fixed number can be applied to everyone.

Does blood sugar stay the same all day?

No, blood sugar doesn’t stay the same all day; it keeps changing throughout the day.

What happens if my blood sugar drops too low?

When your blood sugar drops too low, your body sends warning signs. You might feel confused, dizzy, very hungry, or very tired. If it’s not treated, it can be harmful in the long term.

What happens if my blood sugar becomes too high?

If your blood sugar gets too high, you might notice that you’re feeling quite thirsty, a bit tired, experiencing blurry vision, or needing to visit the bathroom more frequently. When your sugar levels are high, it can make you feel a bit off.

Final Thoughts

Whether your goal is to prevent diabetes, control prediabetes, or prevent it from worsening, understanding normal blood sugar can be your first step towards improving your health. Small and healthy lifestyle changes can achieve all this.

Your blood sugar levels are like a signal from your body that tells you how it’s doing. If you eat healthy, exercise daily, sleep enough, and manage your stress, your blood sugar levels will be balanced, which indicates your body is doing well.

When your blood sugar is balanced, you have more energy, can focus better, feel happier, and stay healthier for a longer time.

January 14, 2026 0 comment
0 FacebookTwitterPinterestEmail
  • 1
  • 2
  • 3

Recent Posts

  • Alka Lean Review 2026: Ingredients, Science, Safety, and How It Compares to Jelly Lean
  • Baking Soda Slim Recipe: The Complete Science-Backed Guide to Making Slime With Baking Soda
  • Why Do You Have a Bump on Your Eye? Causes, Symptoms, Treatment & Prevention
  • Jaw Pain on One Side: Common Causes and When to Worry
  • Brushing Teeth With Baking Soda: Does It Really Work for Whiter Teeth?

Recent Comments

No comments to show.

About Me

About Me

Home Healhty Remedy

Welcome to Home Healthy Remedy, your ultimate source for all things related to natural health remedies and holistic well-being.

Keep in touch

Facebook Twitter Instagram Pinterest Youtube

Popular Posts

  • 1

    How to Boost Immunity Naturally: 7 Proven Tips You Can Try Today!

  • Read Seroburn User Reviews Know If It Is Legit or Scam

  • 3

    ProDentim Reviews (Important Customer Alert) Is This Teeth Whitening Supplement Effective? Should You Buy It?

  • ProstaVive Reviews: A Powerful Boost for Prostate Health

  • Pineal Gland: What is it, Function and Complications

Categories

  • BEAUTY (29)
  • BLOOD SUGAR & DIABETES (13)
  • DENTAL HEALTH (7)
  • DIETARY SUPPLEMENTS (26)
  • DIGESTIVE HEALTH (6)
  • EYE HEALTH (11)
  • FUNGAL INFECTION (6)
  • Gift Ideas (3)
  • HAIR PROBLEM (6)
  • HEALTH (78)
  • HEARING HEALTH (20)
  • JOINTS PROBLEMS (3)
  • MEDITATION (3)
  • MEN'S HEALTH (10)
  • MENTAL HEALTH (12)
  • NUTRITION (4)
  • PET HEALTH (3)
  • PRODUCT REVIEWS (11)
  • PROSTATE HEALTH (10)
  • SKIN CARE (7)
  • SPIRITUAL HEALTH (1)
  • Stomach Health (1)
  • Symptoms & Conditions (2)
  • WEIGHT LOSS (54)
  • WOMEN'S HEALTH (5)
  • Privacy Policy
  • Terms and Condition
  • Disclaimer
  • Facebook
  • Twitter
  • Instagram
  • Pinterest
  • Linkedin
  • Tumblr
  • Youtube
Footer Logo

@2026- All Right Reserved. Designed and Developed by Home Healthy Remedy

Home Health Remedy – Natural Path to Better Wellness
  • Home
  • About Us
  • Product Reviews
  • HEALTH & FITNESS
    • Slider #1
      • BEAUTY
      • BLOOD SUGAR & DIABETES
      • DENTAL HEALTH
      • DIETARY SUPPLEMENTS
      • EYE HEALTH
    • Slider #2
      • FUNGAL INFECTION
      • HEARING HEALTH
      • JOINTS PROBLEMS
      • MEDITATION
      • MEN’S HEALTH
    • Slider #3
      • MENTAL HEALTH
      • NUTRITION
      • PROSTATE HEALTH
    • Slider #4
      • SPIRITUAL HEALTH
      • WEIGHT LOSS
      • WOMEN’S HEALTH
      • HAIR PROBLEM
  • Contact Us For More Information