
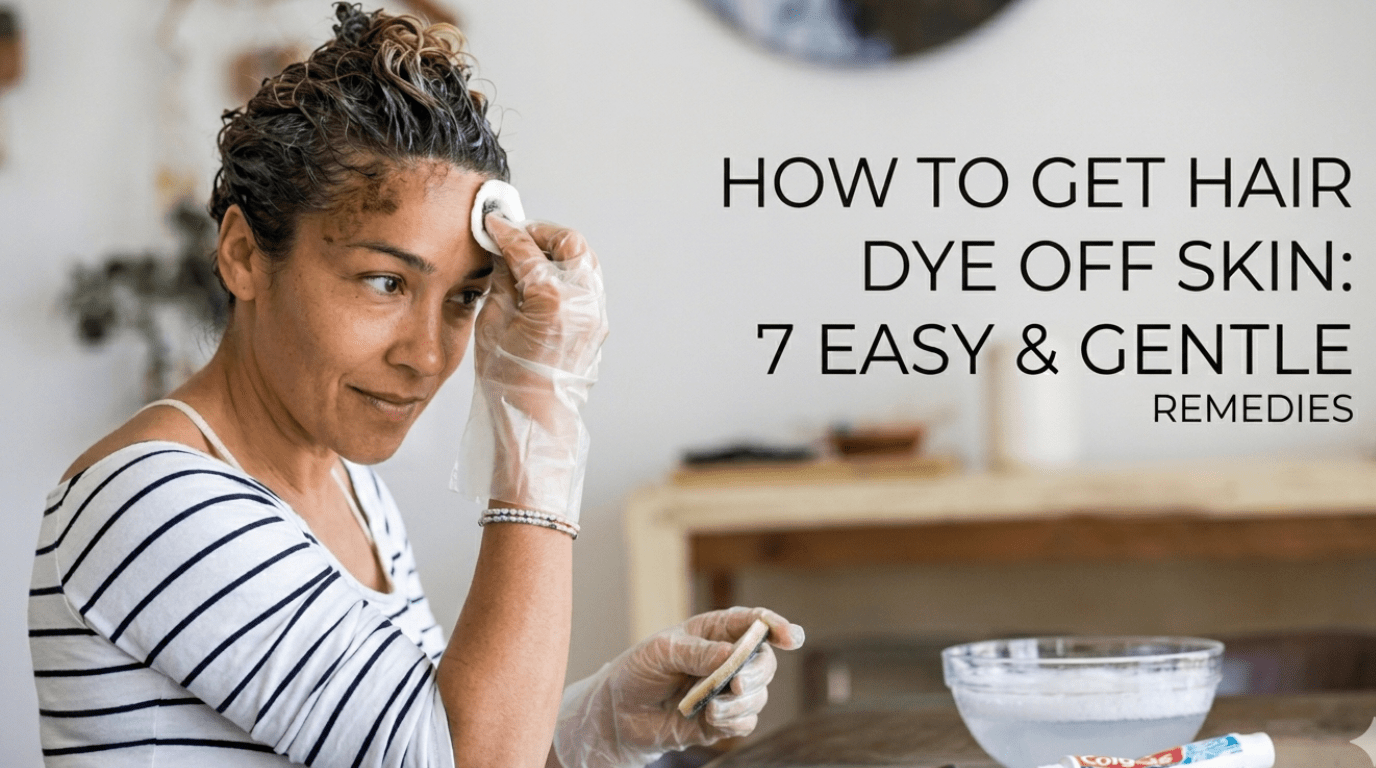
Few things ruin the excitement of a fresh hair color faster than catching sight of a dark smudge along your hairline, ears, or fingertips. Whether you’re a seasoned DIY colorist or trying out a box dye for the very first time, dealing with stray pigment on your skin is almost a rite of passage. The good news is that learning how to get hair dye off skin is much simpler than it looks, and in most cases you can fix the problem with items you already have at home.
This guide covers everything you need to know — from the science behind why dye sticks to skin, to a complete list of removal methods ranked by intensity, to prevention tricks that can save you the hassle altogether. We’ll also answer the most frequently searched questions people have about hair dye stains, so by the end of this article you’ll have a complete toolkit for handling any coloring mishap with confidence.
Why Does Hair Dye Stick to Skin So Stubbornly?
To understand how to remove hair dye from skin effectively, it helps to know what’s actually happening at a cellular level. Hair dye is engineered to do one job extremely well: penetrate deep into the hair shaft, lift the natural pigment, and deposit new color molecules that won’t wash out easily. Unfortunately, your skin’s outermost layer — called the stratum corneum — is made up of similar protein structures to hair, which means the same pigment molecules that color your strands can also bond with the surface cells of your skin.
When dye touches skin, especially if it’s left in contact for several minutes during processing, the colorant doesn’t just sit on top like a layer of paint. As SkinKraft’s dermatology team explains, it actually begins to seep into the microscopic gaps between skin cells. This is why a stain that looked faint right after application can appear darker and more “set in” an hour later — the pigment has had time to settle deeper into the skin’s surface.
Several factors influence how badly your skin stains and how long the stain lasts:
Skin dryness is one of the biggest contributors. Dry, flaky, or cracked skin has more surface area and more microscopic openings for dye to cling to. This is exactly why colorists often recommend moisturizing your hairline, ears, and neck heavily in the days before a coloring session.
Dye shade and formula also matters significantly. Darker permanent dyes — especially blacks, deep browns, and vibrant fashion colors like blue, red, or purple — contain higher pigment concentrations and tend to leave more noticeable marks than lighter, semi-permanent formulas.
Processing time plays a role too. The longer dye sits on your skin (even accidentally), the more time the pigment has to bond with skin cells, making it progressively harder to remove the longer you wait.
Skin location matters as well. Thinner skin around the eyes, ears, and hairline tends to absorb pigment more readily than thicker skin on the back of your hands, which is part of why facial stains often seem to linger longer.
Understanding these factors isn’t just academic — it directly informs the best removal strategy. The faster you act and the gentler your approach on sensitive areas, the better your results will be.
The Golden Rule: Act Fast, But Stay Gentle
Before diving into specific techniques, there’s one principle that applies across the board: speed matters more than strength. A fresh dye stain that’s only a few minutes old can often be lifted with nothing more than soap and water, while the same stain left to dry and set for hours might require a stronger product and more effort.
At the same time, reaching for the harshest chemical in your cabinet the moment you spot a stain is rarely the right call. Aggressive scrubbing or harsh solvents can irritate your skin far more than the stain itself ever would, leaving you with redness, dryness, or even tiny abrasions that take longer to heal than the dye would have taken to fade naturally.
With that balance in mind, let’s walk through the most effective methods for removing hair dye from skin, organized from gentlest to most intensive — a structure echoed in Healthline’s breakdown of removal methods and prevention tips.
Method 1: Soap and Warm Water — Your First Move
This is always the first thing you should try, and for good reason: it’s gentle, accessible, and surprisingly effective on fresh stains. As soon as you notice dye on your skin, grab a washcloth, wet it with warm (not hot) water, and work up a lather with a mild soap or facial cleanser.
Gently massage the stained area in small circular motions for thirty to sixty seconds, then rinse and check your progress. Repeat two or three times if needed. Warm water helps soften the dye and open up the skin’s surface slightly, while the soap’s surfactants help lift pigment molecules away.
The key word here is “gently.” Pressing too hard or scrubbing aggressively at this stage won’t speed things up — it’ll just irritate your skin before you’ve even tried other methods.
Method 2: Petroleum Jelly — The Dermatologist’s Go-To
If soap and water doesn’t fully do the trick, petroleum jelly (the kind found in products like Vaseline) is often the next recommendation from skincare professionals, and it’s one of the gentlest options on this entire list.
Scoop a generous amount onto your fingertips and massage it directly into the stained skin, working it in for a full minute or two. The thick, occlusive texture of petroleum jelly helps trap and loosen pigment particles, allowing them to be wiped away rather than scrubbed off. After massaging, wipe the area with a soft tissue or cloth, then follow up with a rinse of warm water.
What makes petroleum jelly particularly useful is its versatility — it’s gentle enough for the delicate skin around your eyes, hairline, and ears, areas where you’d want to avoid anything abrasive or drying.
Method 3: Baby Oil or Olive Oil — The Sensitive-Skin Solution
Oils work on hair dye stains for a simple chemical reason: many of the compounds in hair dye are hydrophobic, meaning they repel water but bond easily with oil. This makes oils like baby oil, olive oil, coconut oil, or even almond oil surprisingly effective at breaking down stubborn pigment.
To use this method, saturate a cotton ball or pad with your chosen oil and dab it directly onto the stain. For mild stains, gentle massaging for a minute or two followed by wiping with a damp cloth is often enough. For more stubborn marks, apply a generous layer of oil and let it sit for several minutes — or for very tough stains on areas like your hands, you can even leave it on overnight under a thin layer of cling wrap or an old glove, then wipe away in the morning.
This is widely considered one of the best options for anyone with sensitive or easily irritated skin, since oils nourish the skin barrier rather than stripping it.
Method 4: Makeup Remover — A Surprisingly Effective Tool
If you have makeup remover on hand, particularly an oil-based formula, it can double as an effective hair dye stain remover. Makeup removers are specifically designed to dissolve stubborn pigments from cosmetics, and that same dissolving power works on hair dye.
Saturate a cotton pad generously and hold it against the stained area for about sixty seconds without rubbing, allowing the formula time to break down the pigment. Then gently wipe in one direction — avoid rubbing back and forth, which can spread the stain rather than lift it. Rinse thoroughly with water afterward.
This method is particularly handy for facial stains, since most makeup removers are formulated to be safe for use around the eyes and on sensitive skin.
Method 5: Baking Soda and Dish Soap Paste — The Power Combo
For stains that have had time to set, a paste made from baking soda and liquid dish soap is one of the most consistently recommended remedies, and for good reason — LifeMD notes that this combination is especially effective on older or more stubborn stains, since it combines gentle exfoliation with degreasing power.
Mix roughly equal parts baking soda and dish soap (or non-gel toothpaste as an alternative) until you get a thick, spreadable paste. Apply this directly to the stained skin and rub gently in small circular motions for two to three minutes. The baking soda provides mild physical exfoliation, helping to lift dye particles from the skin’s surface, while the dish soap’s degreasing properties help break the chemical bonds holding the pigment in place.
Rinse thoroughly with warm water once finished, and follow up with a moisturizer, since this combination — while effective — can be drying with repeated use.
Method 6: Rubbing Alcohol — Strong But Effective
Rubbing alcohol is one of the more potent options on this list, and it tends to work particularly well on fresher stains on hands and fingers. Dampen a cotton ball with rubbing alcohol and gently rub the stained area, checking your progress every few seconds.
The alcohol helps dissolve the dye’s chemical structure, often lifting even moderately set stains within a minute or two of gentle rubbing. However, alcohol is also quite drying and can be irritating, particularly on facial skin or anywhere your skin barrier is already compromised.
If you choose this method, limit it to hands and other less sensitive areas, and always follow up with a rich moisturizer to replenish moisture the alcohol strips away.
Method 7: Nail Polish Remover (Acetone) — For Hands Only
Acetone-based nail polish remover is one of the strongest household solvents you can use for hair dye removal, and it’s particularly effective on stubborn, dried stains on your hands and fingers.
Apply a small amount to a cotton ball and rub it over the stained area, allowing the acetone to break down even set-in pigment. Because acetone is harsh and strips natural oils very effectively, it should never be used on your face, neck, or any other delicate area — reserve it strictly for hands. After use, wash thoroughly with soap and water and apply a generous amount of hand cream, as acetone can leave skin feeling extremely dry.
Method 8: Commercial Hair Dye Stain Removers
If home remedies aren’t cutting it, or if you simply want a reliable, no-guesswork solution, dedicated hair dye stain removers are widely available and formulated specifically for this purpose. Products in this category typically come as pre-saturated wipes or liquid solutions designed to dissolve dye pigment without harsh side effects.
These products are generally considered safe for most skin types, including facial skin, and follow a simple application process — wipe the pad over the affected area, let it sit briefly if instructed, and wipe clean. Keeping one of these products on hand before you start a home dye job can save you a lot of trial-and-error afterward.
Method 9: Magic Eraser Sponges — For Hands and Body Only
Melamine foam sponges, commonly sold under brand names associated with “magic” cleaning products, work almost like an extremely fine sandpaper. They’re remarkably effective at lifting surface stains from skin on hands, arms, and other less sensitive body areas.
Dampen the sponge slightly with water and gently rub the stained area using light pressure. Because the texture is genuinely abrasive at a microscopic level, this method should never be used on facial skin, where it can cause micro-tears and irritation. Stick to areas with thicker skin, and always follow up with rinsing and moisturizing.
Method 10: The Fresh Dye Reactivation Trick
This method might sound backwards, but it’s a trick many experienced colorists swear by for stubborn, set-in stains. Applying a small amount of the same fresh hair dye directly onto the stained skin can actually help lift the older stain — the new dye’s chemical activators reactivate the bonds of the old, dried pigment, loosening it enough to wipe away easily with a damp cloth.
To use this method, apply a small dab of fresh dye directly onto the stain, wait no more than thirty seconds to a minute, then immediately wipe both the new dye and the reactivated old stain away with a damp washcloth. This works best when done shortly after the original staining occurred, ideally within the same coloring session.
Mistakes to Avoid When Removing Hair Dye From Skin
Knowing what not to do is just as important as knowing the right techniques. Here are the most common mistakes people make when trying to remove hair dye stains:
Using bleach or harsh cleaning chemicals directly on skin. While bleach is effective at removing dye from hard surfaces and fabric, it’s far too harsh for skin and can cause chemical burns, particularly on thinner facial skin.
Scrubbing too aggressively. It’s tempting to really go at a stubborn stain, but excessive friction breaks down your skin’s protective barrier, leading to redness, irritation, and sometimes small abrasions that take days to heal — often longer than the stain itself would have lasted.
Using acetone or alcohol on facial skin. Both of these solvents are effective but drying, and facial skin (especially around the eyes) is far more delicate than skin on your hands. What works fine on your fingers can leave your face red, tight, and irritated for hours.
Reaching for abrasive tools like pumice stones on your face. These tools are designed for thick, calloused skin like on your feet, and using them on facial skin can cause micro-tears and long-term sensitivity.
Ignoring signs of an allergic reaction. If you notice swelling, intense itching, blistering, or a spreading rash rather than just a colored stain, this isn’t a simple cosmetic issue — it may indicate an allergic reaction to an ingredient in the dye, which requires different handling entirely (more on this below).
How to Prevent Hair Dye Stains Before You Even Start
The single best way to deal with hair dye on skin is to never let it happen in the first place. A few minutes of prep before you start coloring can save you significant cleanup time afterward.
Create a Barrier Along Your Hairline
Before applying any dye, take a thick layer of petroleum jelly, coconut oil, or a specialized barrier cream and apply it along your entire hairline, around your ears, and down the back of your neck. This creates a protective film that prevents dye from soaking into your skin even if it drips or spreads slightly during application. Just be careful to keep the barrier product off the hair itself, since oils and petroleum jelly can interfere with how evenly the dye processes.
Keep Your Skin Hydrated in the Days Leading Up to Coloring
Since dry skin absorbs dye more readily than well-moisturized skin, make a habit of applying a rich moisturizer to your hairline, ears, and neck for several days before your coloring session. Healthy, hydrated skin acts as a more effective natural barrier against staining.
Always Wear Gloves
This one seems obvious, but it’s worth emphasizing: disposable gloves (vinyl or nitrile work well for those with latex sensitivities) should be worn for the entire duration of your coloring process, from application through rinsing. Your hands and fingernails are especially prone to staining because they come into direct, repeated contact with the product.
Work Methodically and Use the Right Tools
Using an applicator brush rather than your fingers gives you more control and reduces the chances of dye dripping onto your skin. Working in sections, starting from the back of your head and moving forward, also helps minimize accidental drips onto your face and neck.
Protect Your Clothing and Surfaces Too
While this article focuses on skin, it’s worth noting that an old towel draped around your shoulders and protective coverings on bathroom counters can prevent a small drip from becoming a bigger cleanup job — and reduce the temptation to wipe stray dye onto your hands or arms in a hurry.
Understanding Allergic Reactions vs. Simple Staining
It’s important to distinguish between a harmless cosmetic stain and a genuine allergic reaction, because the appropriate response is quite different for each.
A simple stain appears as a flat, discolored patch of skin that matches the color of the dye you used. It doesn’t itch significantly, doesn’t swell, and the surrounding skin looks and feels normal aside from the color change. This type of stain typically fades on its own within a few days as your skin naturally exfoliates.
An allergic reaction, on the other hand, often presents very differently. You might notice redness that extends beyond where the dye actually touched, swelling (sometimes significant, particularly around the eyes or face), intense itching, small blisters, or a rash that seems to spread rather than stay contained. Reactions can develop immediately or take a day or two to appear, particularly with ingredients like paraphenylenediamine (PPD) — identified by the FDA as one of the most common allergens found in permanent hair dyes.
If you experience any of these symptoms, stop trying to remove the stain with home remedies and instead focus on managing the reaction — cool compresses, over-the-counter hydrocortisone cream, and antihistamines can help with mild symptoms, but more significant swelling or difficulty breathing requires immediate medical attention.
When to Seek Professional Help
For the vast majority of people, hair dye stains are a minor, temporary cosmetic inconvenience that resolves within a few days without any intervention beyond the methods described above. However, there are a few scenarios where reaching out for professional guidance makes sense.
If you’ve tried multiple removal methods over several days and a stain remains stubbornly visible, particularly on a prominent area like your face, a dermatologist can offer in-office treatments designed for exactly this purpose. If you experience any signs of an allergic reaction as described above, especially if symptoms worsen rather than improve, contacting a healthcare provider is the right call. And if hair dye accidentally gets into your eyes or causes significant chemical irritation, Poison Control recommends rinsing thoroughly with room-temperature water for a full fifteen minutes and then contacting their helpline or a medical professional for further guidance — this isn’t a situation where home remedies are appropriate.
A Quick-Reference Cheat Sheet
For fresh stains, use soap and warm water; if needed, apply petroleum jelly or an oil-based product suitable for facial skin. For set stains, a paste of baking soda and dish soap is effective and safe. Tough hand stains may require rubbing alcohol or acetone-based nail polish remover, followed by moisturizer. For persistent facial stains, opt for a commercial dye stain remover designed for skin.
Frequently Asked Questions About Hair Dye on Skin
How long does hair dye stay on skin before it fades naturally?
In most cases, hair dye stains fade within two to four days as your skin’s outer layer naturally sheds and renews itself. Darker dyes or stains on drier areas of skin may take slightly longer, sometimes up to a week, but it’s rare for a stain to persist much beyond that without intervention.
Does toothpaste actually remove hair dye from skin?
Non-gel toothpaste can help lighten hair dye stains thanks to its mildly abrasive texture and, in whitening varieties, the presence of mild bleaching agents. That said, there isn’t strong scientific research confirming its effectiveness specifically for this purpose, and it should be used cautiously and for short periods, since leaving it on too long can cause irritation on sensitive skin.
Is rubbing alcohol safe to use on your face for removing dye stains?
Generally, no — rubbing alcohol is quite drying and can be too harsh for facial skin, particularly around the eyes, nose, and mouth where skin tends to be thinner and more sensitive. It’s better suited for use on hands and other less delicate areas. If facial use feels necessary, apply very sparingly with a cotton swab and immediately follow with a rich, soothing moisturizer.
What household items work best for removing hair dye stains from skin?
The most reliable household options include petroleum jelly, baby oil, olive oil, a baking soda and dish soap paste, makeup remover, and rubbing alcohol. For sensitive areas like the face, petroleum jelly and oils are your safest bets. For tougher stains on hands, the baking soda combination or rubbing alcohol tends to be more effective.
Can hair dye stains cause any lasting skin damage?
For most people, no — hair dye stains are purely cosmetic and temporary, with no lasting impact on the skin. However, repeated and frequent exposure to certain dye chemicals, particularly PPD, can increase the risk of developing an allergic sensitivity over time, which is why patch testing before each new dye application is generally recommended, especially for people who color their hair frequently.
What’s the fastest way to get hair dye off your hands?
For hands specifically, the quickest combination is usually washing with soap and water first to remove any surface residue, followed by a baking soda and dish soap paste rubbed gently for two to three minutes. If color remains, a small amount of acetone-based nail polish remover on a cotton ball can tackle the rest, followed immediately by a thorough rinse and a generous application of hand cream.
Why does my skin stain more easily than other people’s when I dye my hair?
This usually comes down to skin hydration and texture. People with naturally dry, flaky, or rough skin — particularly around the hairline, ears, and hands — provide more surface area and microscopic openings for dye pigments to bond with. Keeping these areas consistently moisturized in the days before coloring can significantly reduce how much your skin absorbs and stains during the process.
Is it safe to use a Magic Eraser sponge on facial skin to remove dye?
No, this isn’t recommended. Magic Eraser sponges work through a fine abrasive texture that can cause micro-tears and irritation on the thinner skin of your face. They’re better reserved for hands, arms, and other body areas with thicker, more resilient skin.
Can I prevent hair dye stains entirely?
While it’s difficult to guarantee a completely stain-free coloring session, applying a thick barrier of petroleum jelly or coconut oil along your hairline, ears, and neck before you start — combined with wearing gloves and using an applicator brush rather than your fingers — dramatically reduces the likelihood and severity of staining.
Final Thoughts
Dealing with hair dye on your skin is one of those small annoyances that comes with the territory of coloring your hair, but it doesn’t have to be a major ordeal. With a bit of patience and the right method matched to the right area of skin, most stains lift away within minutes using nothing more than items you likely already have at home. And if you take a few minutes to prep with a protective barrier before your next coloring session, you might find yourself dealing with this problem far less often. The next time you notice a smudge along your hairline or a tinted fingertip, you’ll know exactly what to reach for — and exactly what to avoid.
Natural home remedies, skincare secrets, dental & eye health tips, and real product reviews to help you stay healthy the natural way.